Featured

Belize – A Caribbean Beauty

7 days itinerary to Belize – A unique central American destination that has so much to offer. Humble, small, beautiful and rich. This itinerary covers some of the major attractions in Belize and trips-tricks-reviews of the activities we did. Reach out to us on Instagram – @travelmutants – if you want more information. Always happy to help.

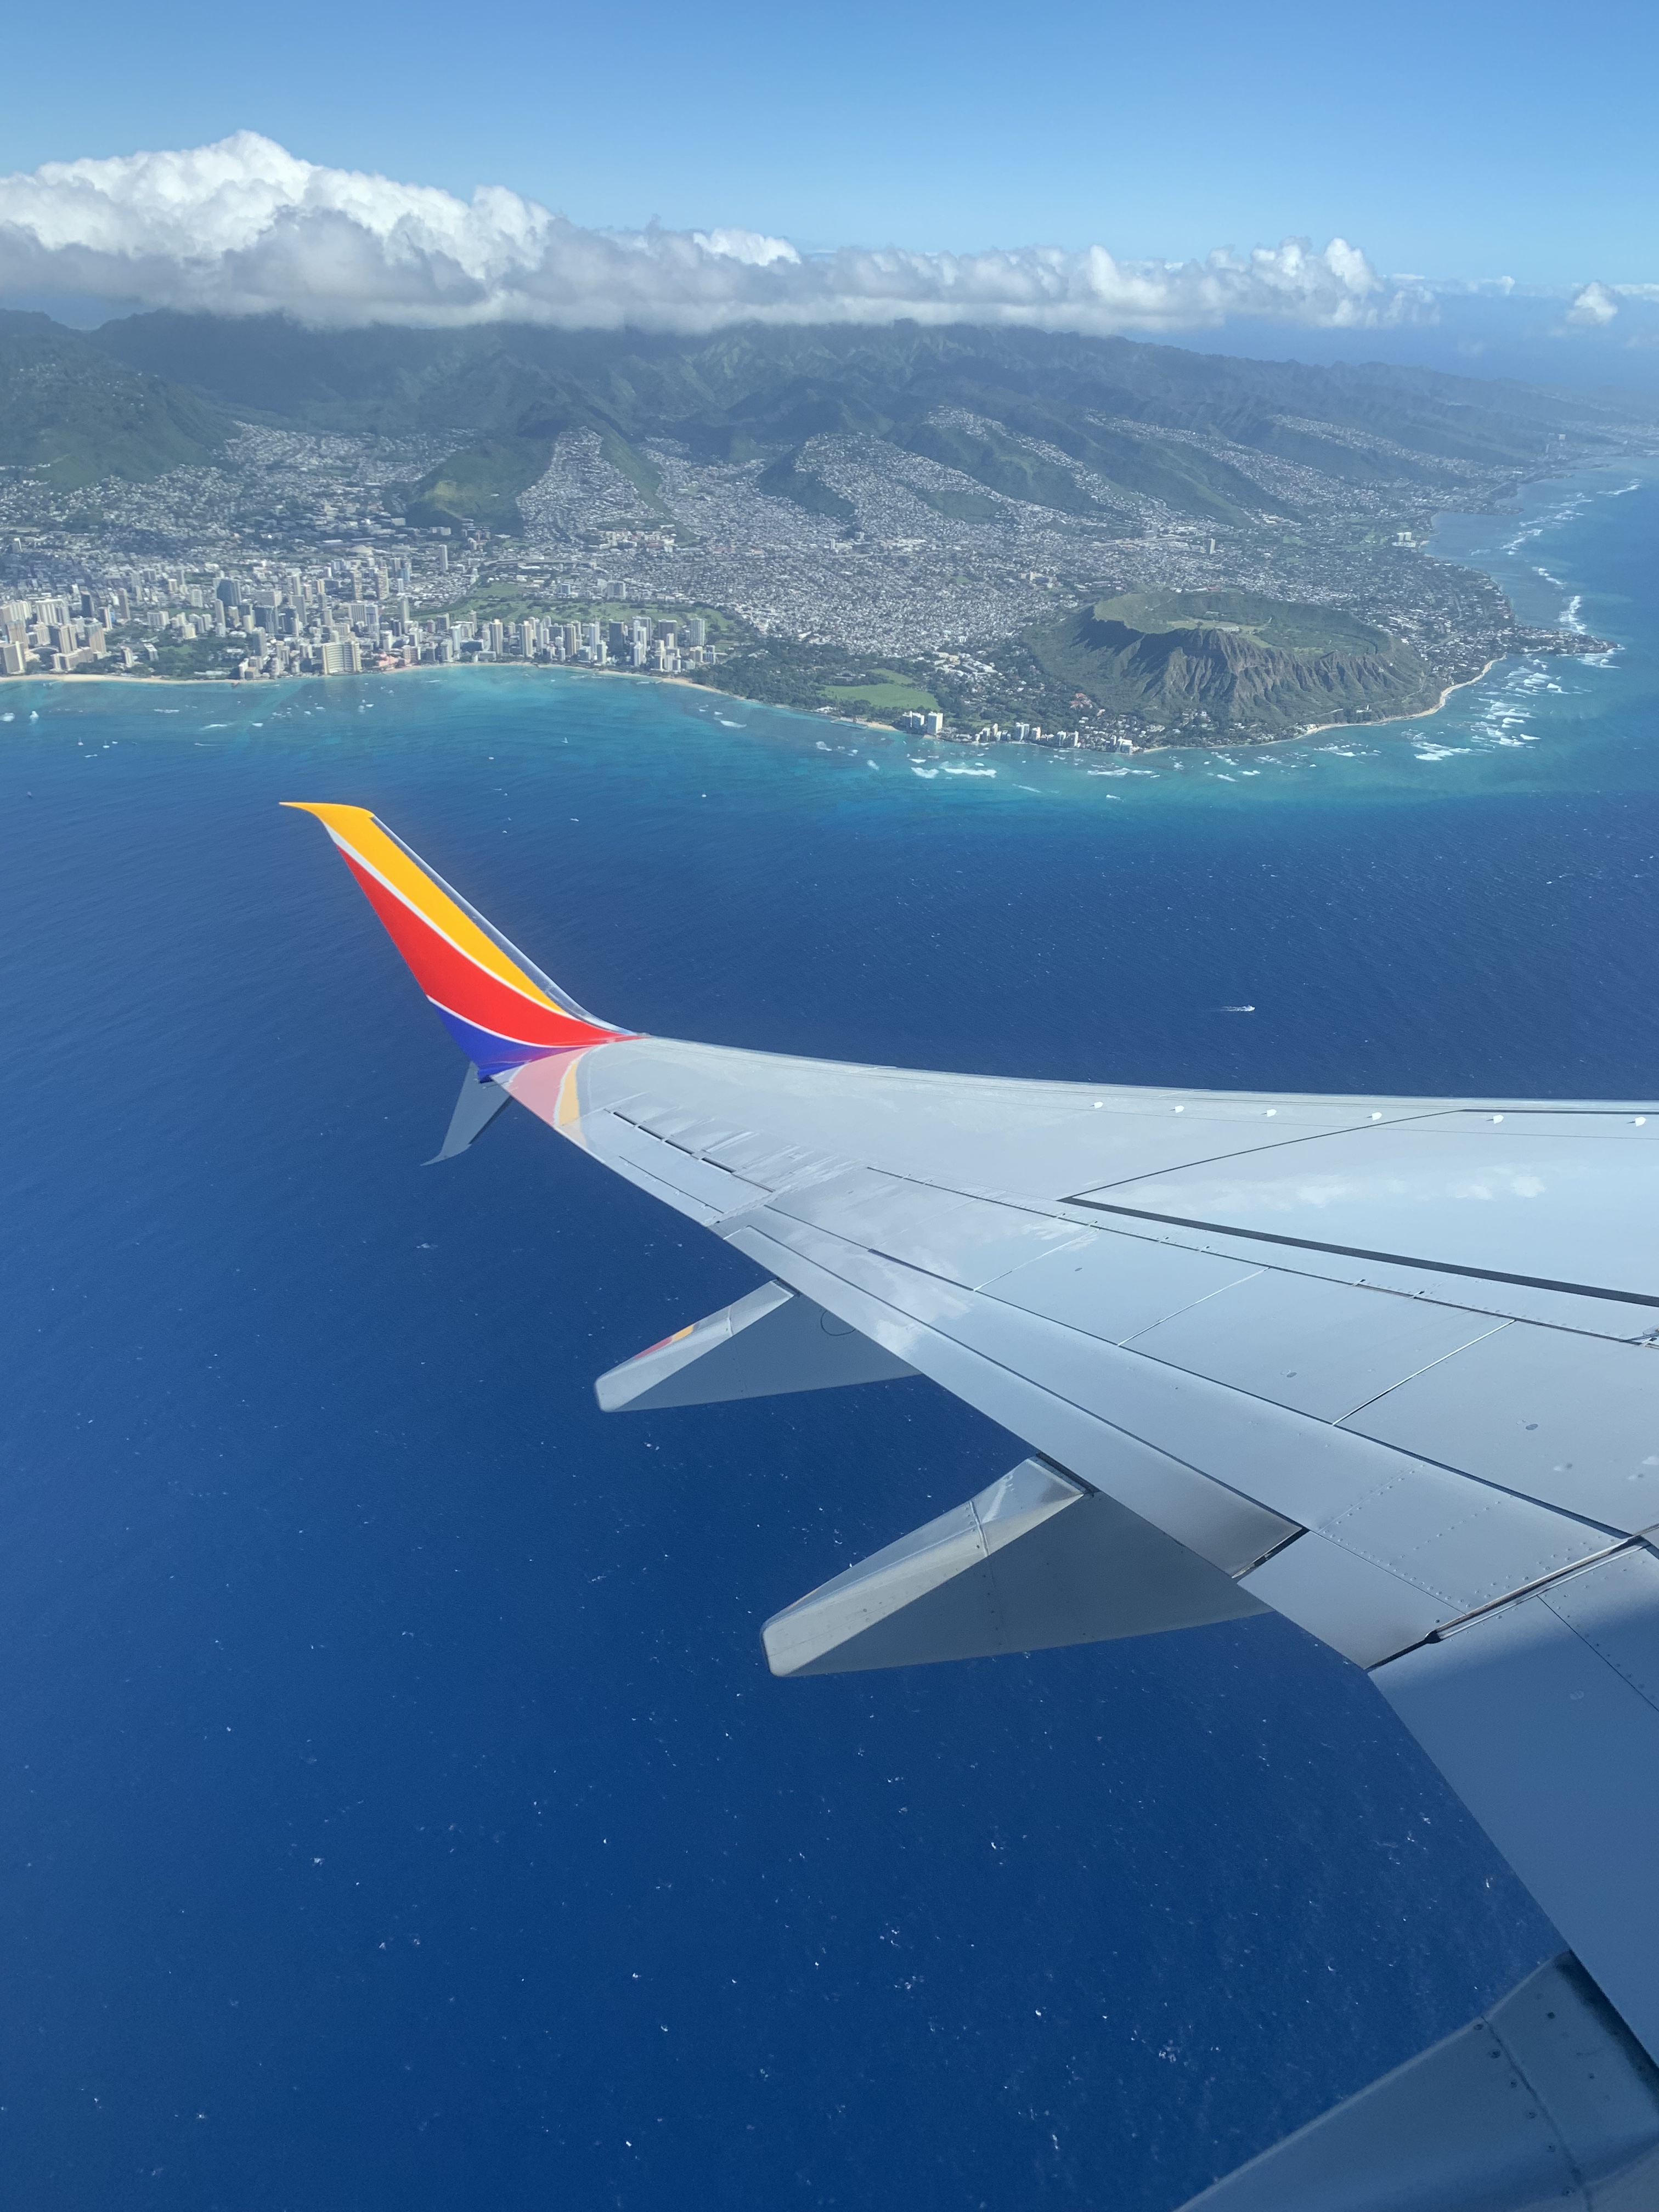
With covid-19 looking a little in control, believing that the vaccines will work, we decided to explore a bit international before our H1B visas (US work permit that allows us to enter back to US) expire. We wanted to choose destinations that are still closer to home so we can fly back on direct flights if things got bad due to the unpredictable variants of covid. We also were opting destinations serviced by Southwest airlines since we have 1+1 (companion pass) offer for this year. It came down to Costa Rica, Belize, Bahamas.

[For reference: This blog was written in December 2021. ]

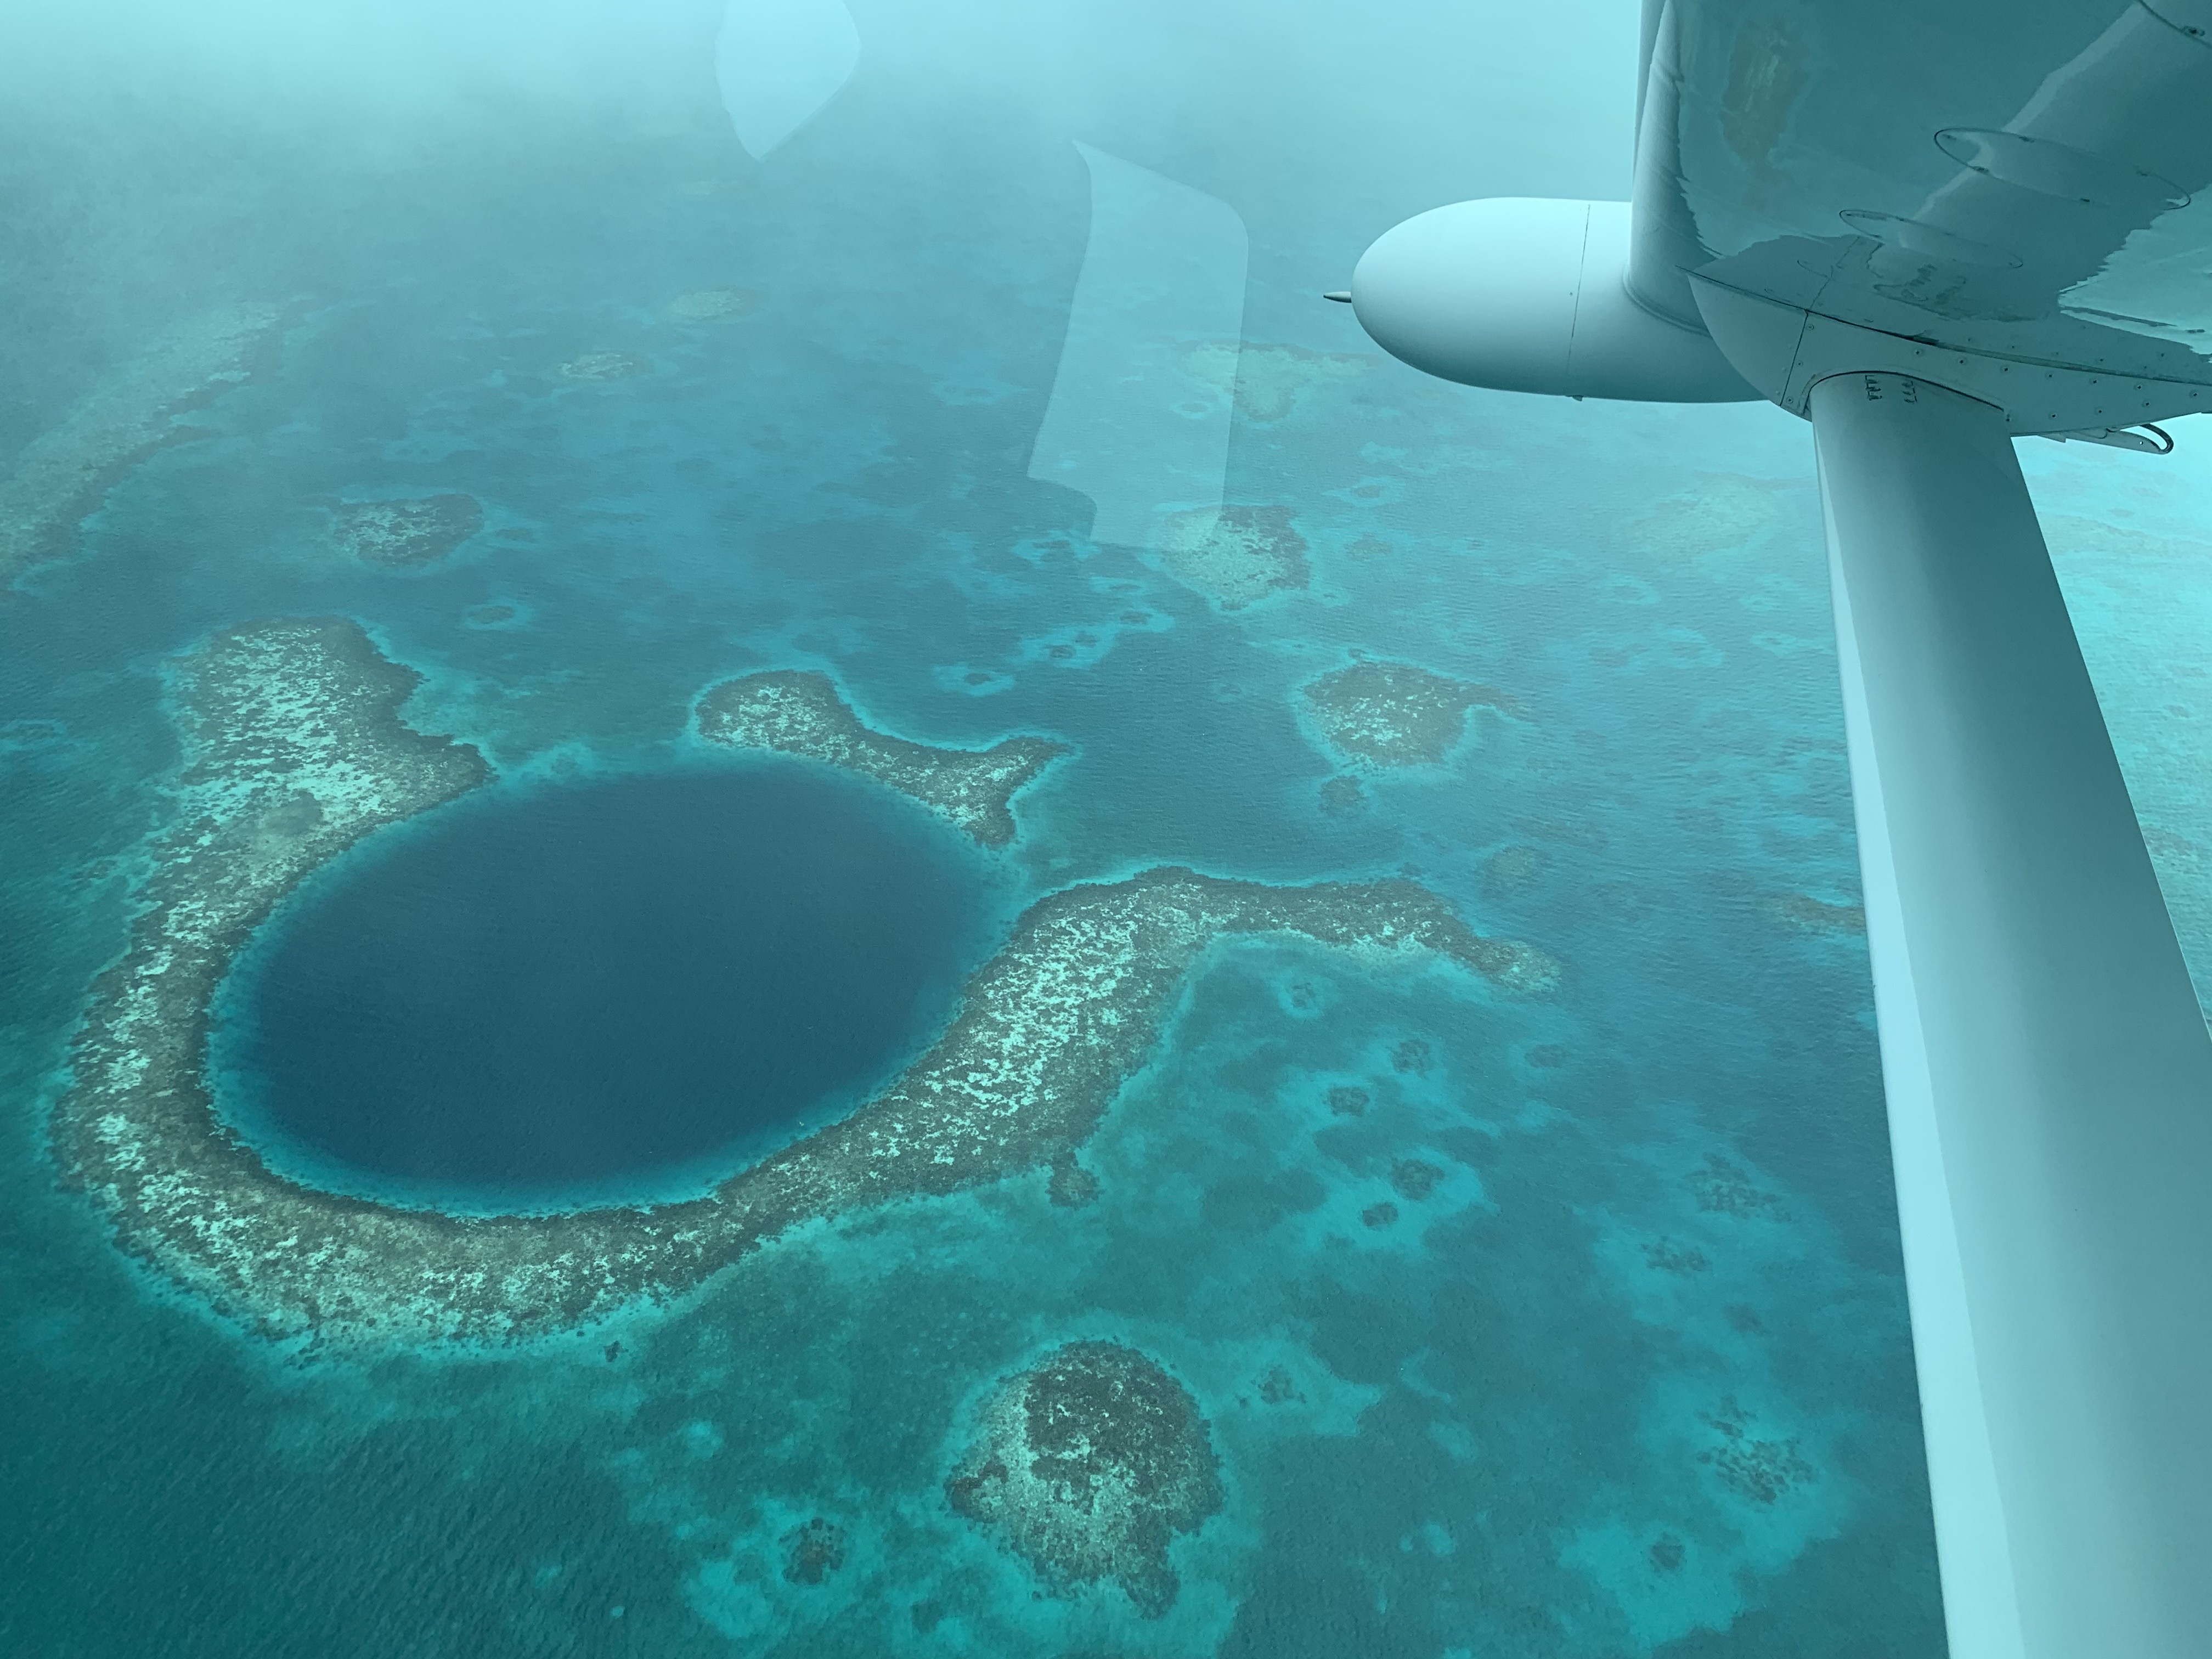
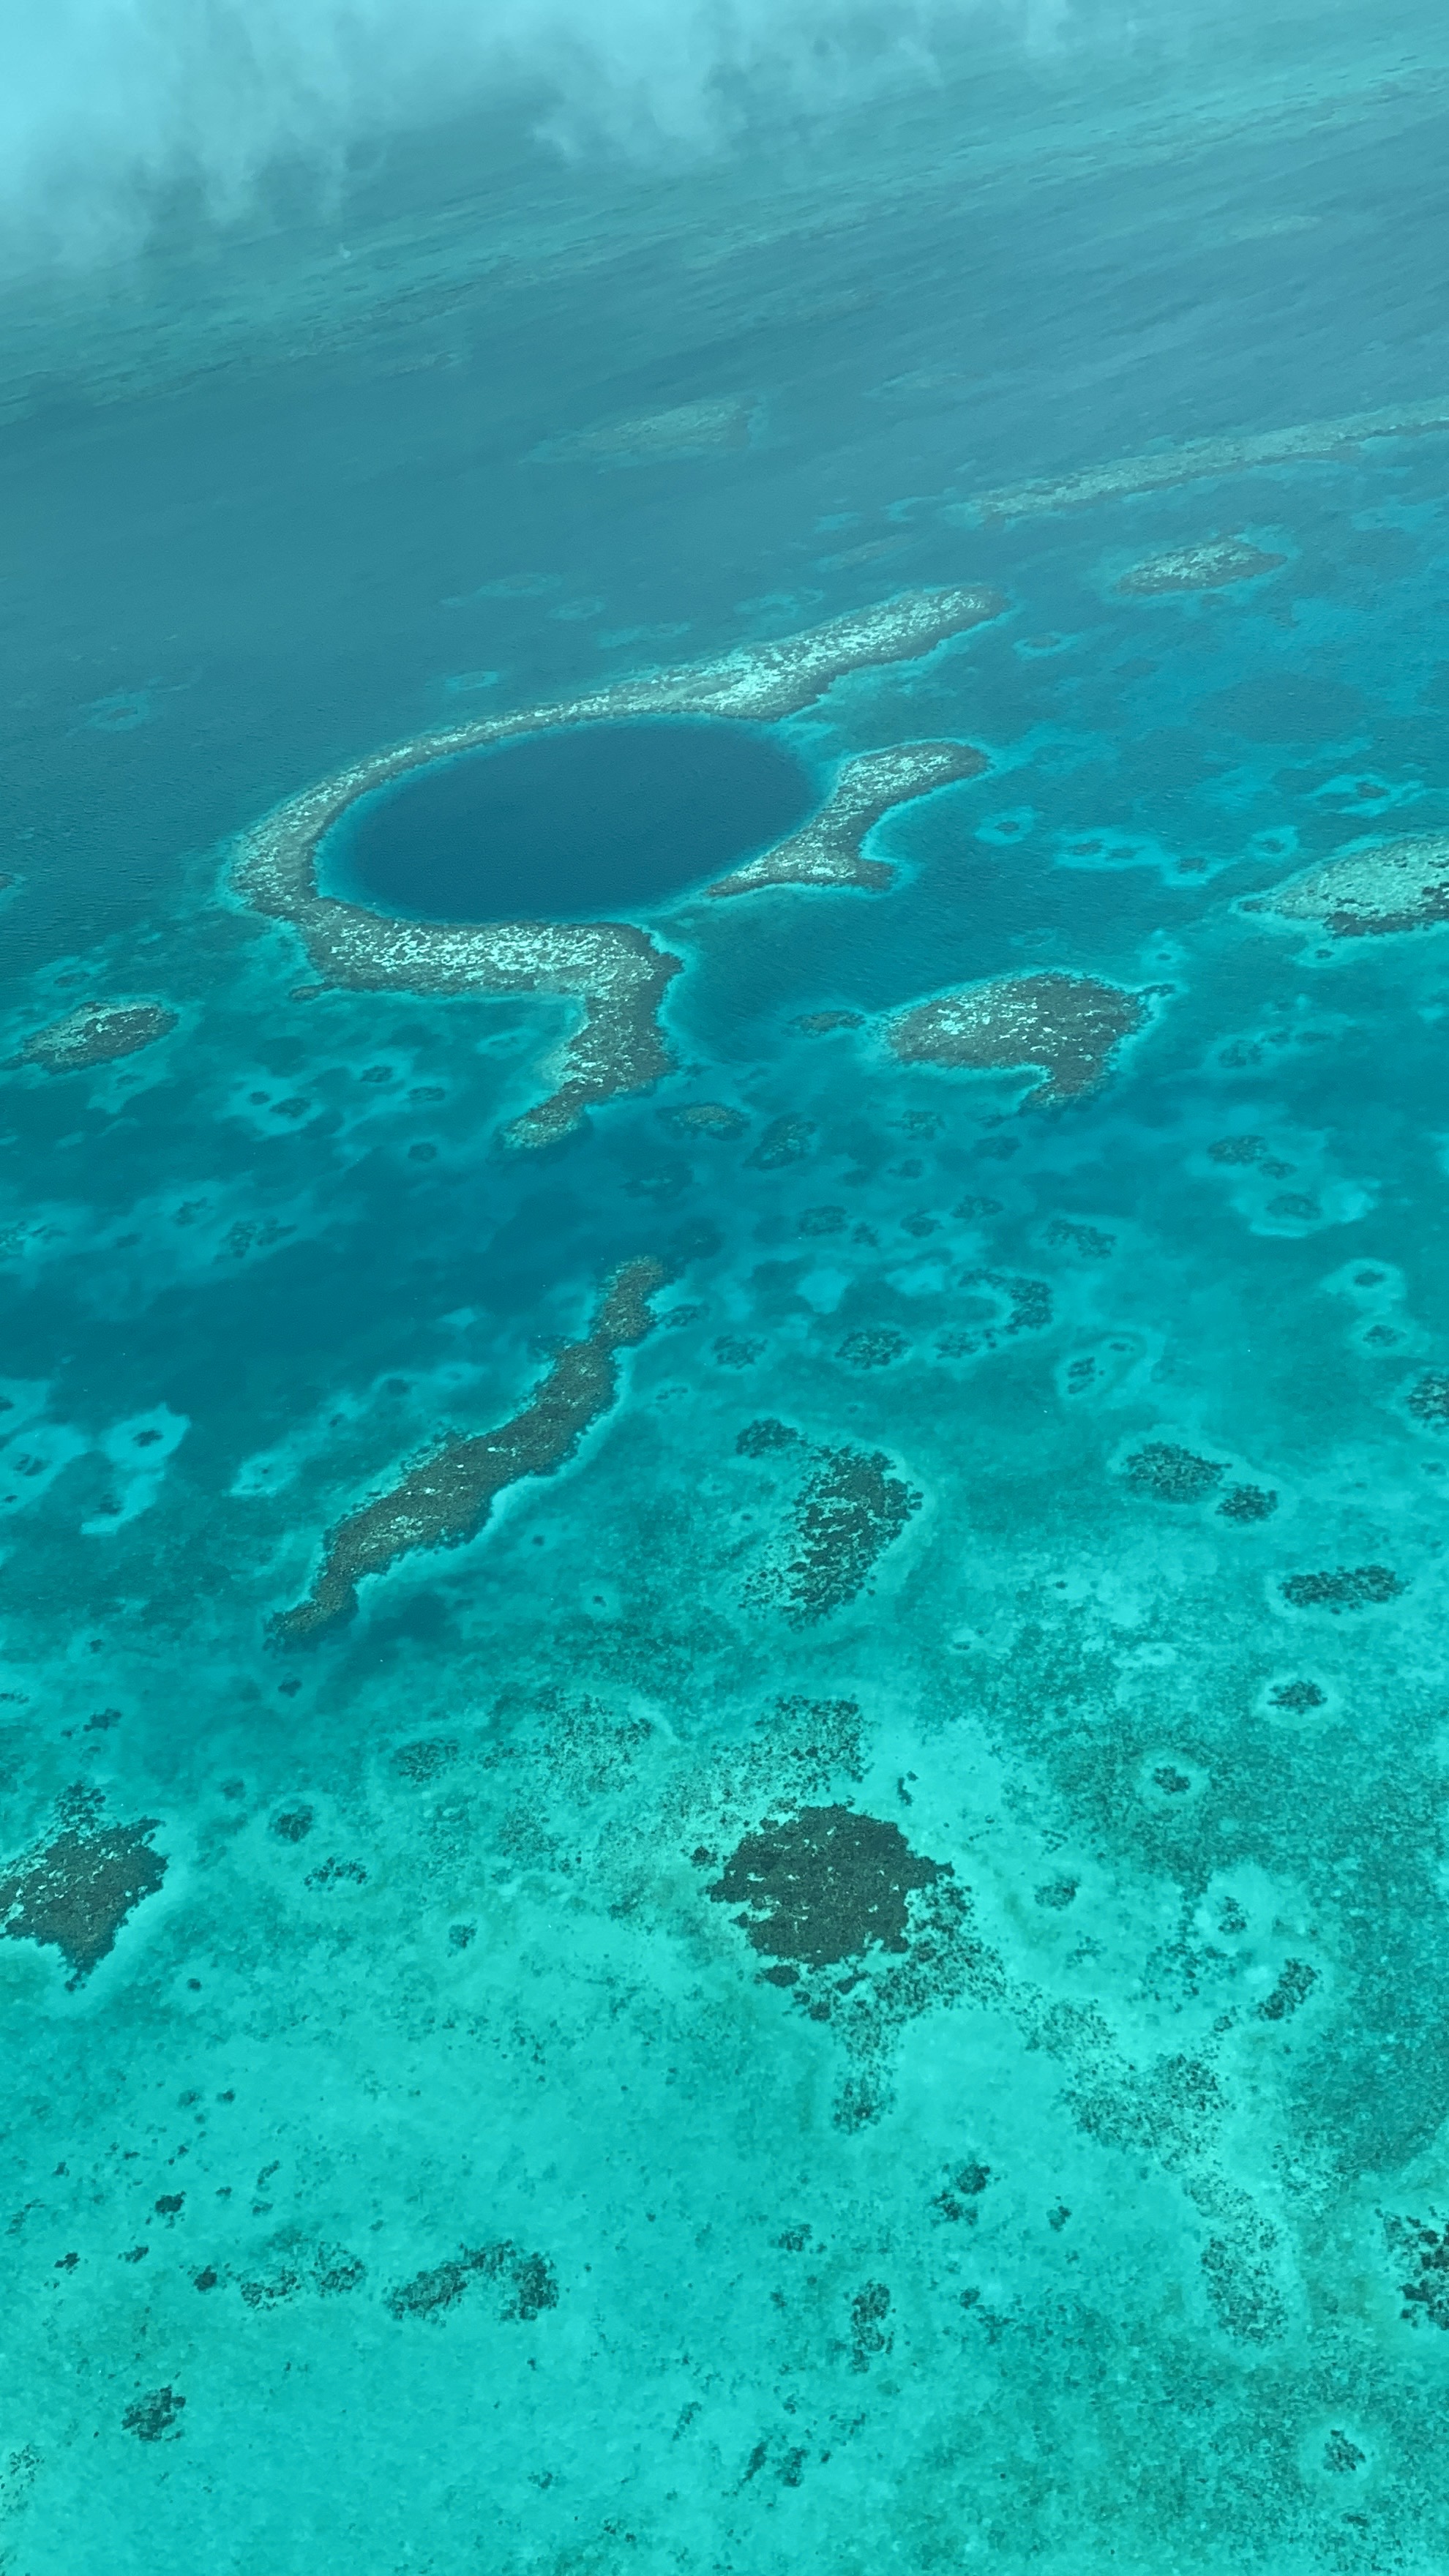
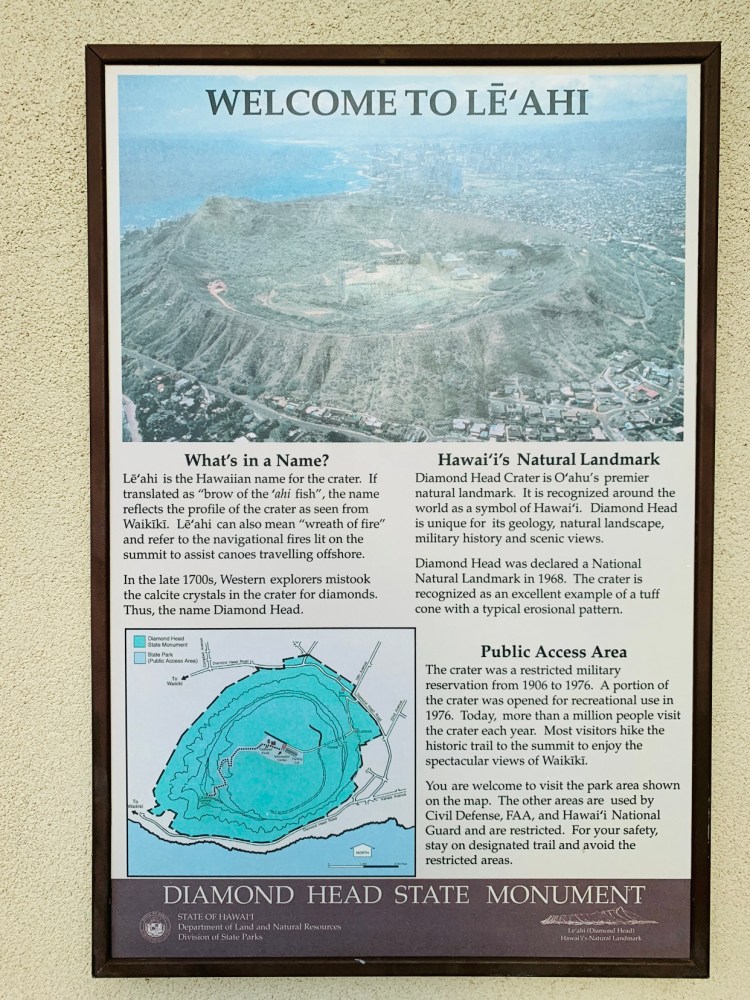
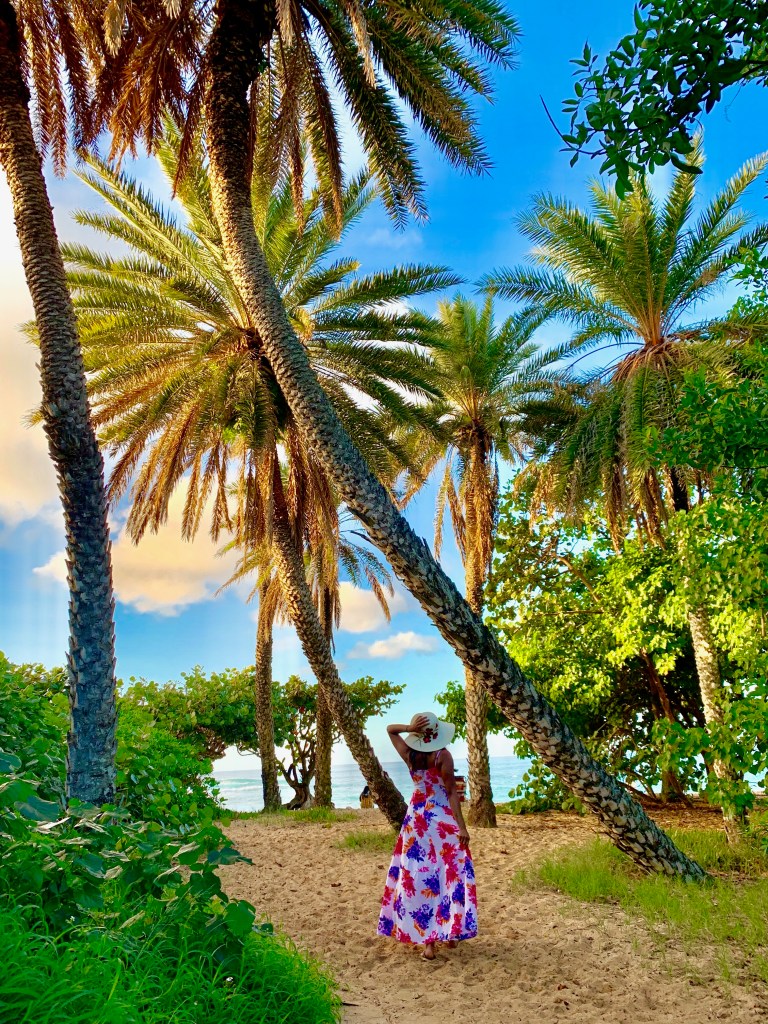
2 years ago I didn’t even know there was a country called Belize. One day while scrolling through the internet I saw a picture of a beautiful deep blue marine sinkhole surrounded by huge stretches of reefs. Witnessing this beauty with my bare eyes became one of my bucketlist items that lead me to this small-humble country Belize this year for thanksgiving holidays. Our checklist for the trip was simple – beach, forest and food! While it surpassed our expectations, what really touched us was the people and how helpful and inviting they were. Belize is a third world country that lives on tourism. What it lacks in luxurious sandy beaches with all-inclusive resorts, it makes up with abundant untouched underwater life, lush green rainforests and ancient history. A must visit for the wanderlust.

Here is a 7 days Belize Itinerary:

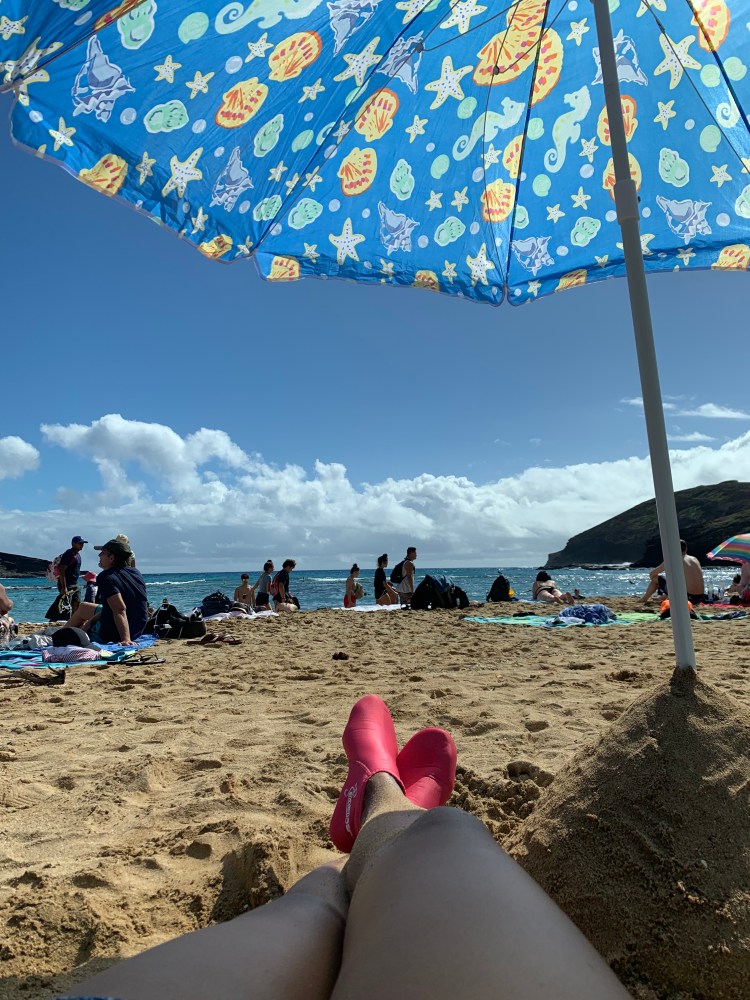
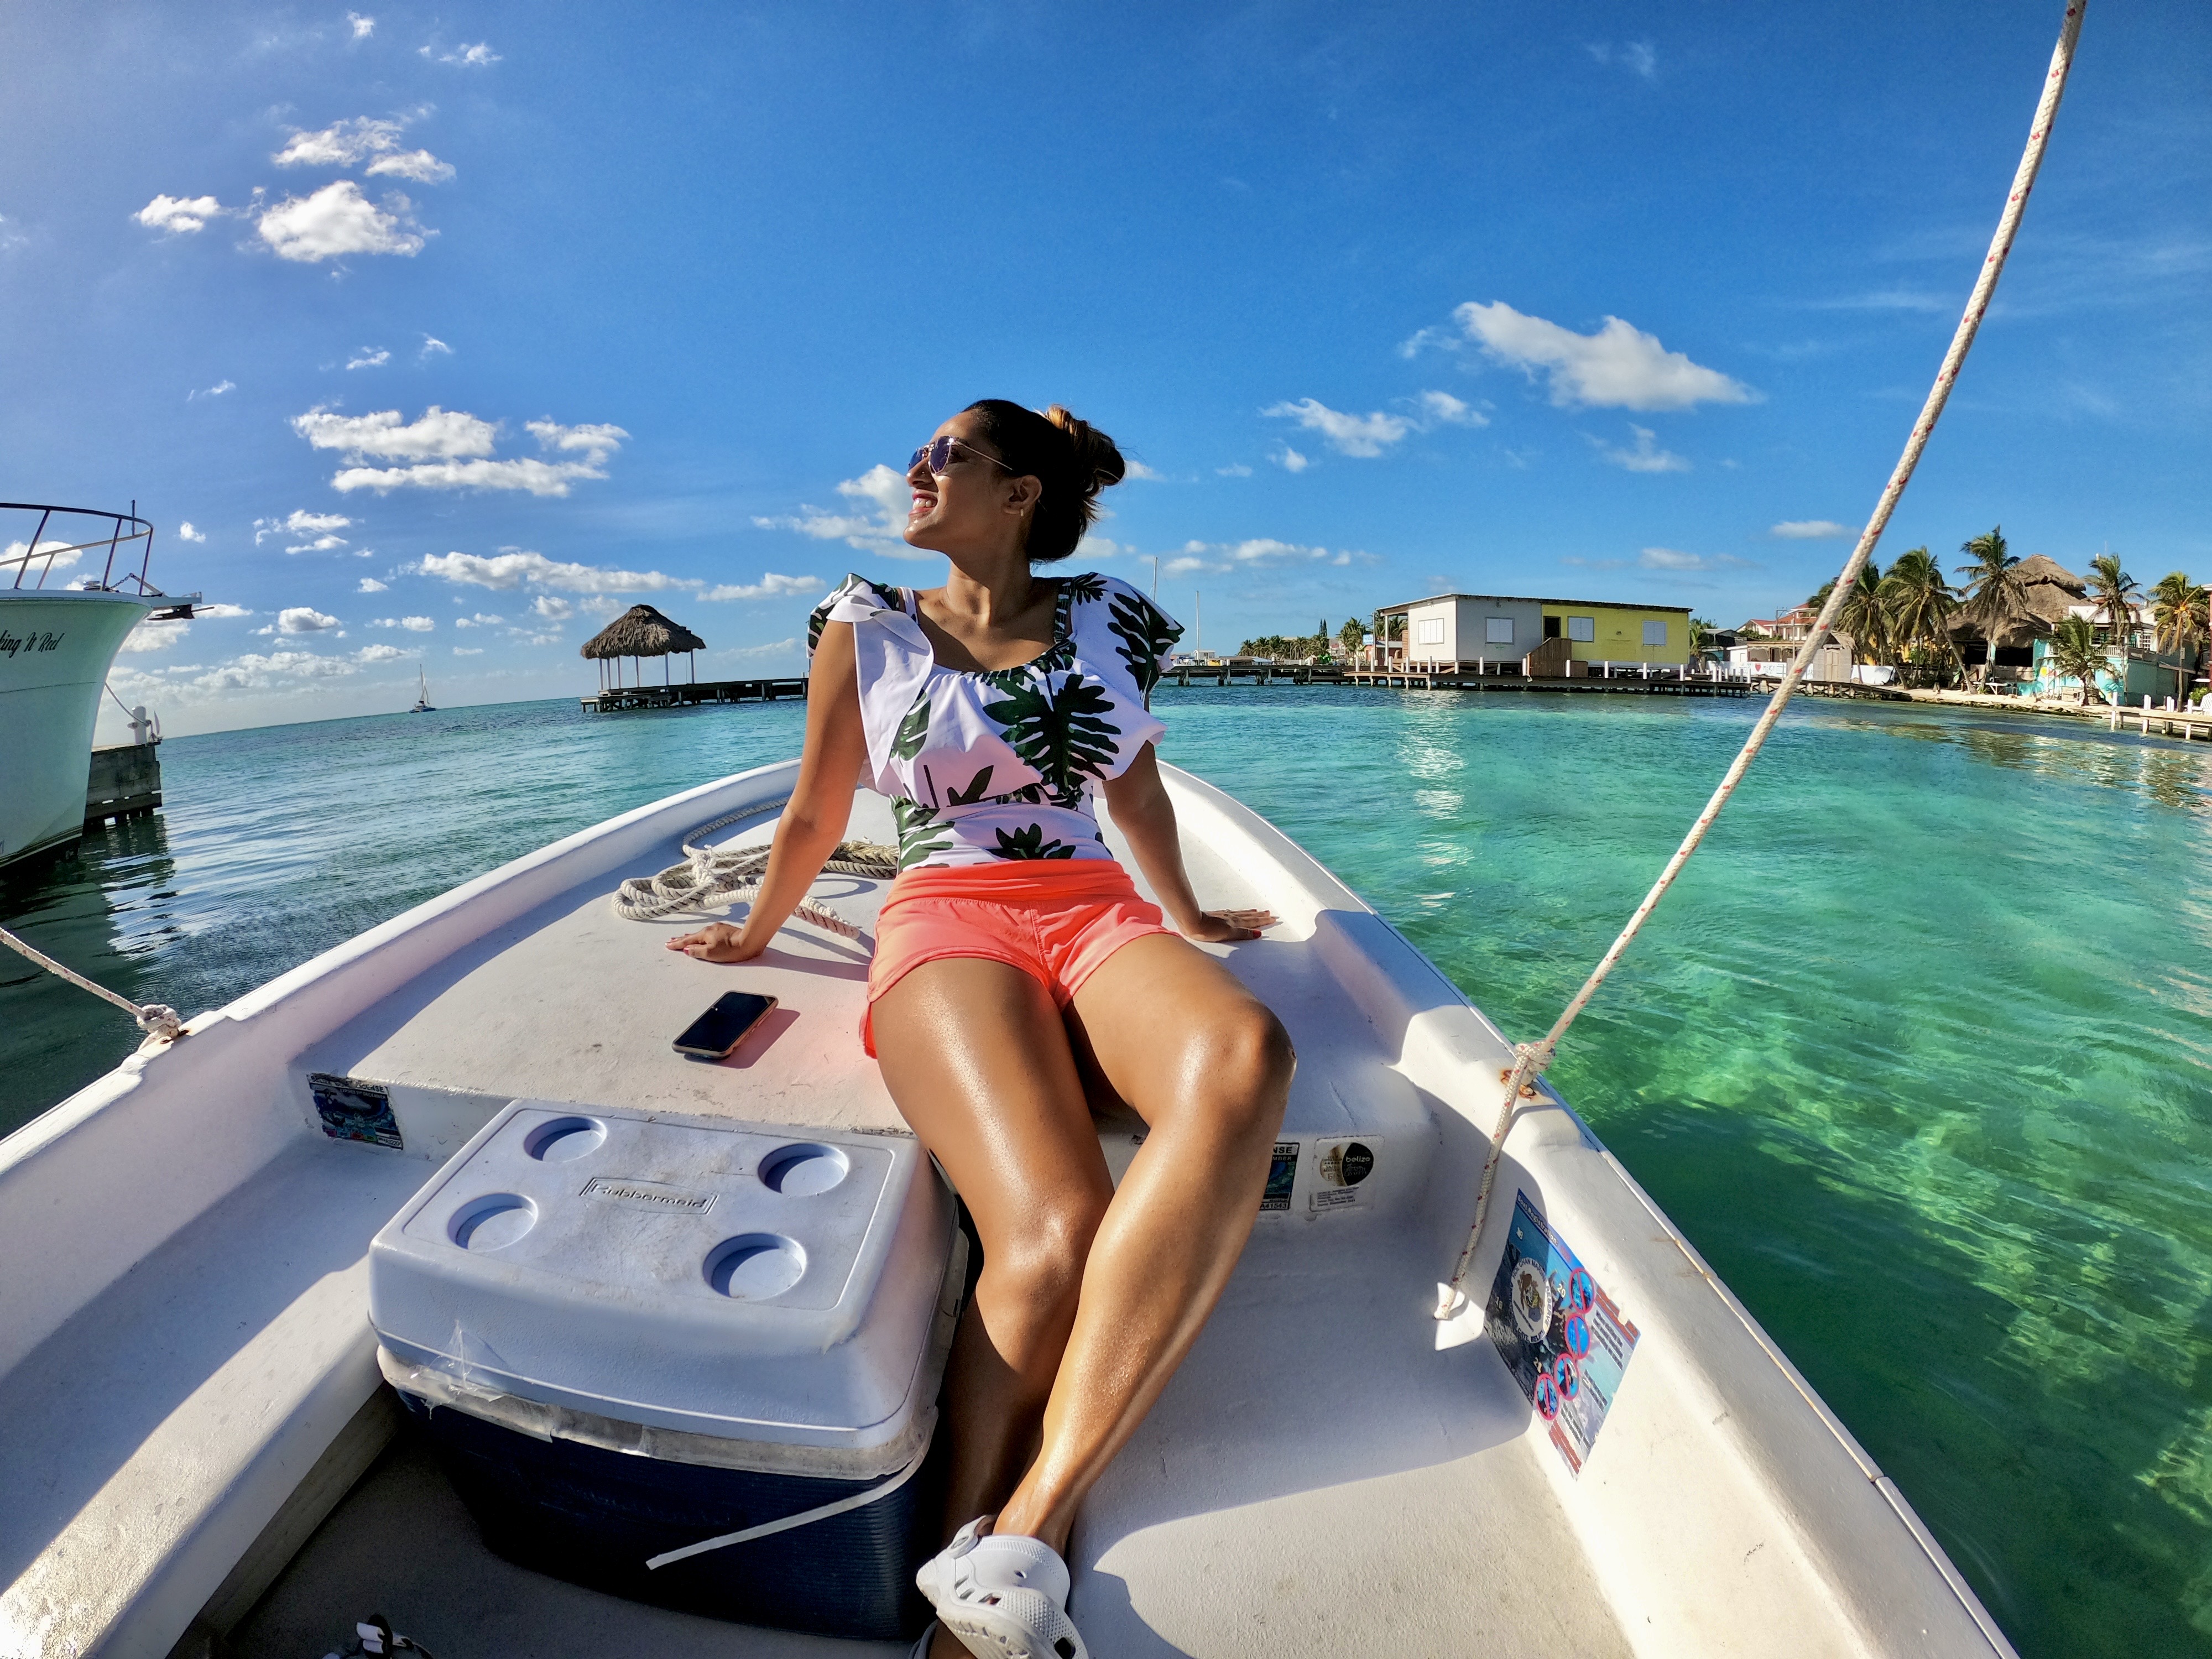
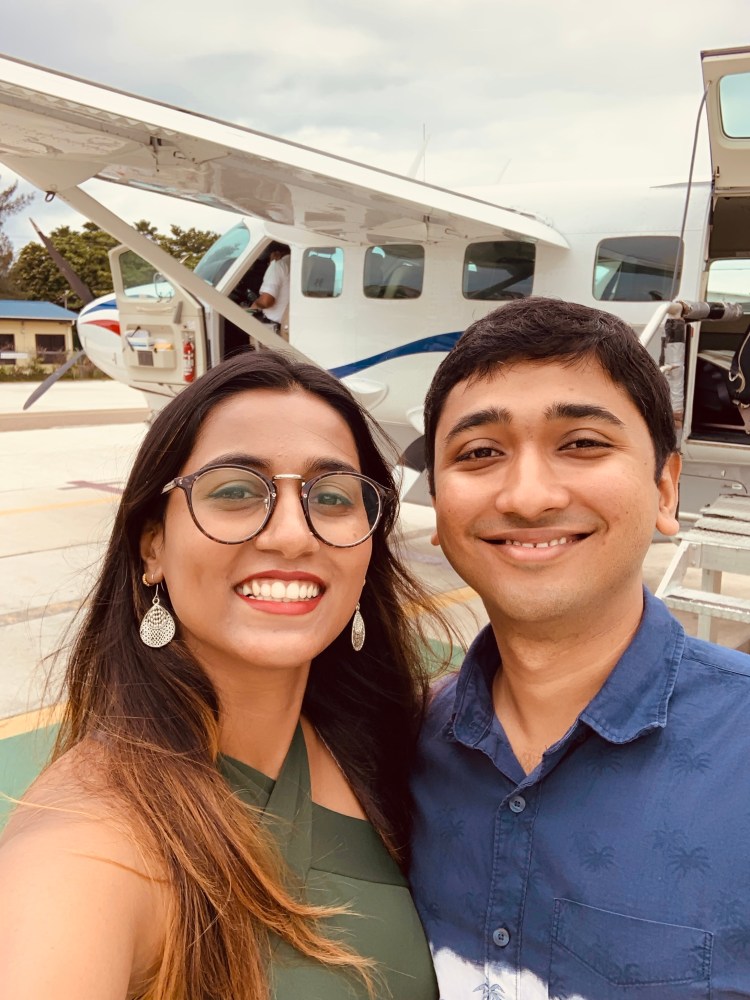
Day 1: Fly into BLZ and hop on to San Pedro Island

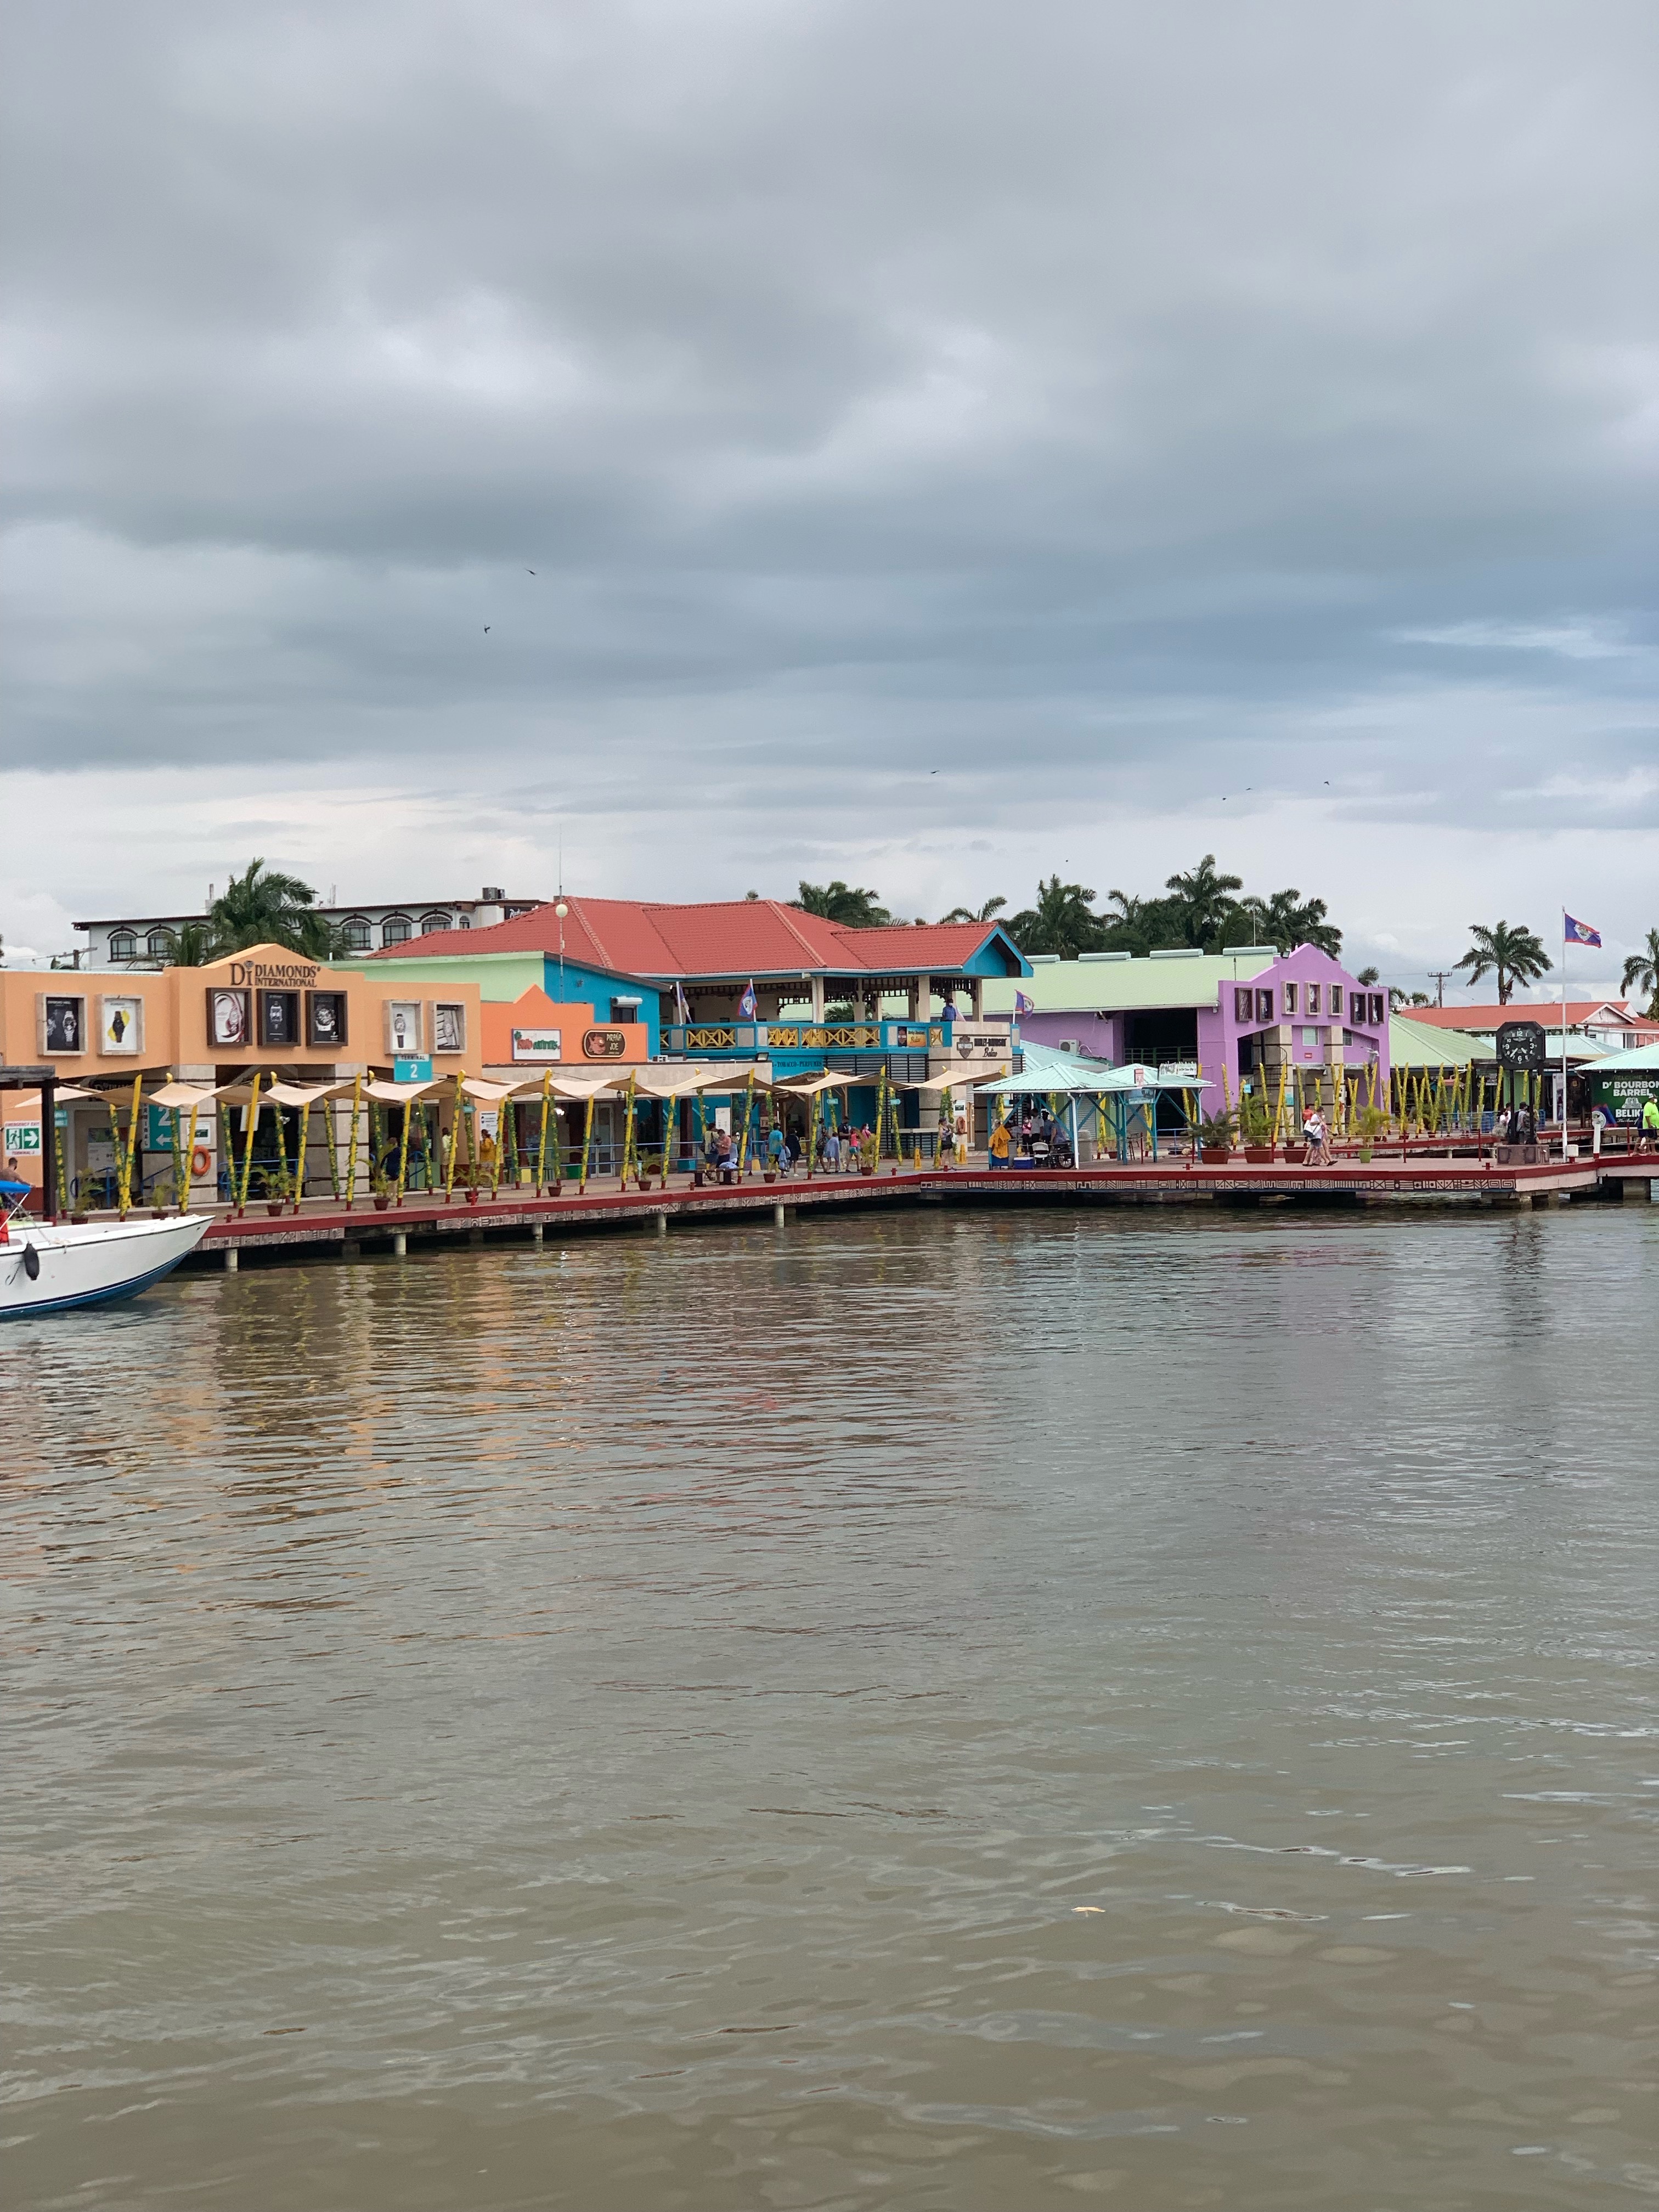
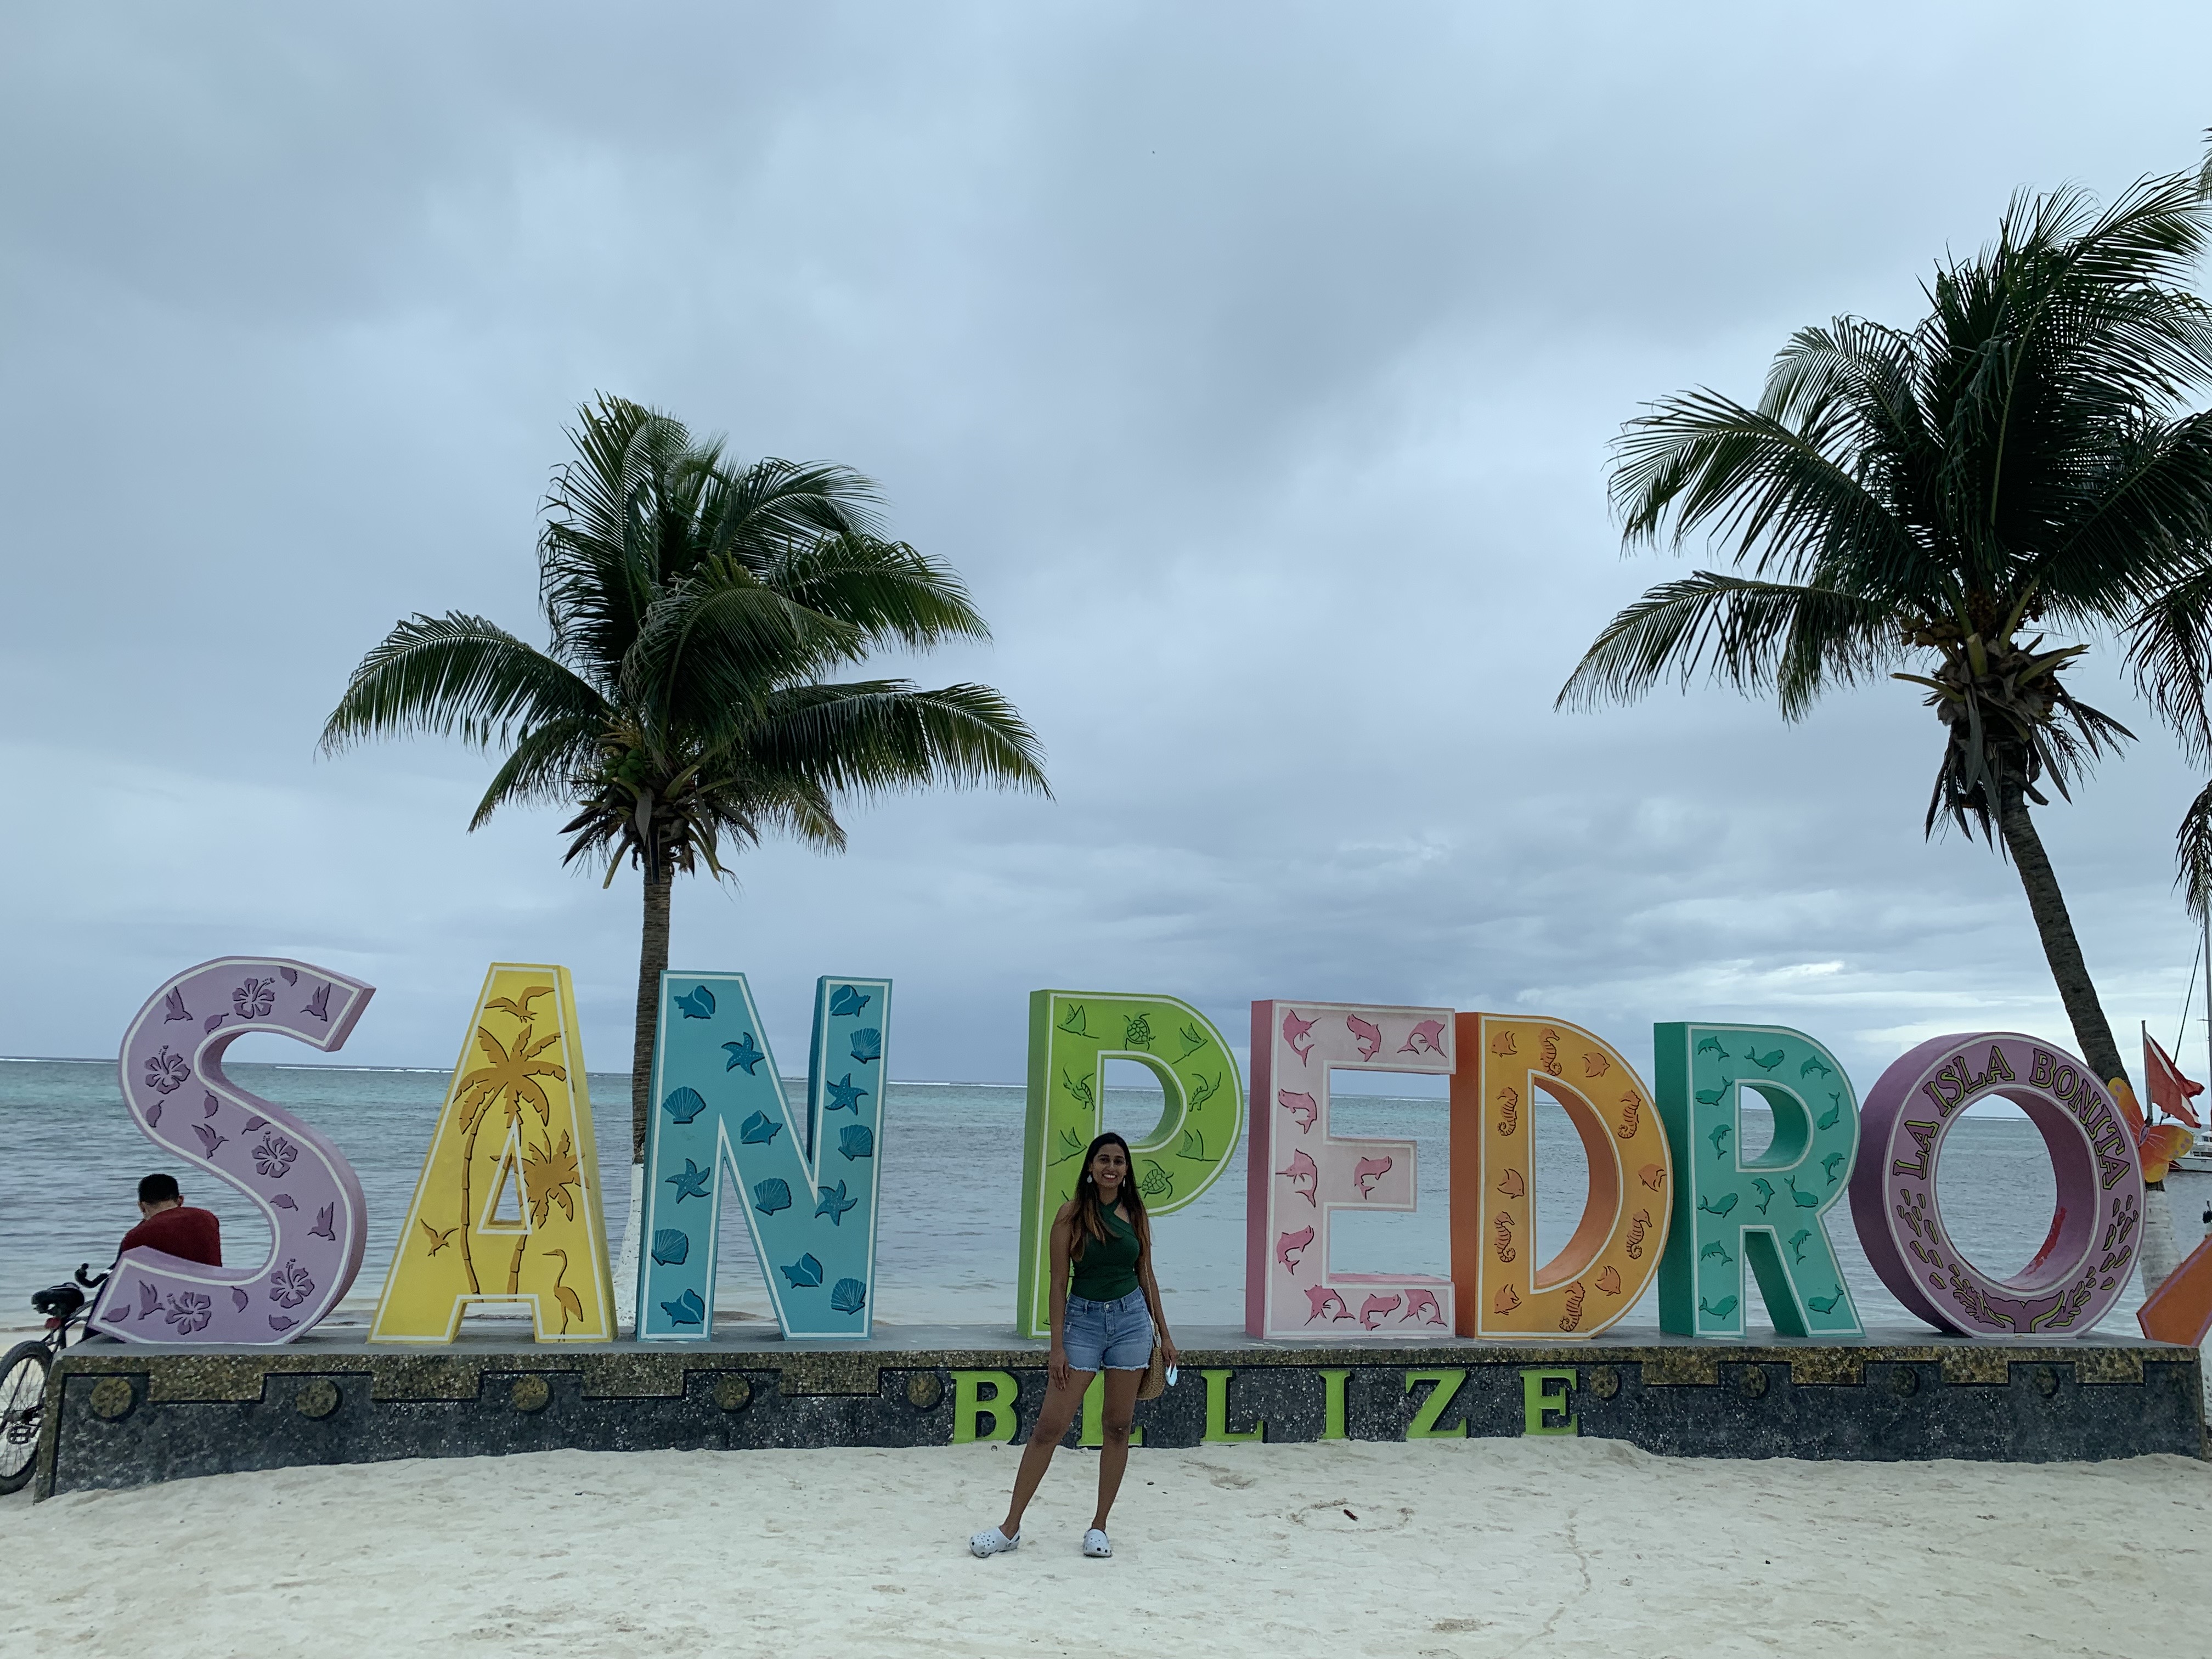
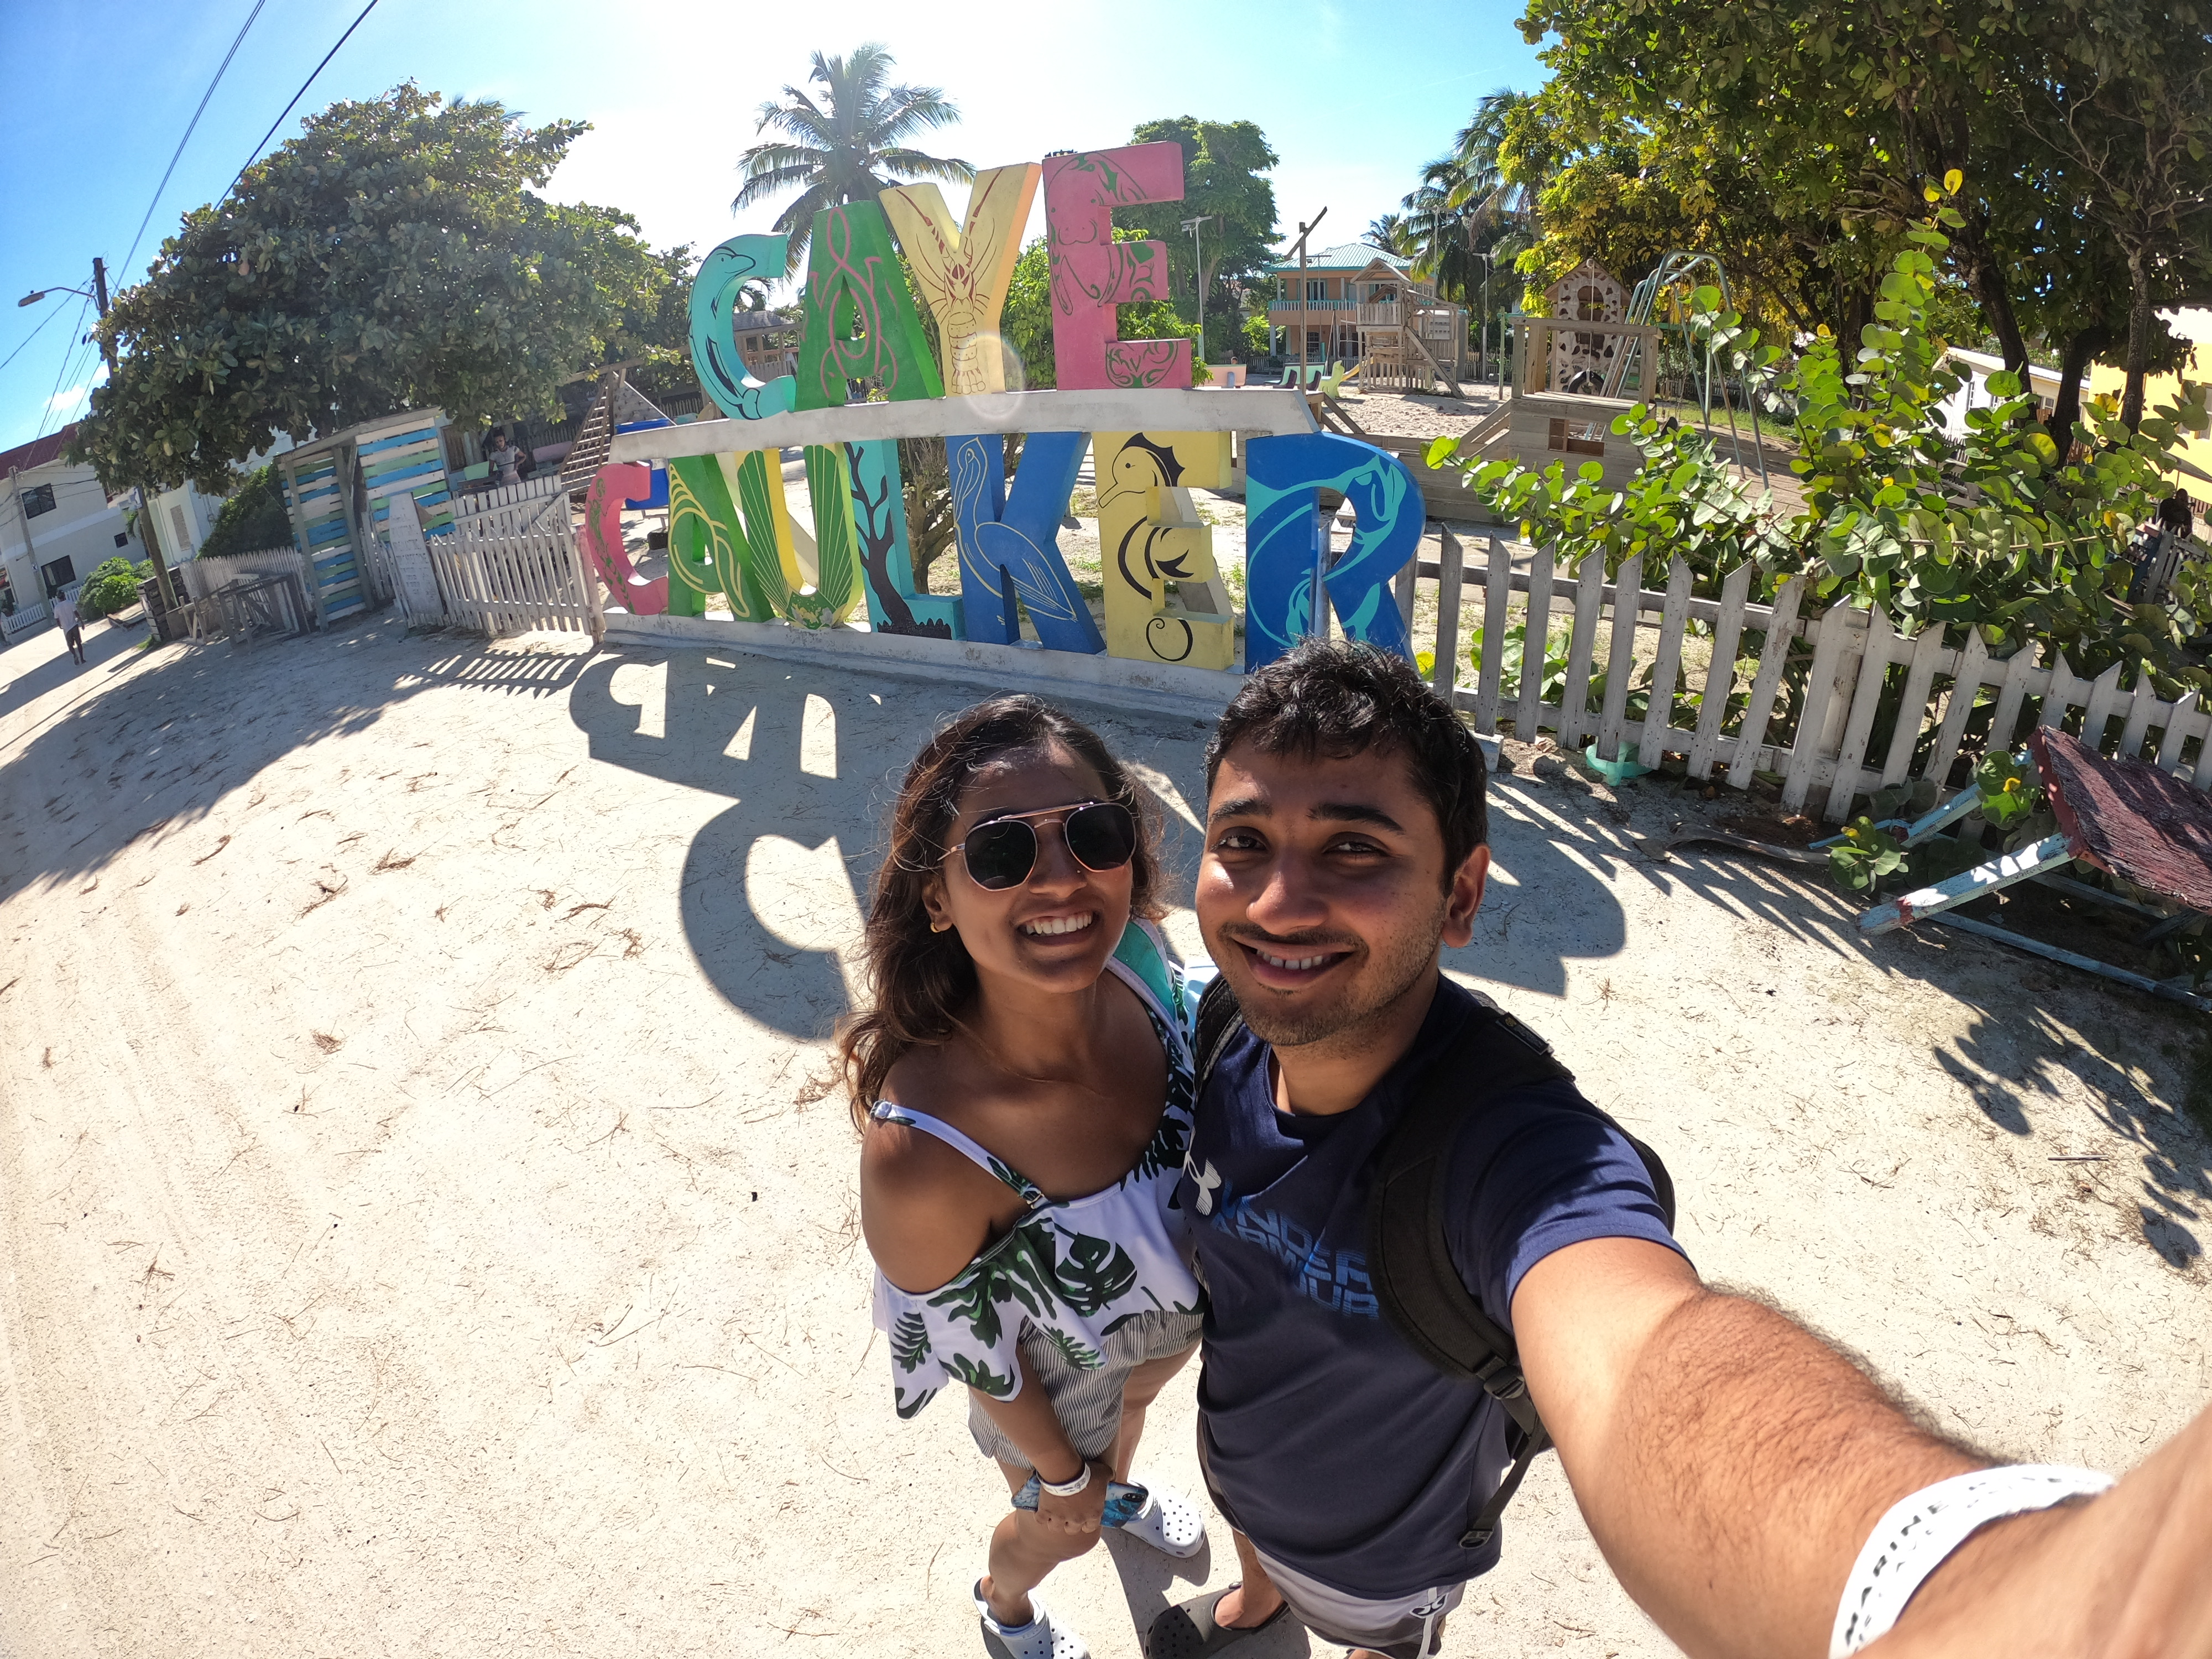
Belize City is one of the most commercial cities in Belize and most international flights land at BLZ airport. For a beachy vacation, tourists usually opt for one of two islands close to Belize city. The larger Ambergris Caye which hosts San Pedro, or the smaller island – Caye Caulker. What you choose is on what you intend to do there. Caye Caulker has more younger crowd, more of a backpacker – hip vibe with few restaurants and options. The motto of the island is to “go slow”. San Pedro on Ambergris Caye is more vibrant, more populated with great restaurants and resort scenes. Both can be reached via domestic airplanes (TropicAir or Maya Air) or by water taxis.

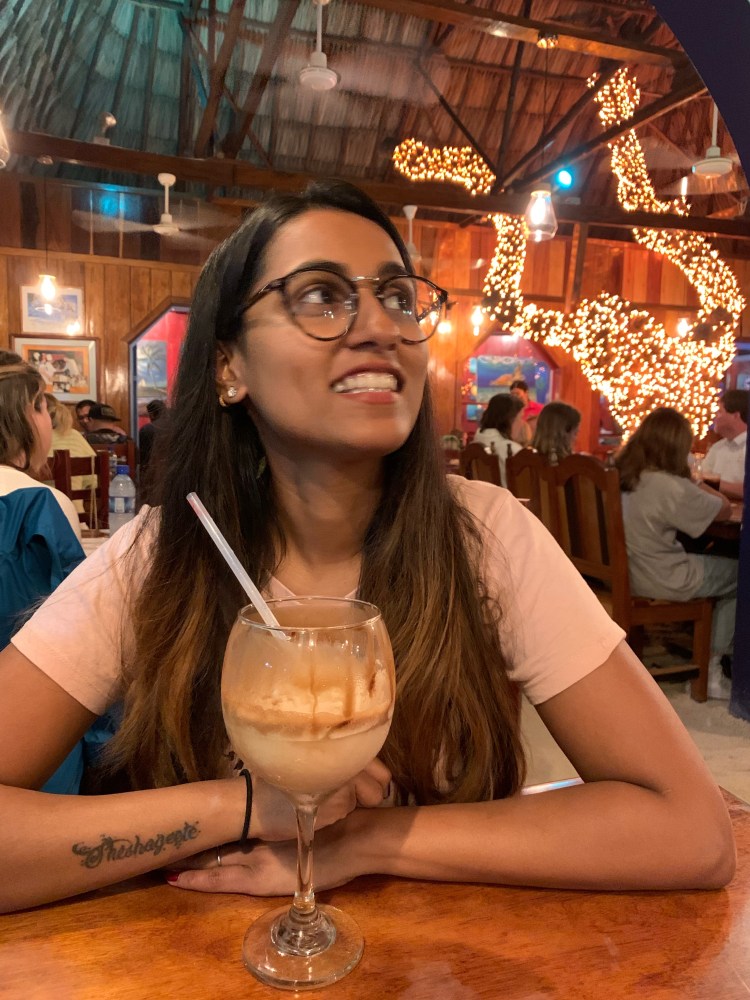
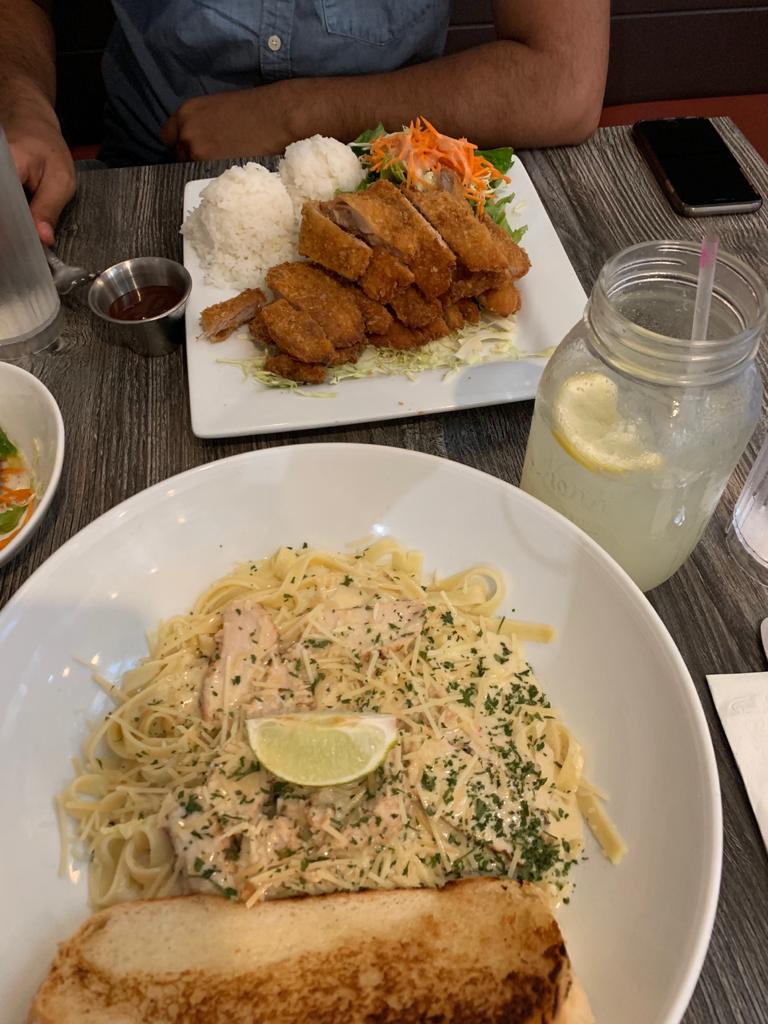
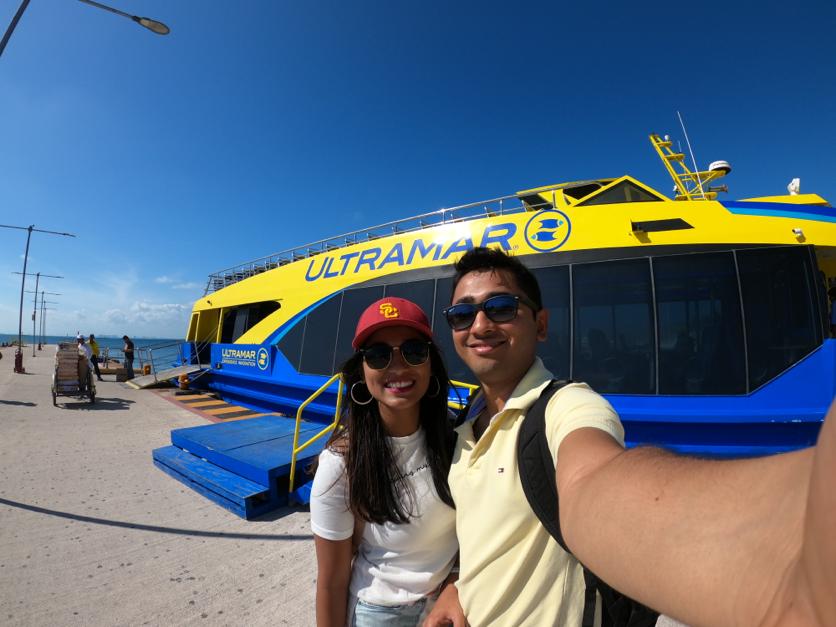
It takes 45mins to reach Caye Caulker from Belize City and then additional 30mins to reach San Pedro via water taxis. We took the Belize Water Taxi to get us to San Pedro which took about 1.5hours. It was evening when we reached our airbnb which was walkable distance from the watertaxi station. We had island’s best dinner at Elvi’s Kitchen – highly highly recommend this one.

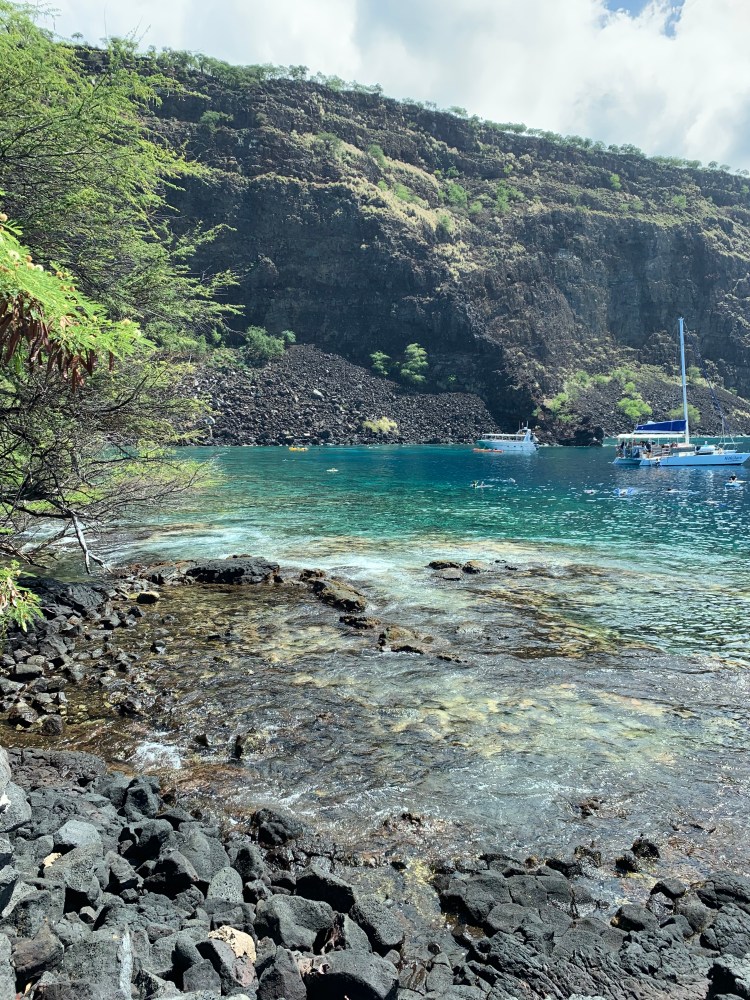
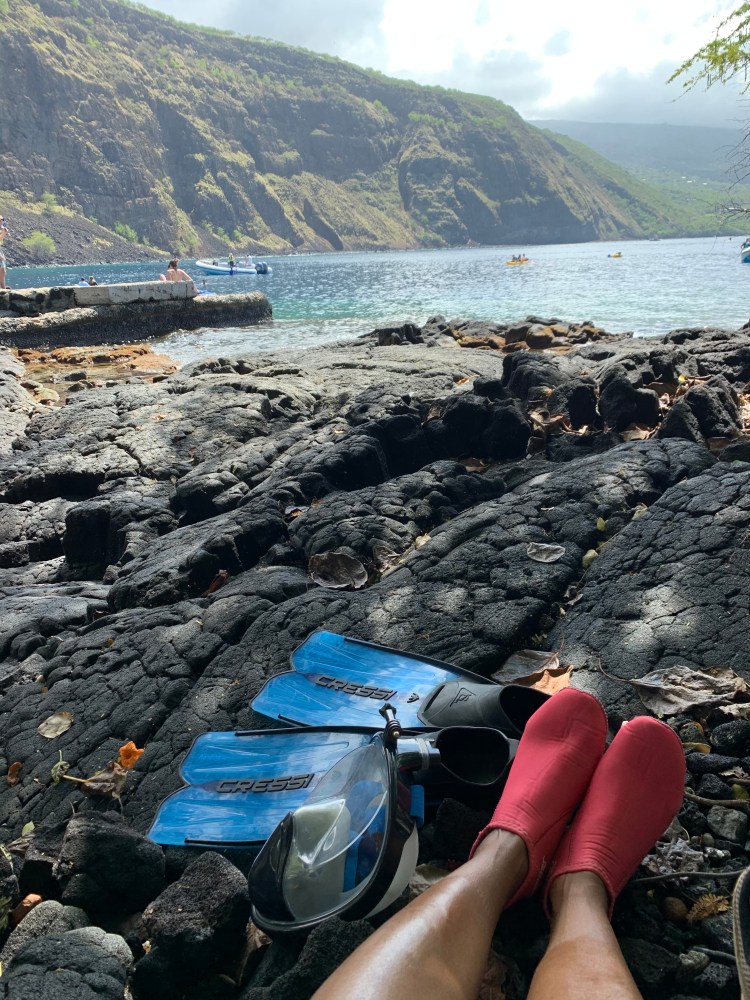
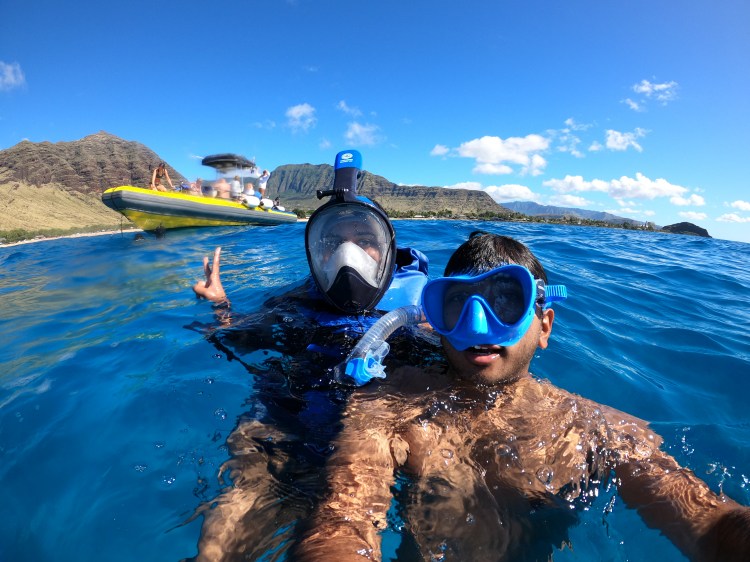
Day 2: Full day snorkeling excursion with Amigos Del Mar

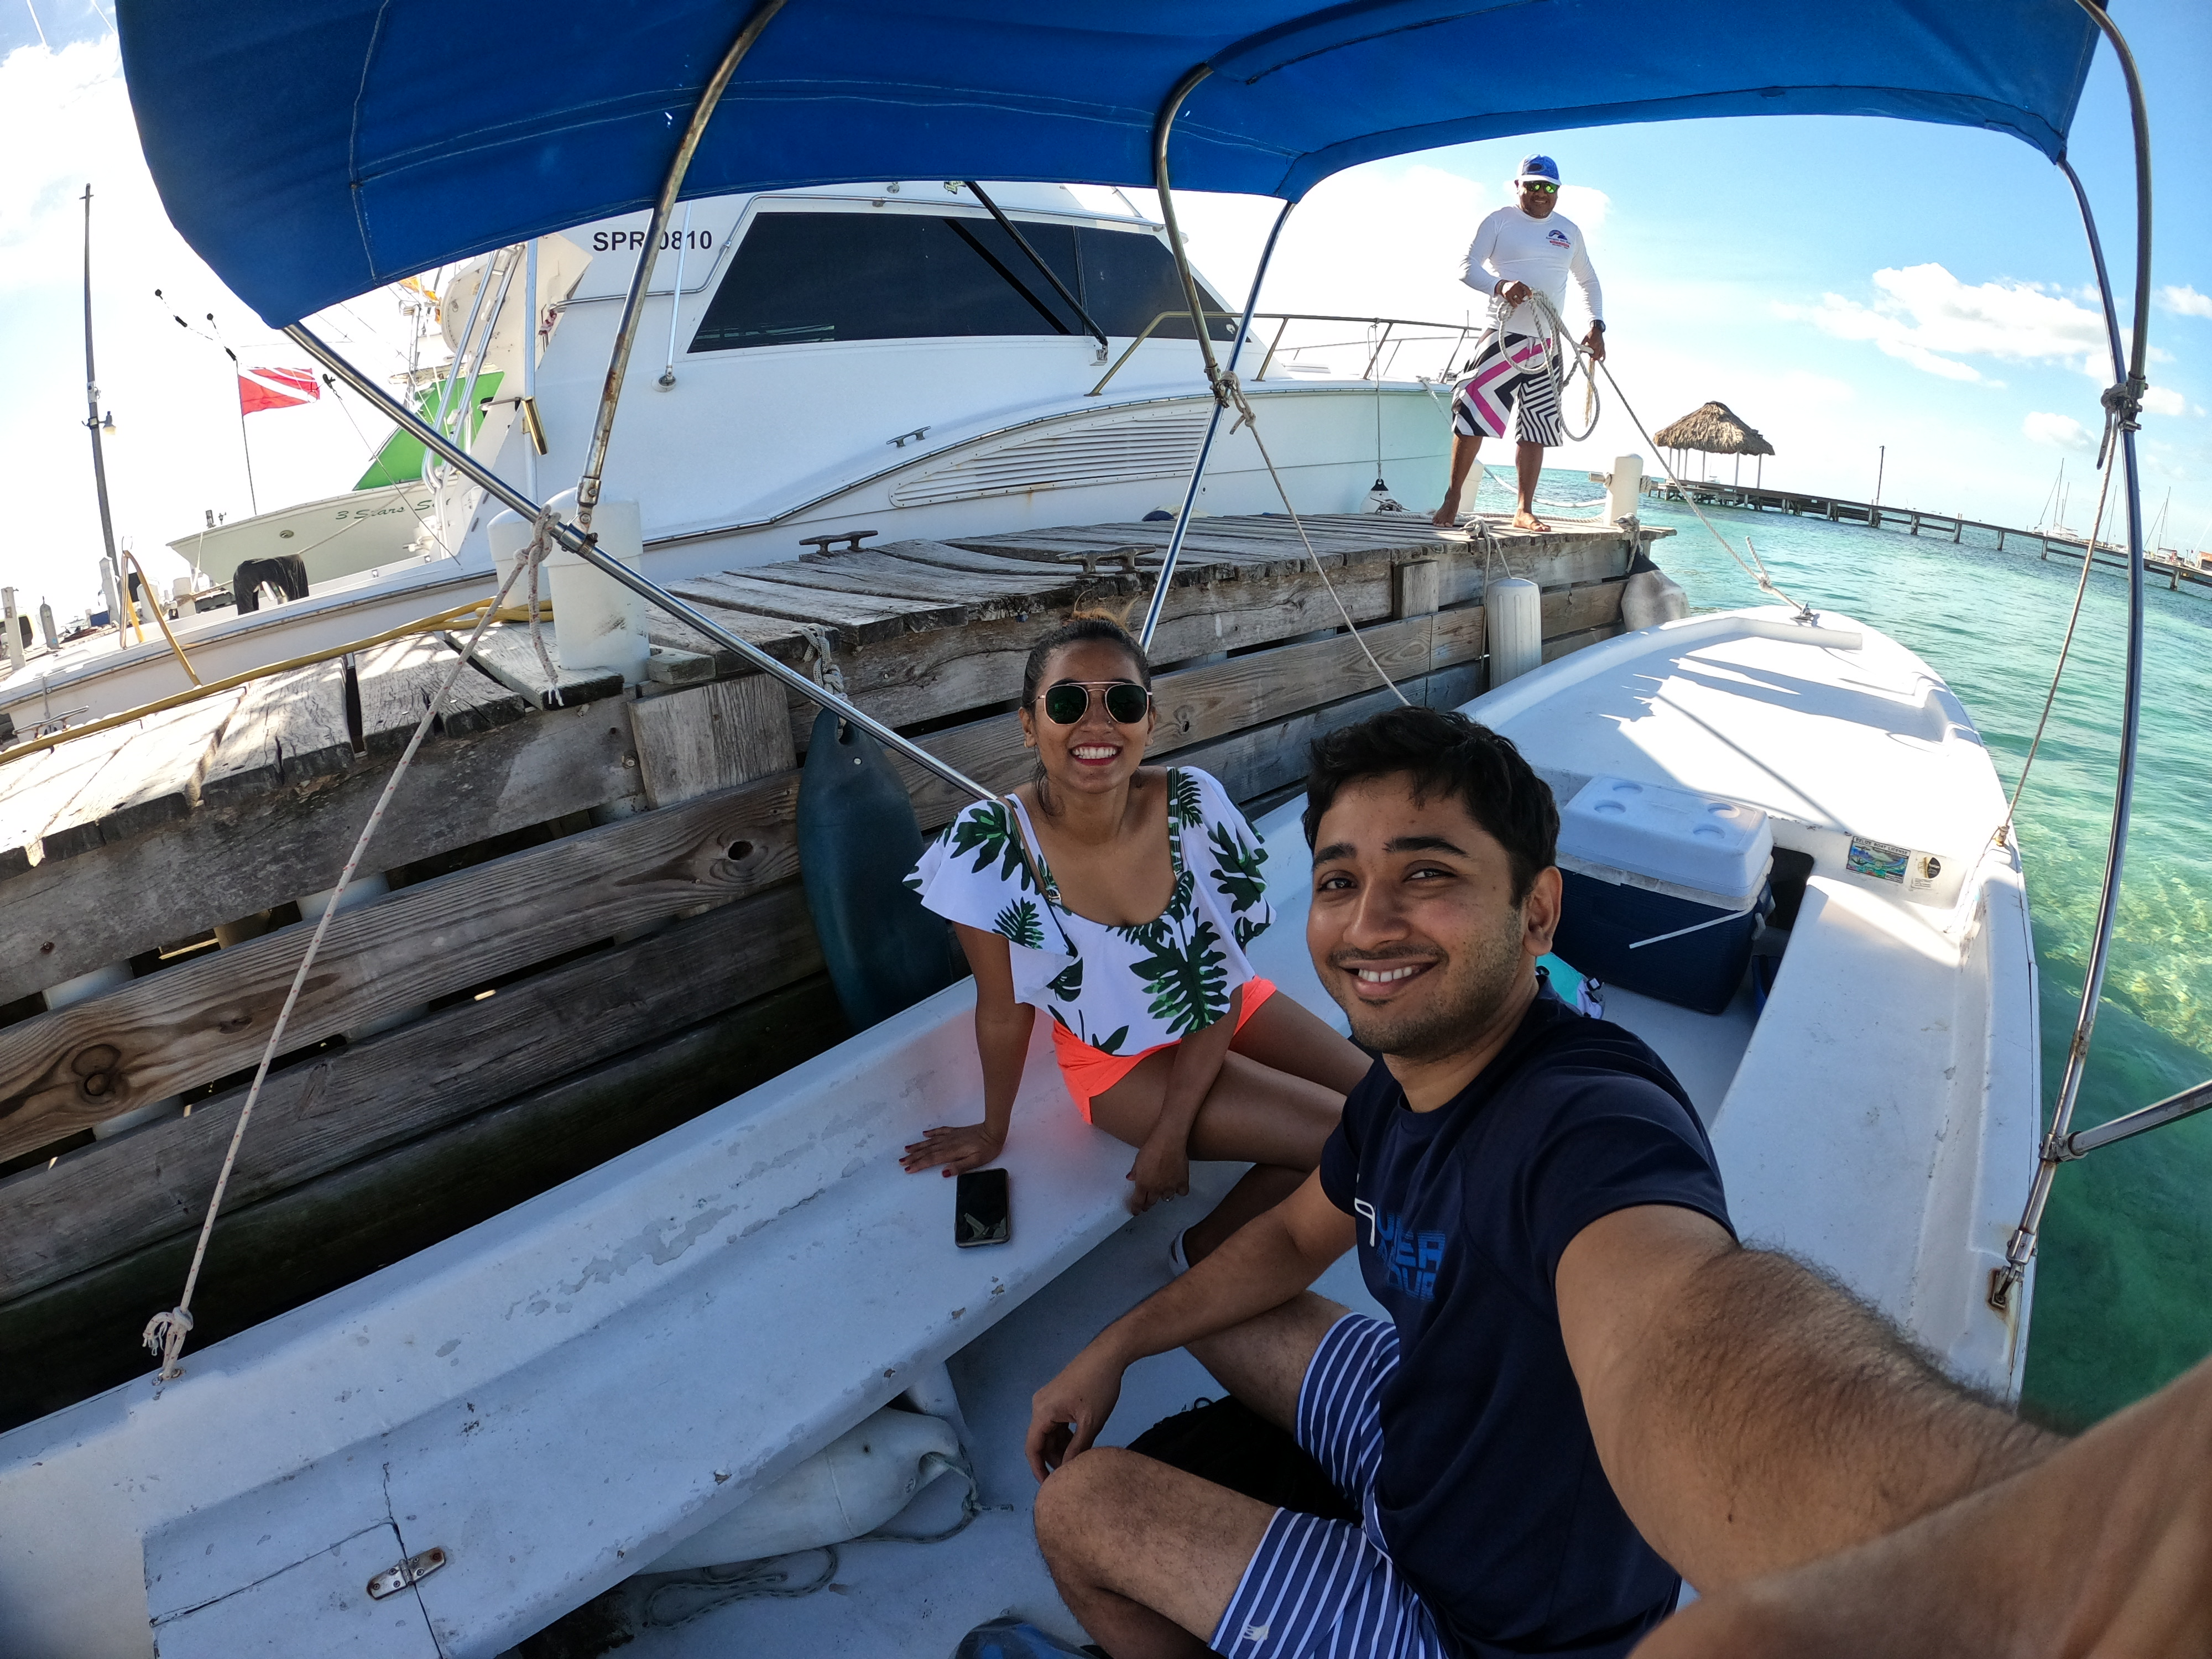
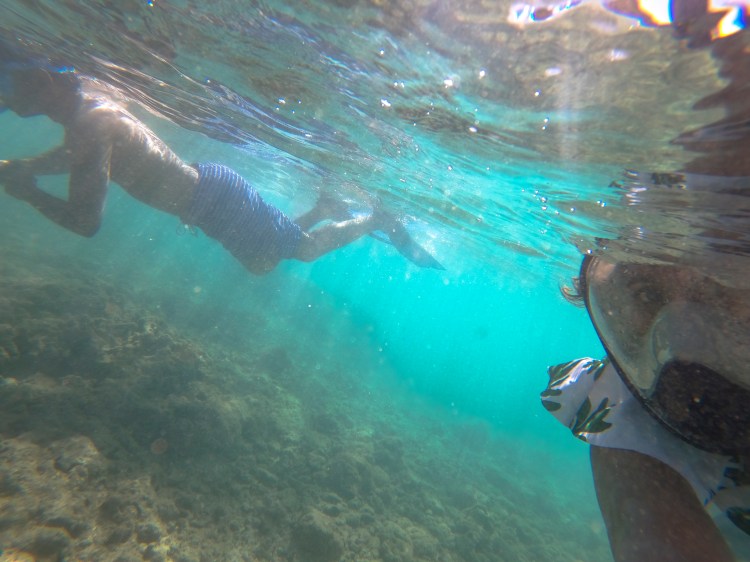
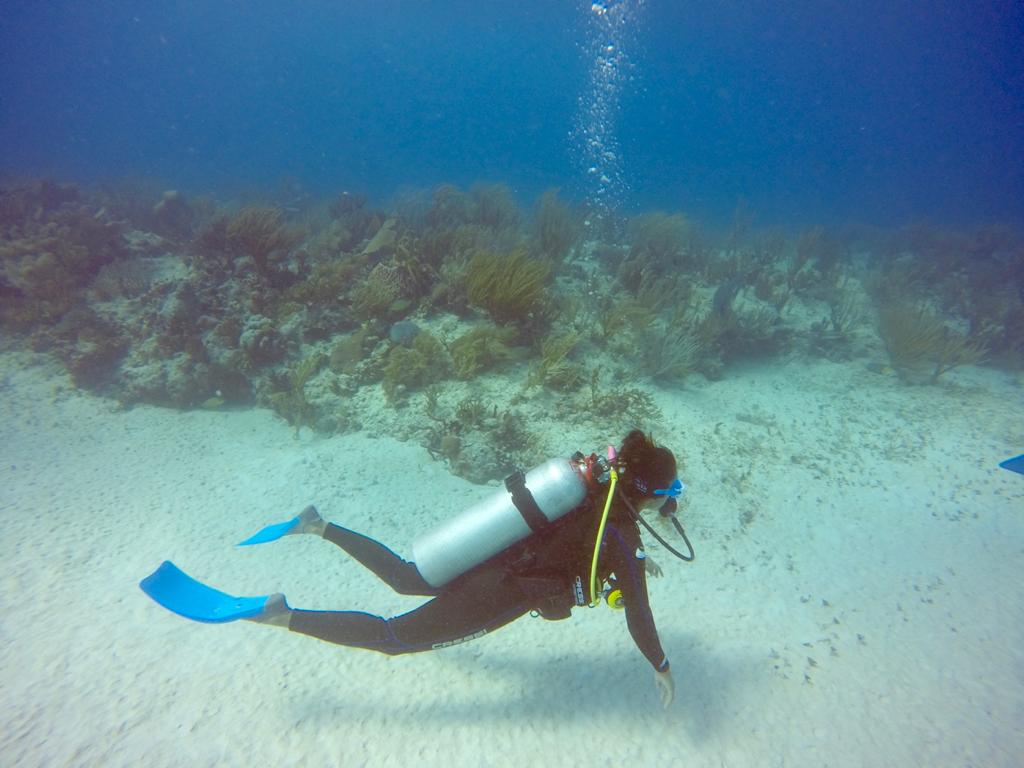
Today was a beautiful sunny day. We had advance booked Caye Caulker All Day Snorkel with Amigos Del Mar dive shop. They have a 4 person minimum requirement for this tour but since we had just arrived at the beginning of tourist season after more than a year of halt in tourism, the folks were happy to accommodate just us.

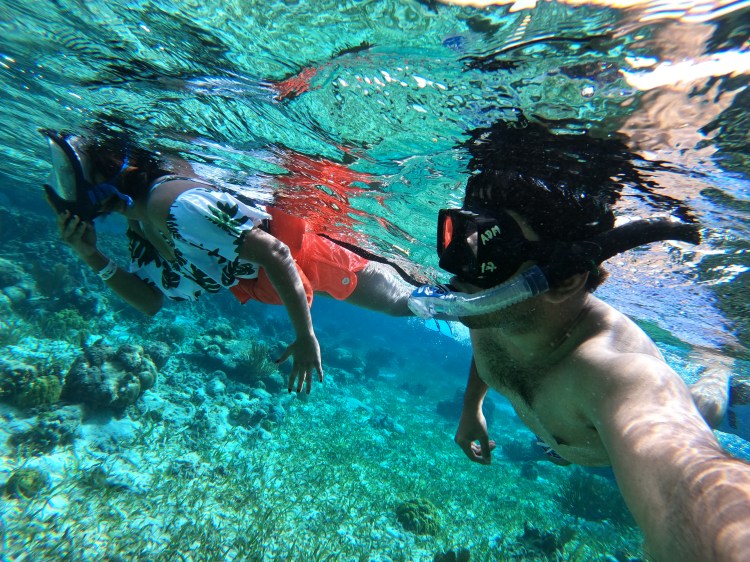
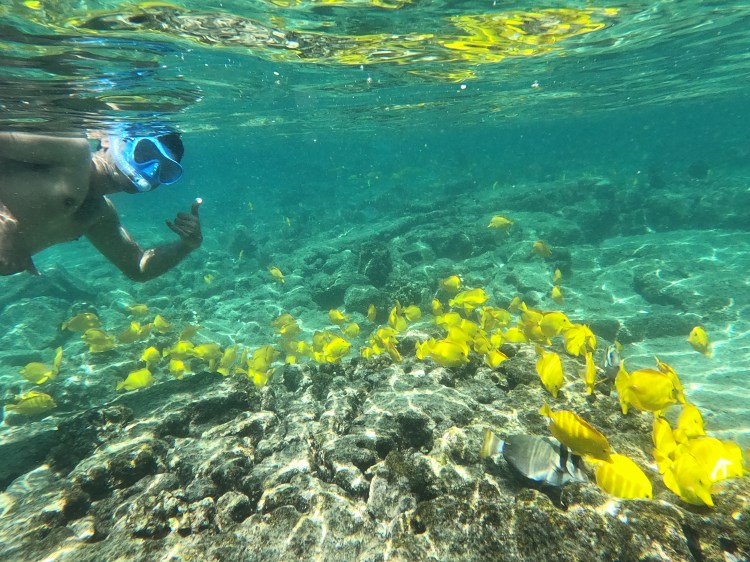
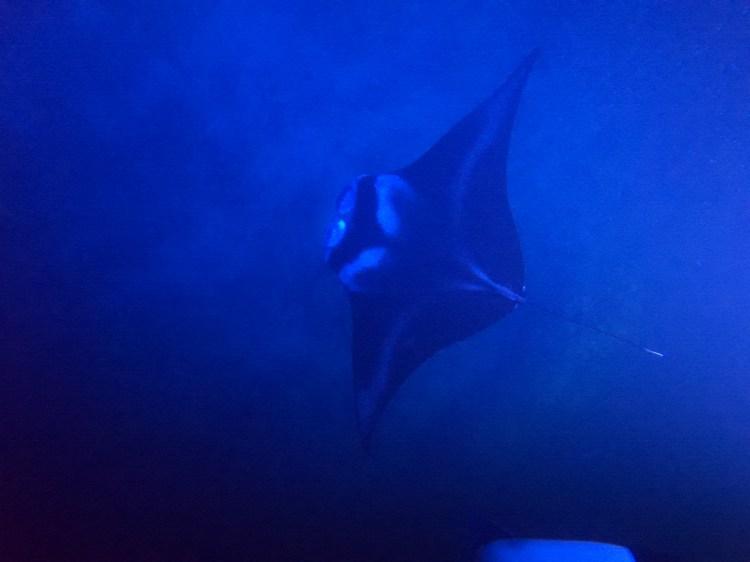
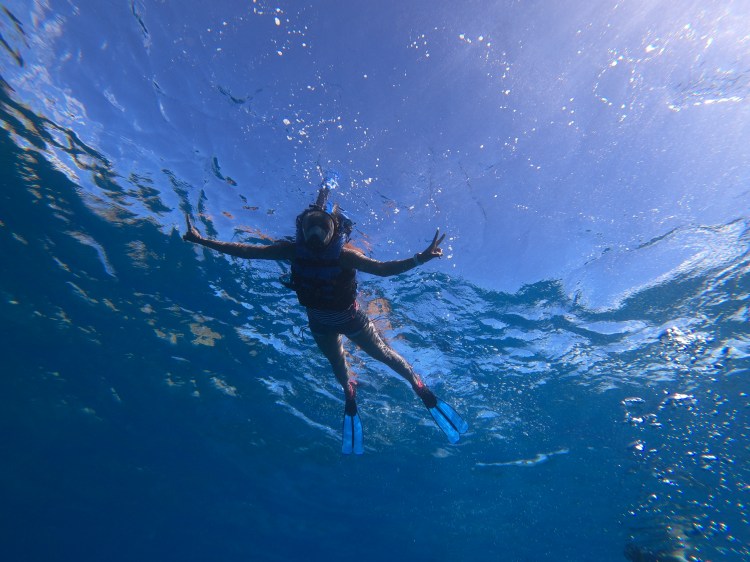
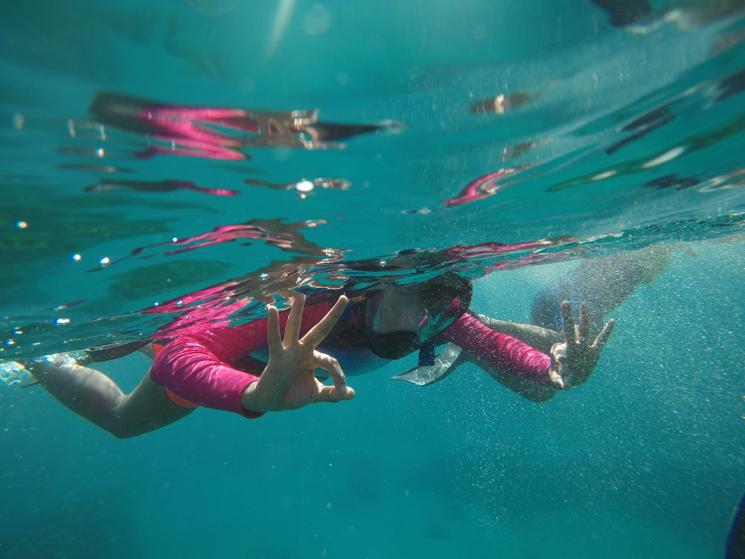
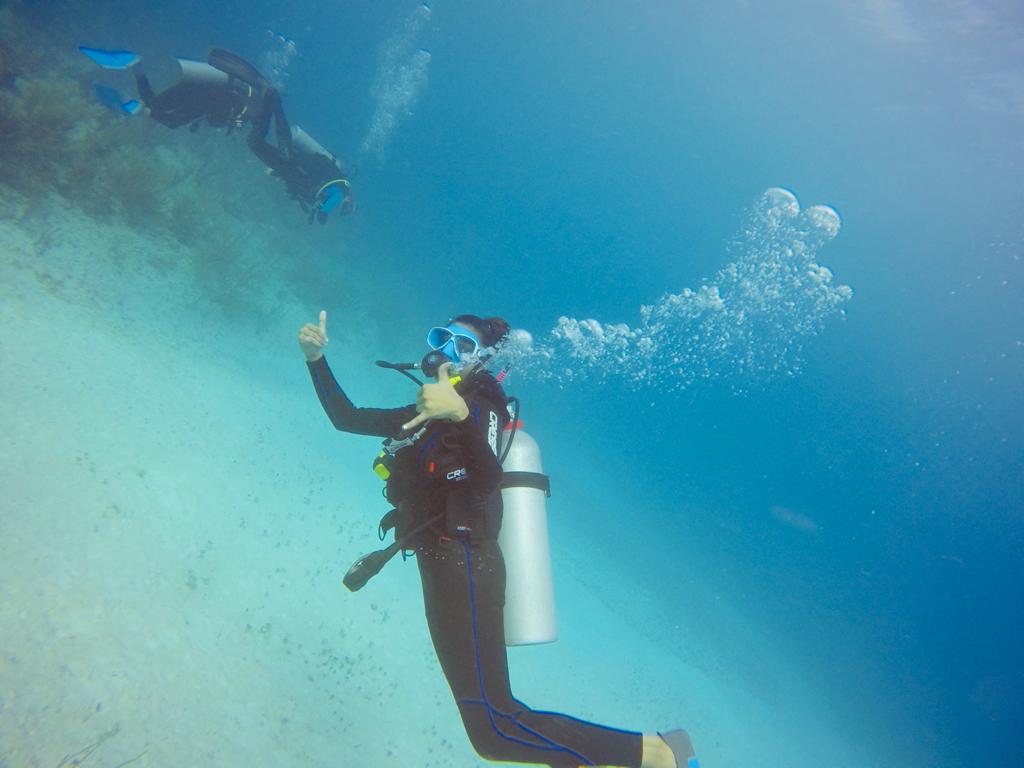
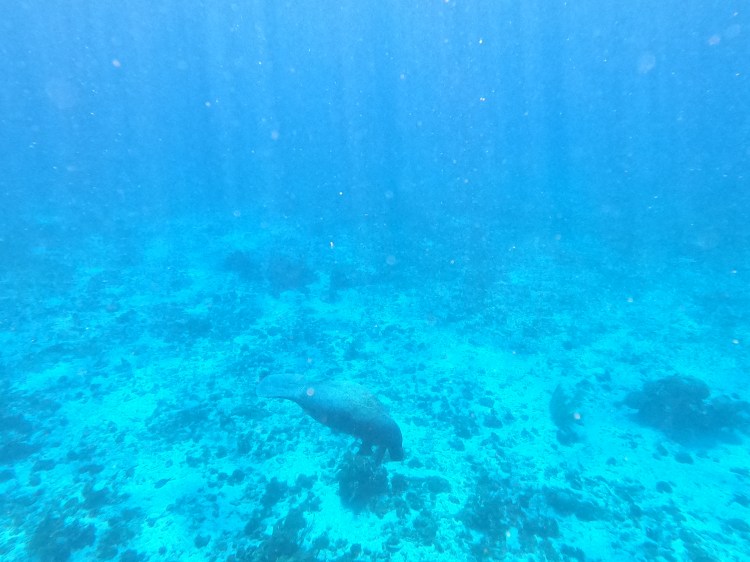
So yes we had an amazing private snorkeling tour exploring the best parts of the second largest barrier reef in the world with best guide.First we went to Hol Chan Marine Reserve which is part of the barrier reef. Such a huge world in there! We were guided along the reefs, the best spots to find most unique fishes and other marine life and each time we find something new he would come up and tell us what we saw. We learnt so much.

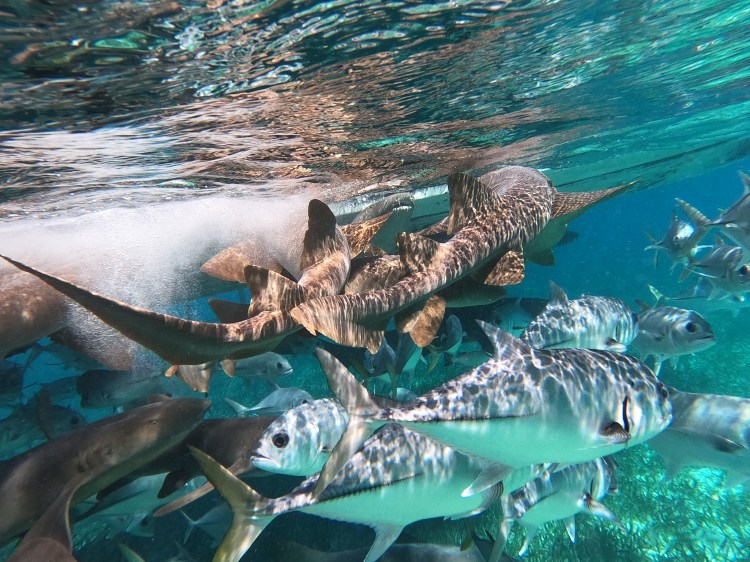
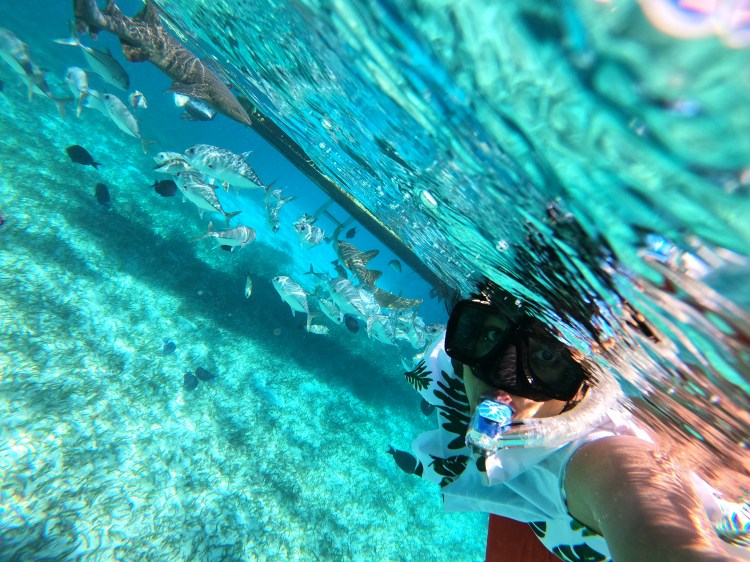
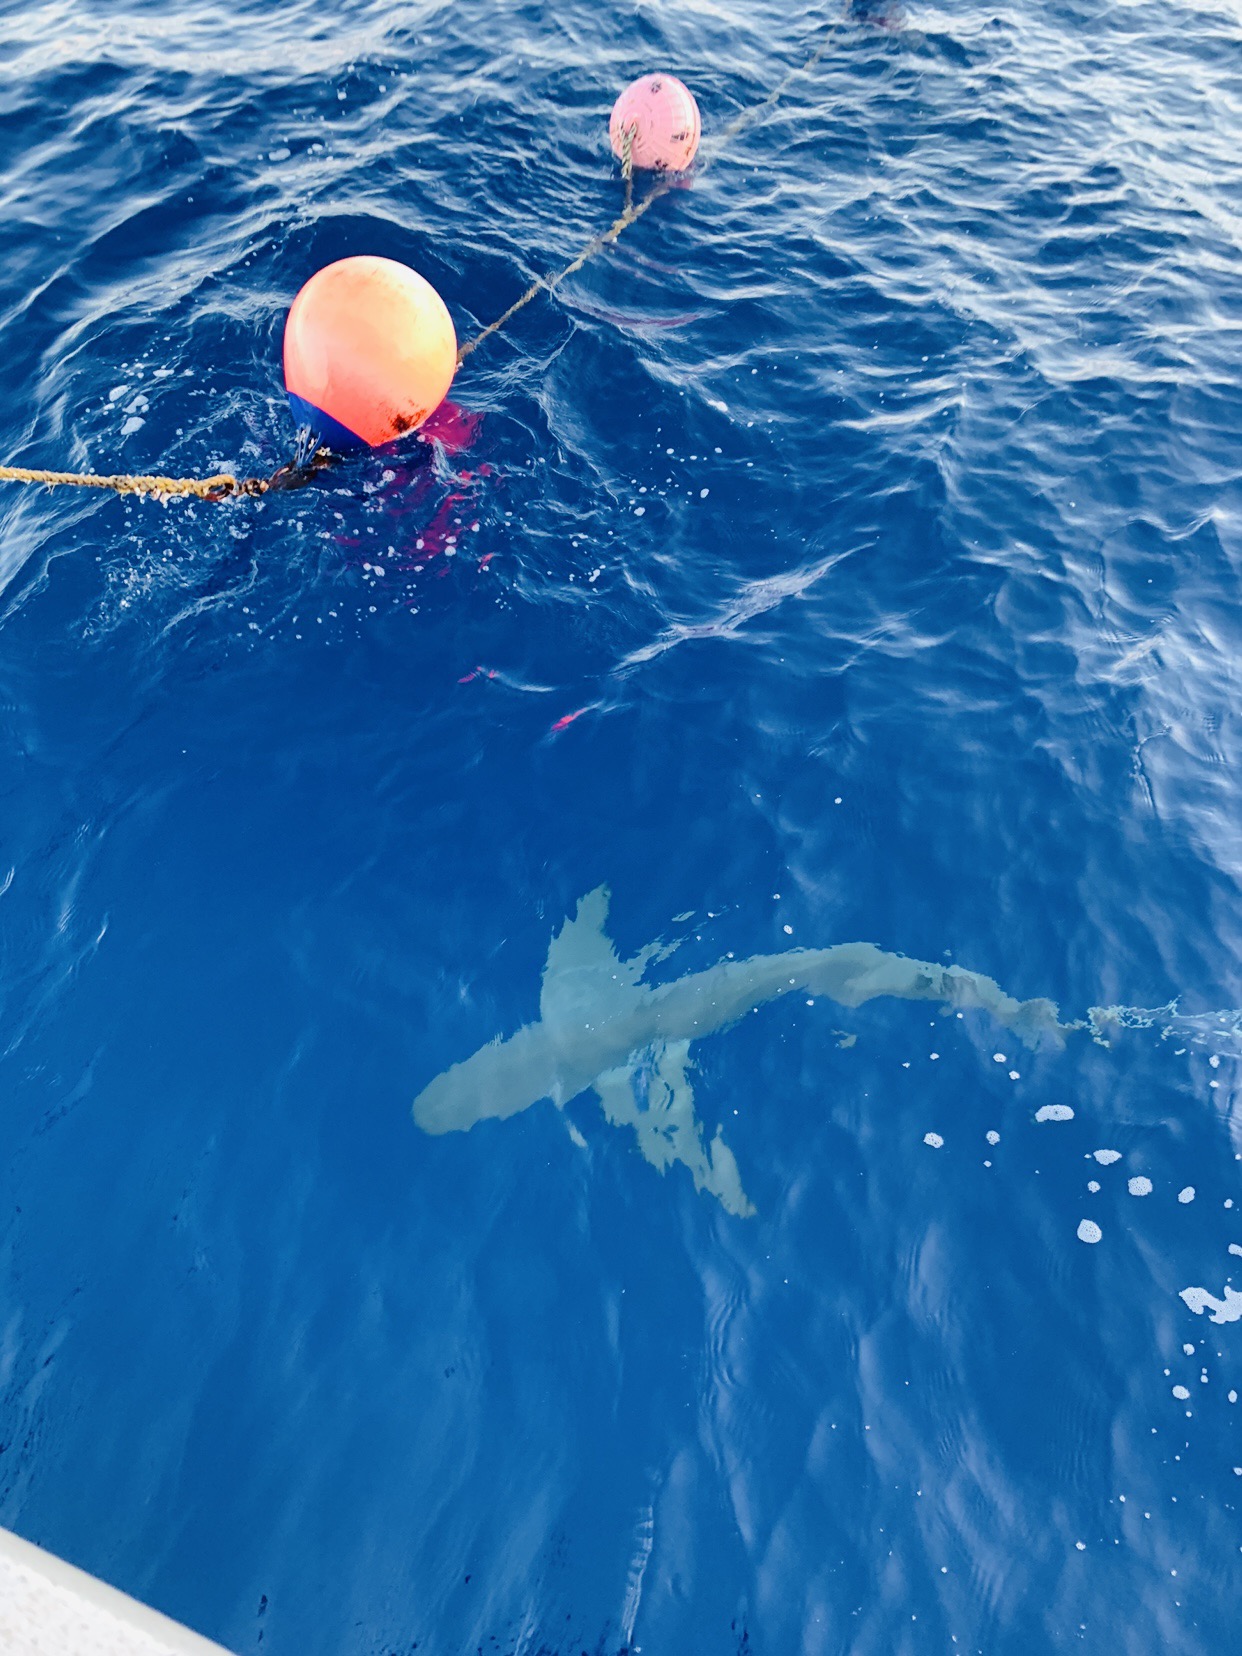
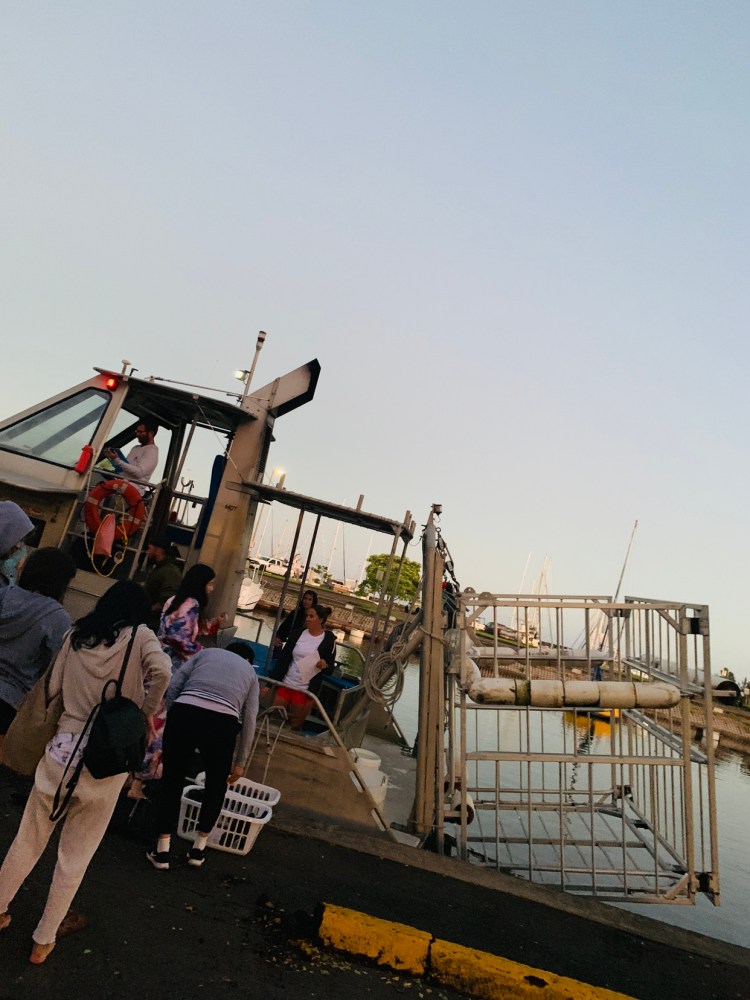
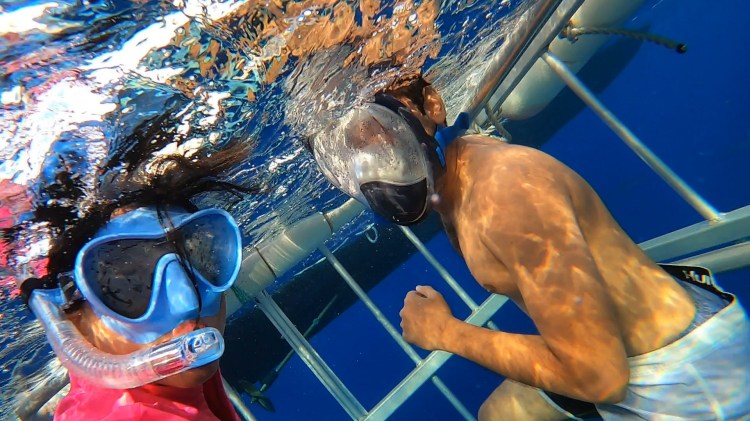
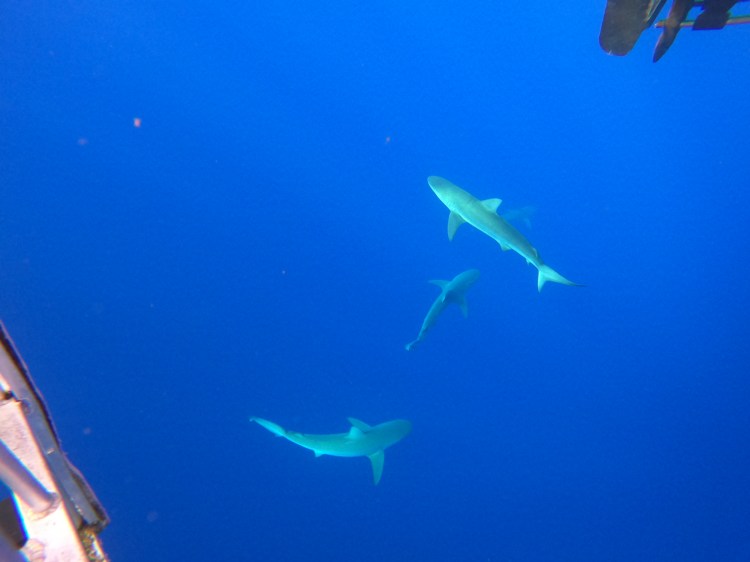
Next snorkel stop was to swim with nurse sharks at Shark Ray Alley. All tour operators attract them with sardines and you get to go sooo close to the sharks. It was quite an experience! We next went in search of the manatees – the cows of the oceans. Such cute creatures. After all the snorkeling we docked at Caye Caulker, had lunch and went around the island to explore.

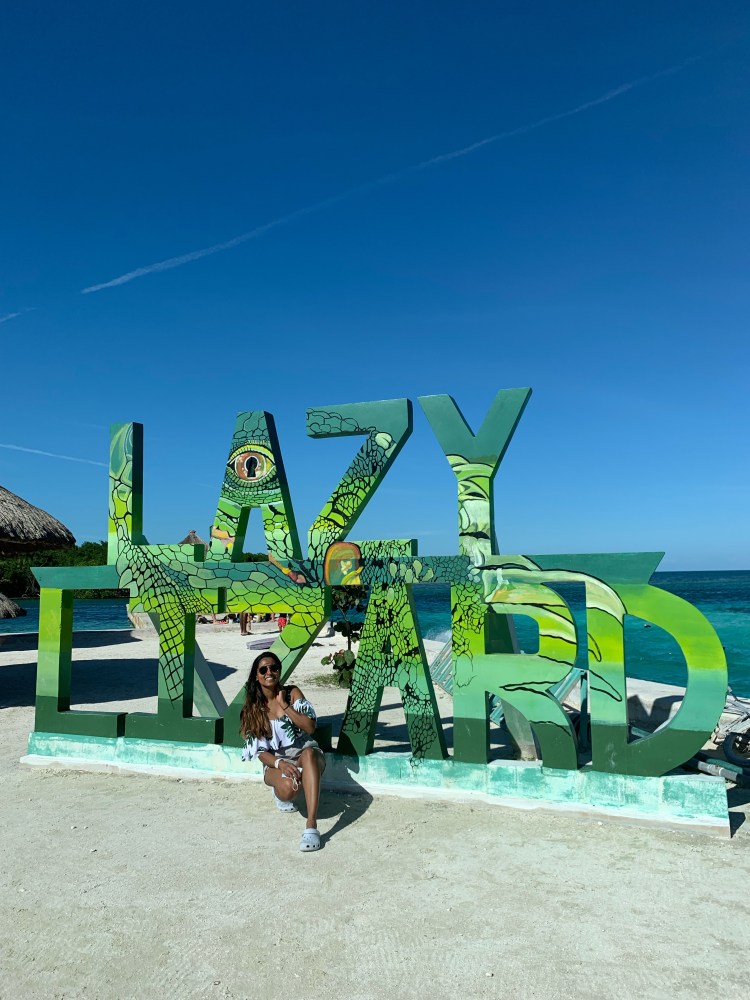
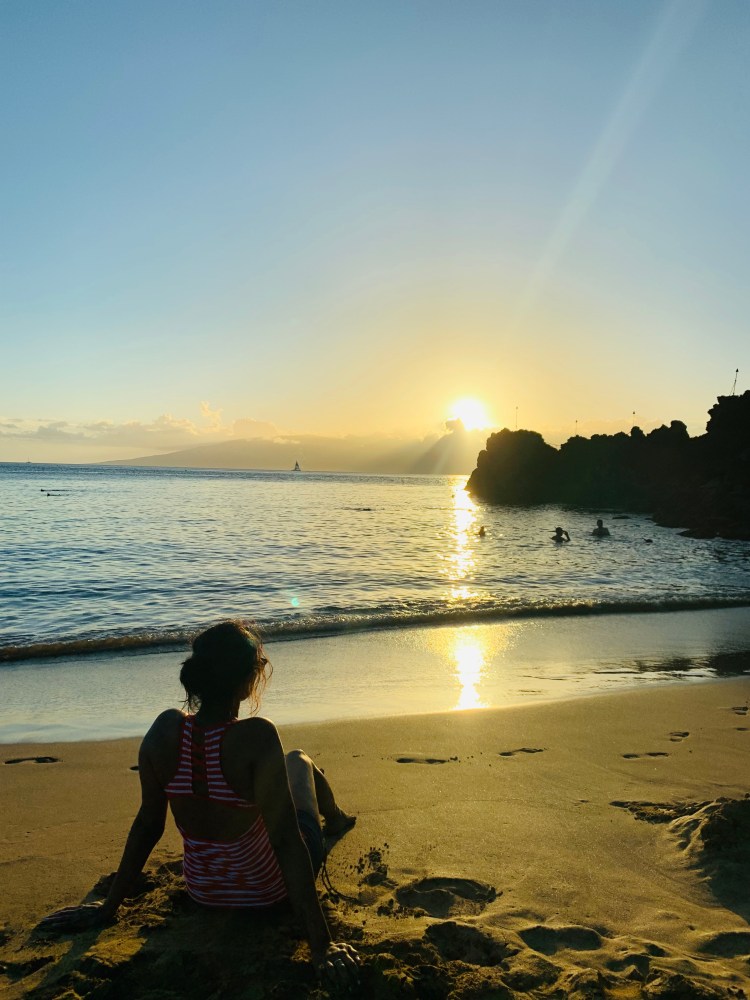
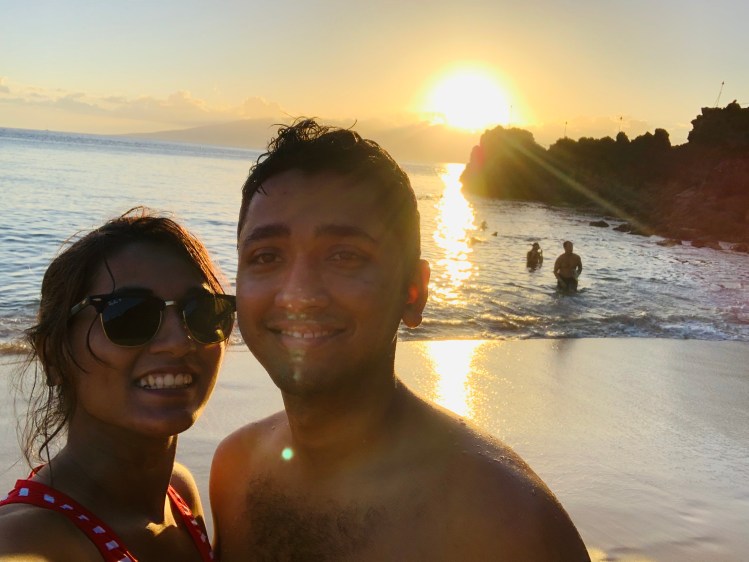
The most famous spot on the island is undoubtedly “The Split” where a narrow water channel, created due to Hurricane Hattie of 1961, divides the island into two halves. The Lazy Lizard bar and grill on the split is the central hangout out place for locals and tourists alike enjoying music, food, sun and cool blue waters around. It is a fun place to be. After spending good amount of time at the split our boat operator + tour guide picked us to visit the Tarpons where we also got to feed sardines to them. Finally later we went looking for sea horses near the island docks and later jetted back to San Pedro witnessing a calming sunset. The whole tour costed us 115USDpp excluding lunch.

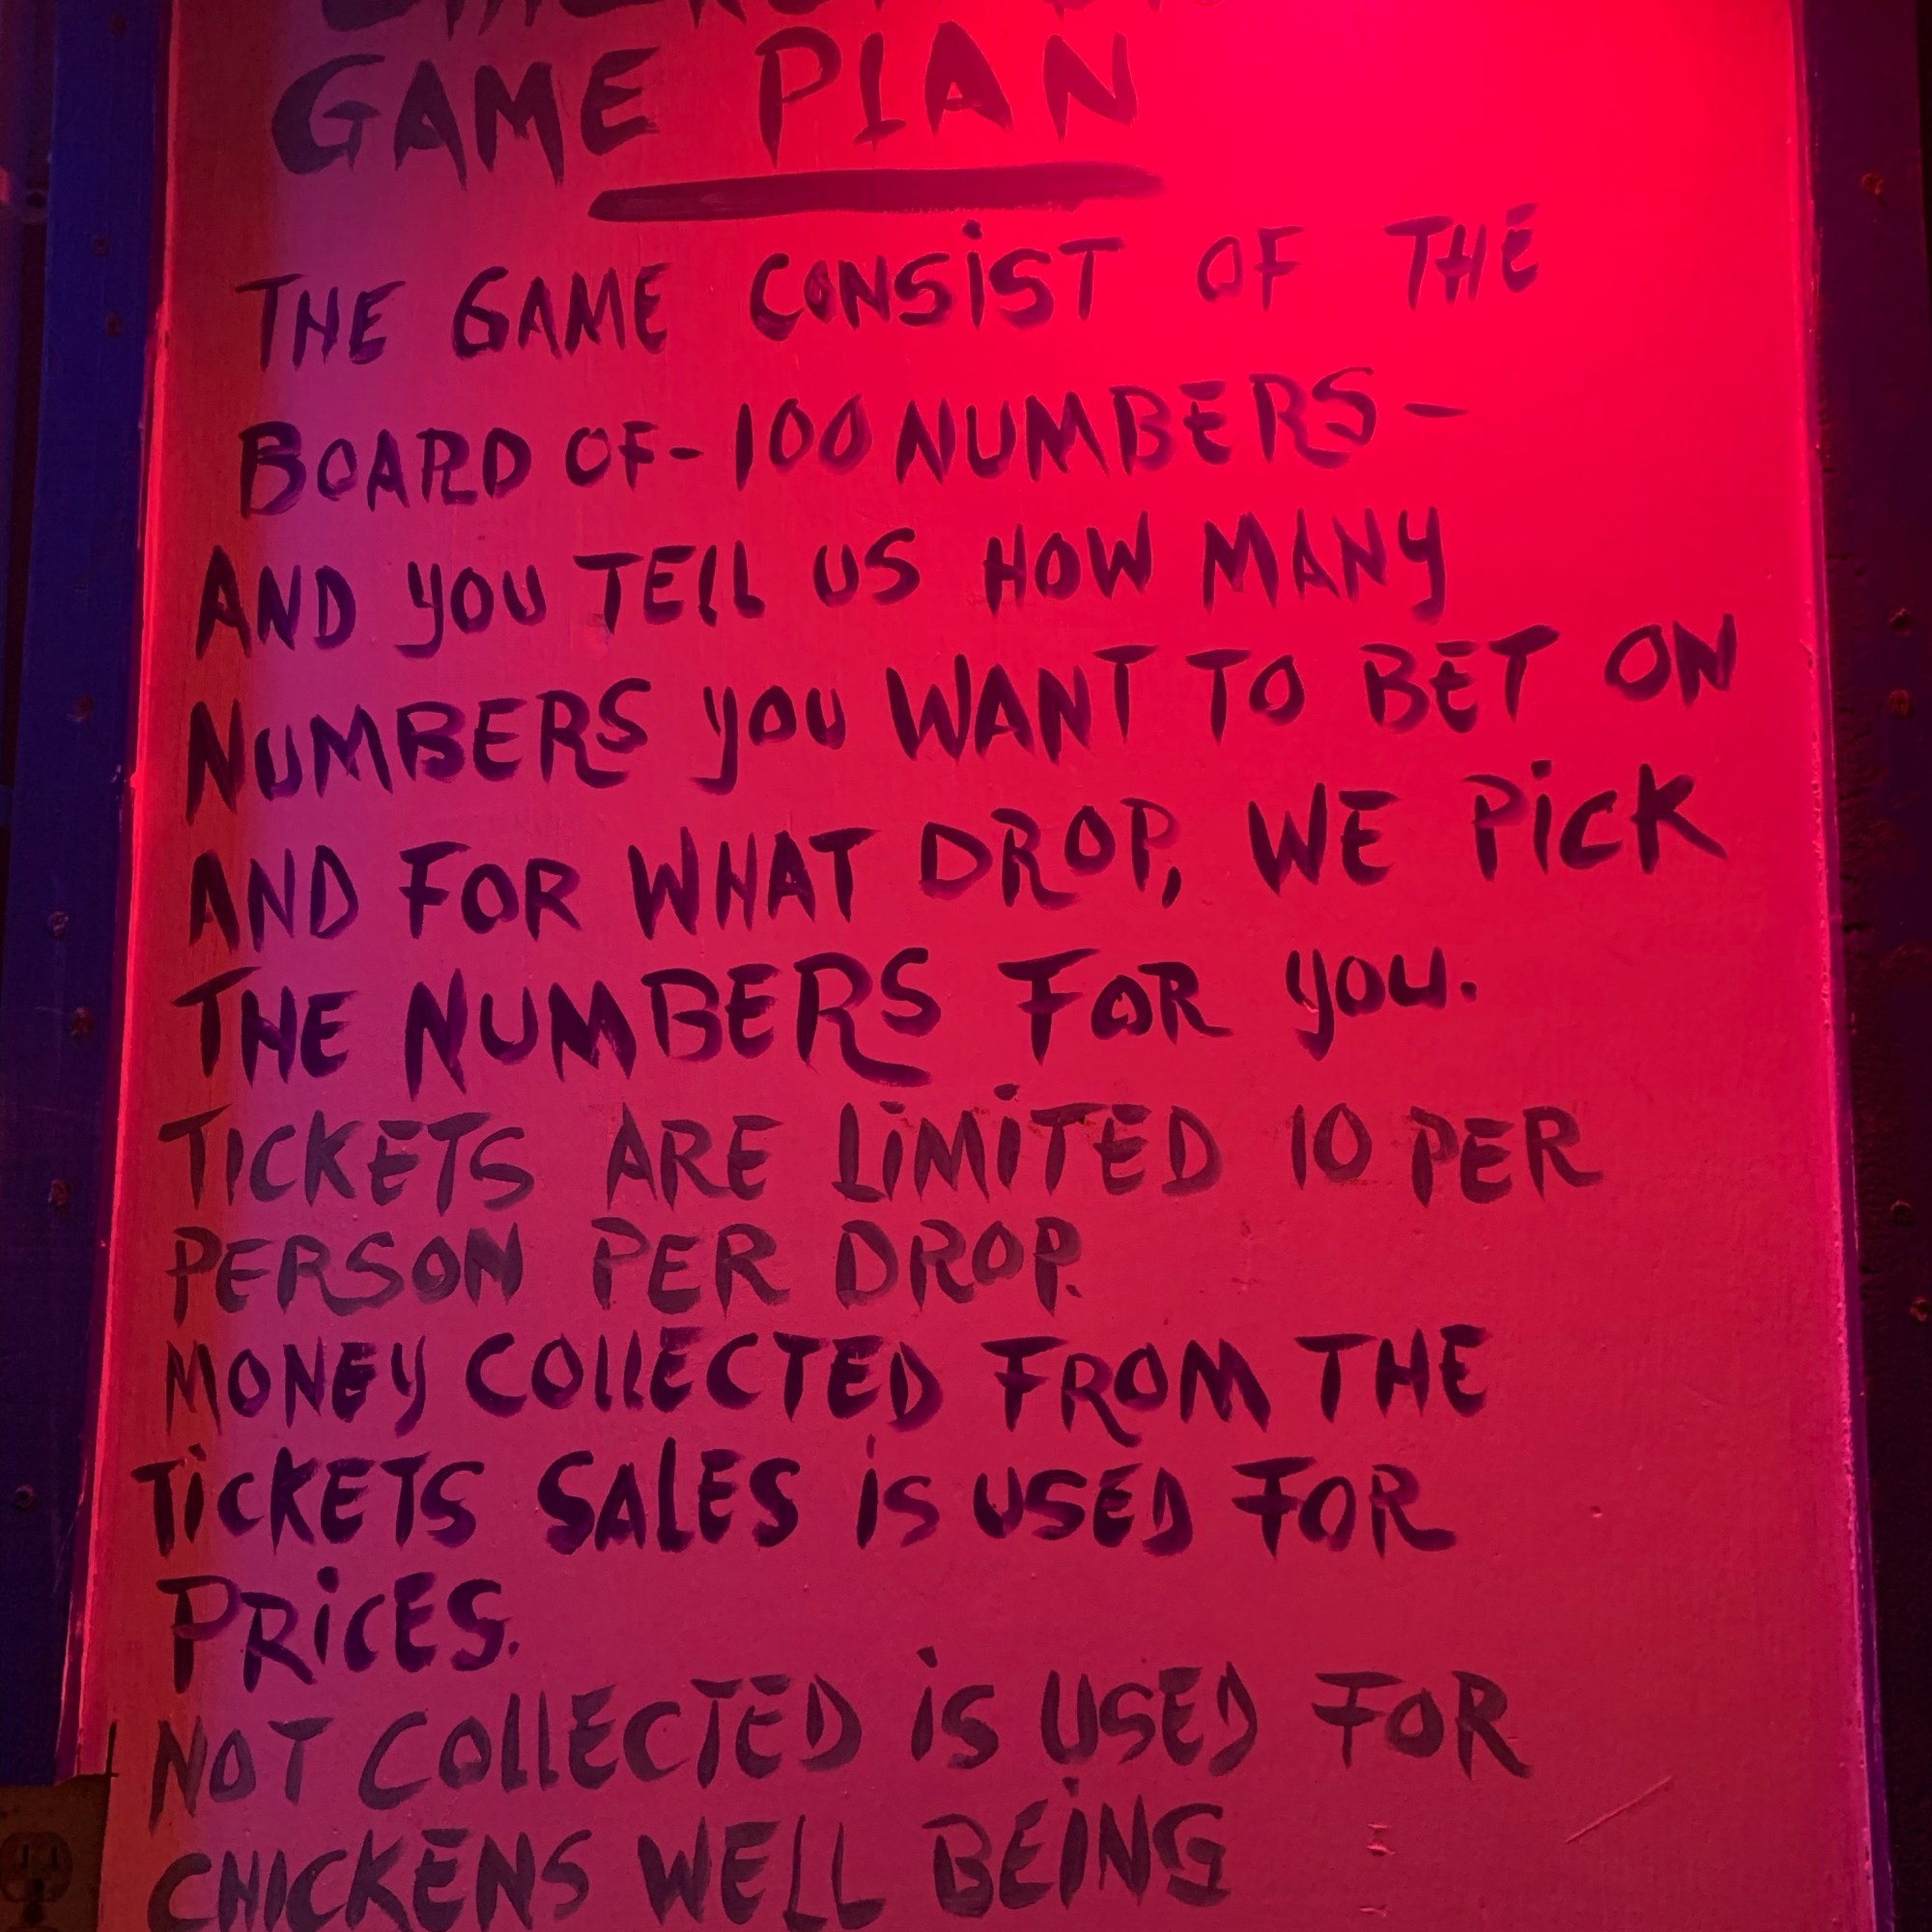
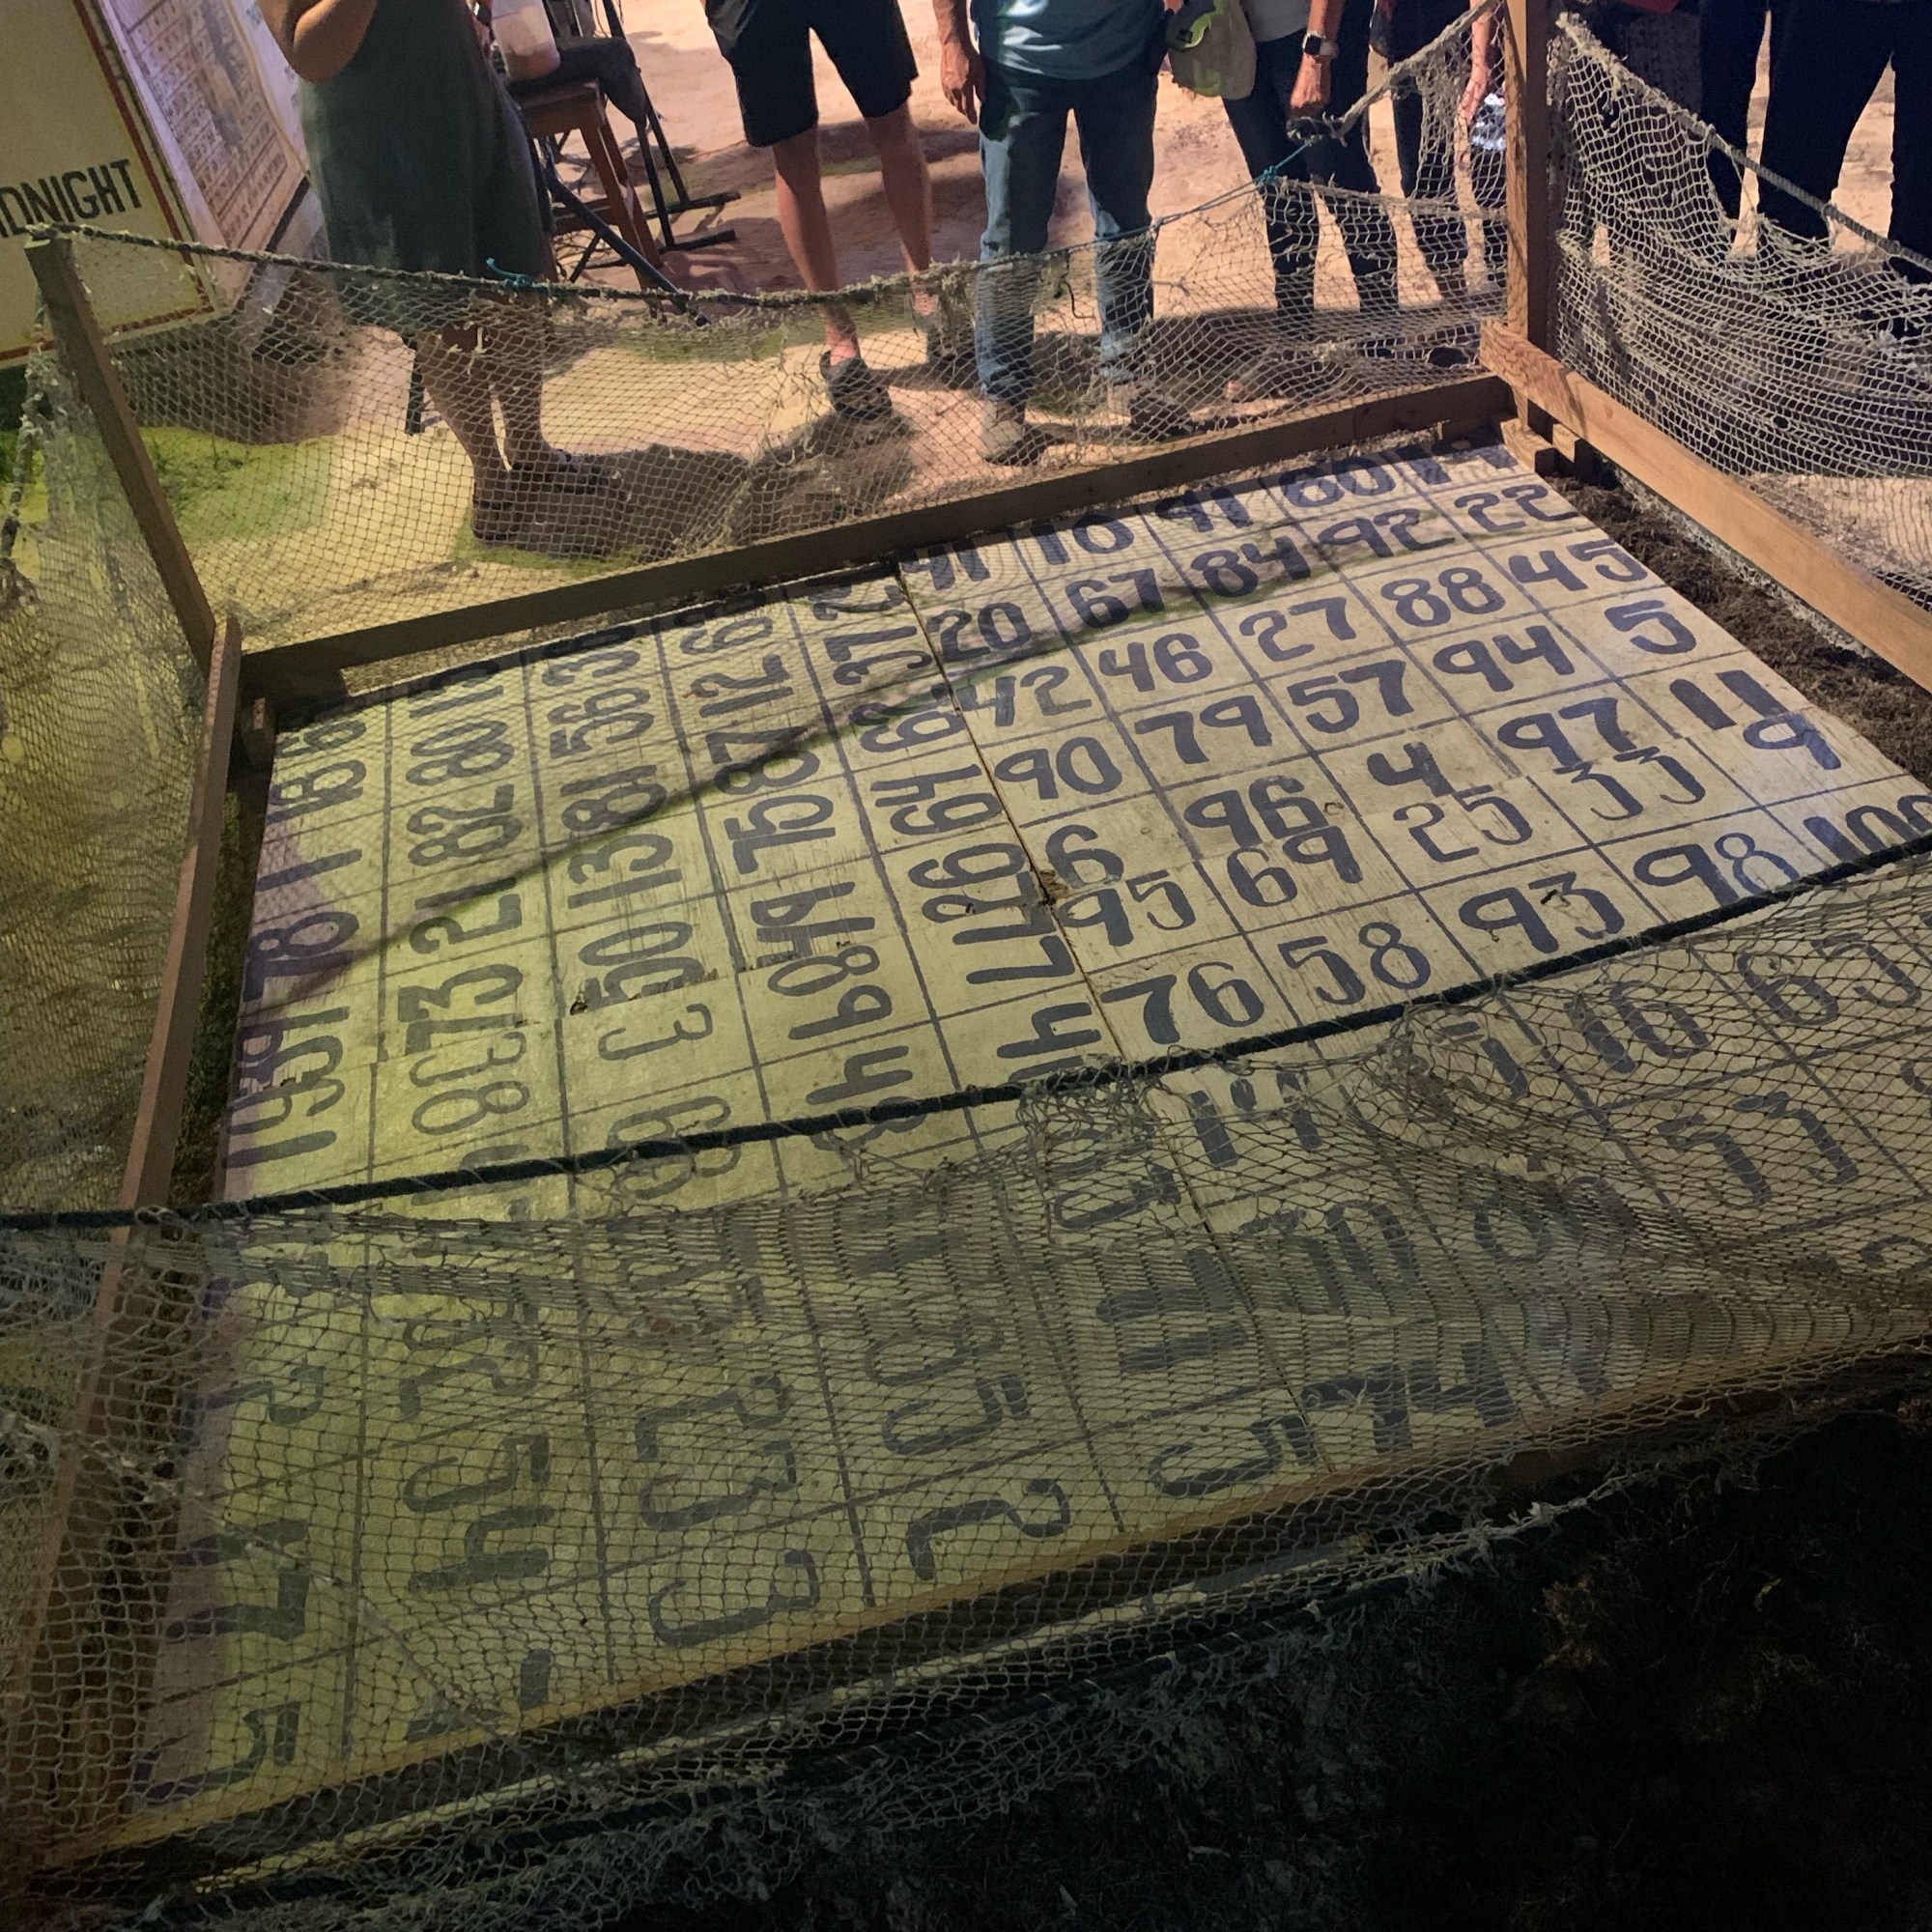
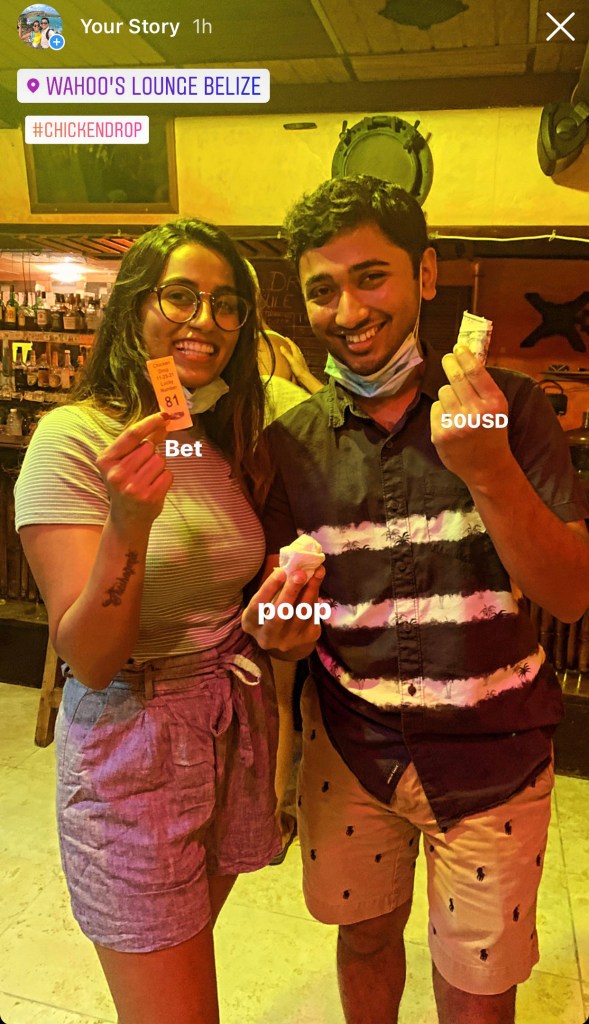
Fun didn’t stop there! We had to checkout Chicken Drop while were in the island! Yes you heard that right. Every Thursday, Wahoo’s Lounge organizes a strangest betting game ever! There are 3-4 drop games happening every hour starting 6PM. Before the game begins you buy a bet for a random number (it was 1USD per bet for a price of 50USD). Than a chicken is let loose on the game board and whoever bet on the number where the chicken poops wins! Oh the winner also cleans the poop! Haha. It was a fun game and we can’t still believe we won a game. We bought 4 bets, all at some random corner spots, the chicken almost did not poop and tried to escape out. After 15minutes of anticipation it dropped on our bet! Fun fun night. We later had dinner at El Fogon on suggestion by our snorkel guide – was bit disappointed.

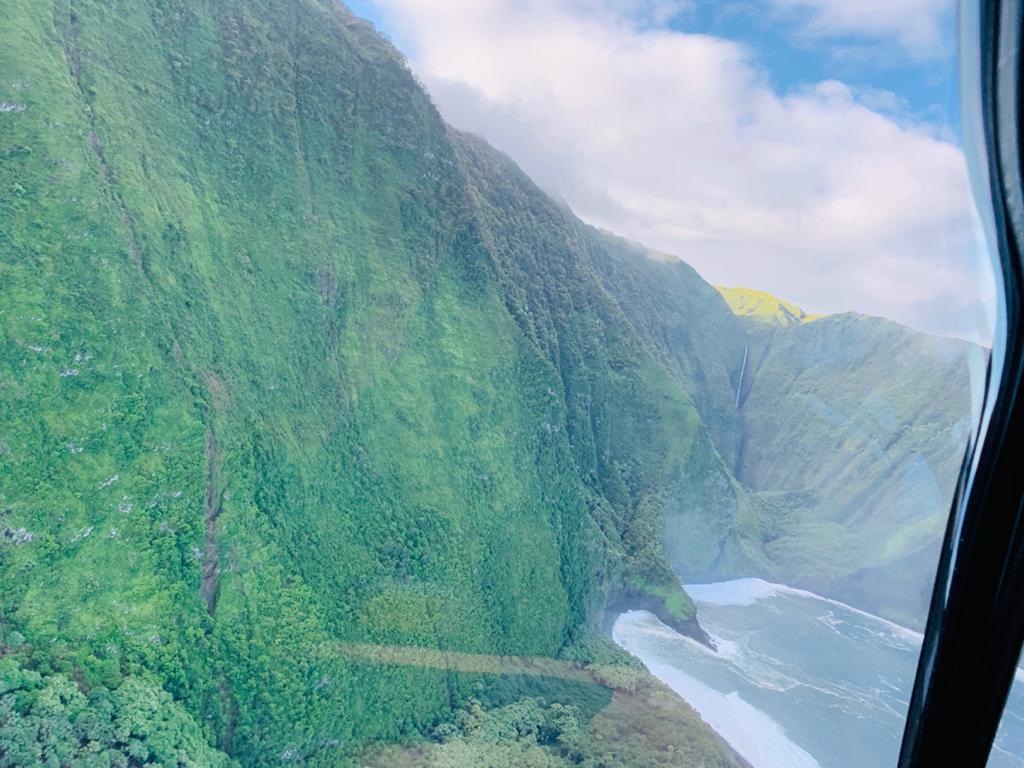
Day 3: Seaplane tour of the Great Blue Hole

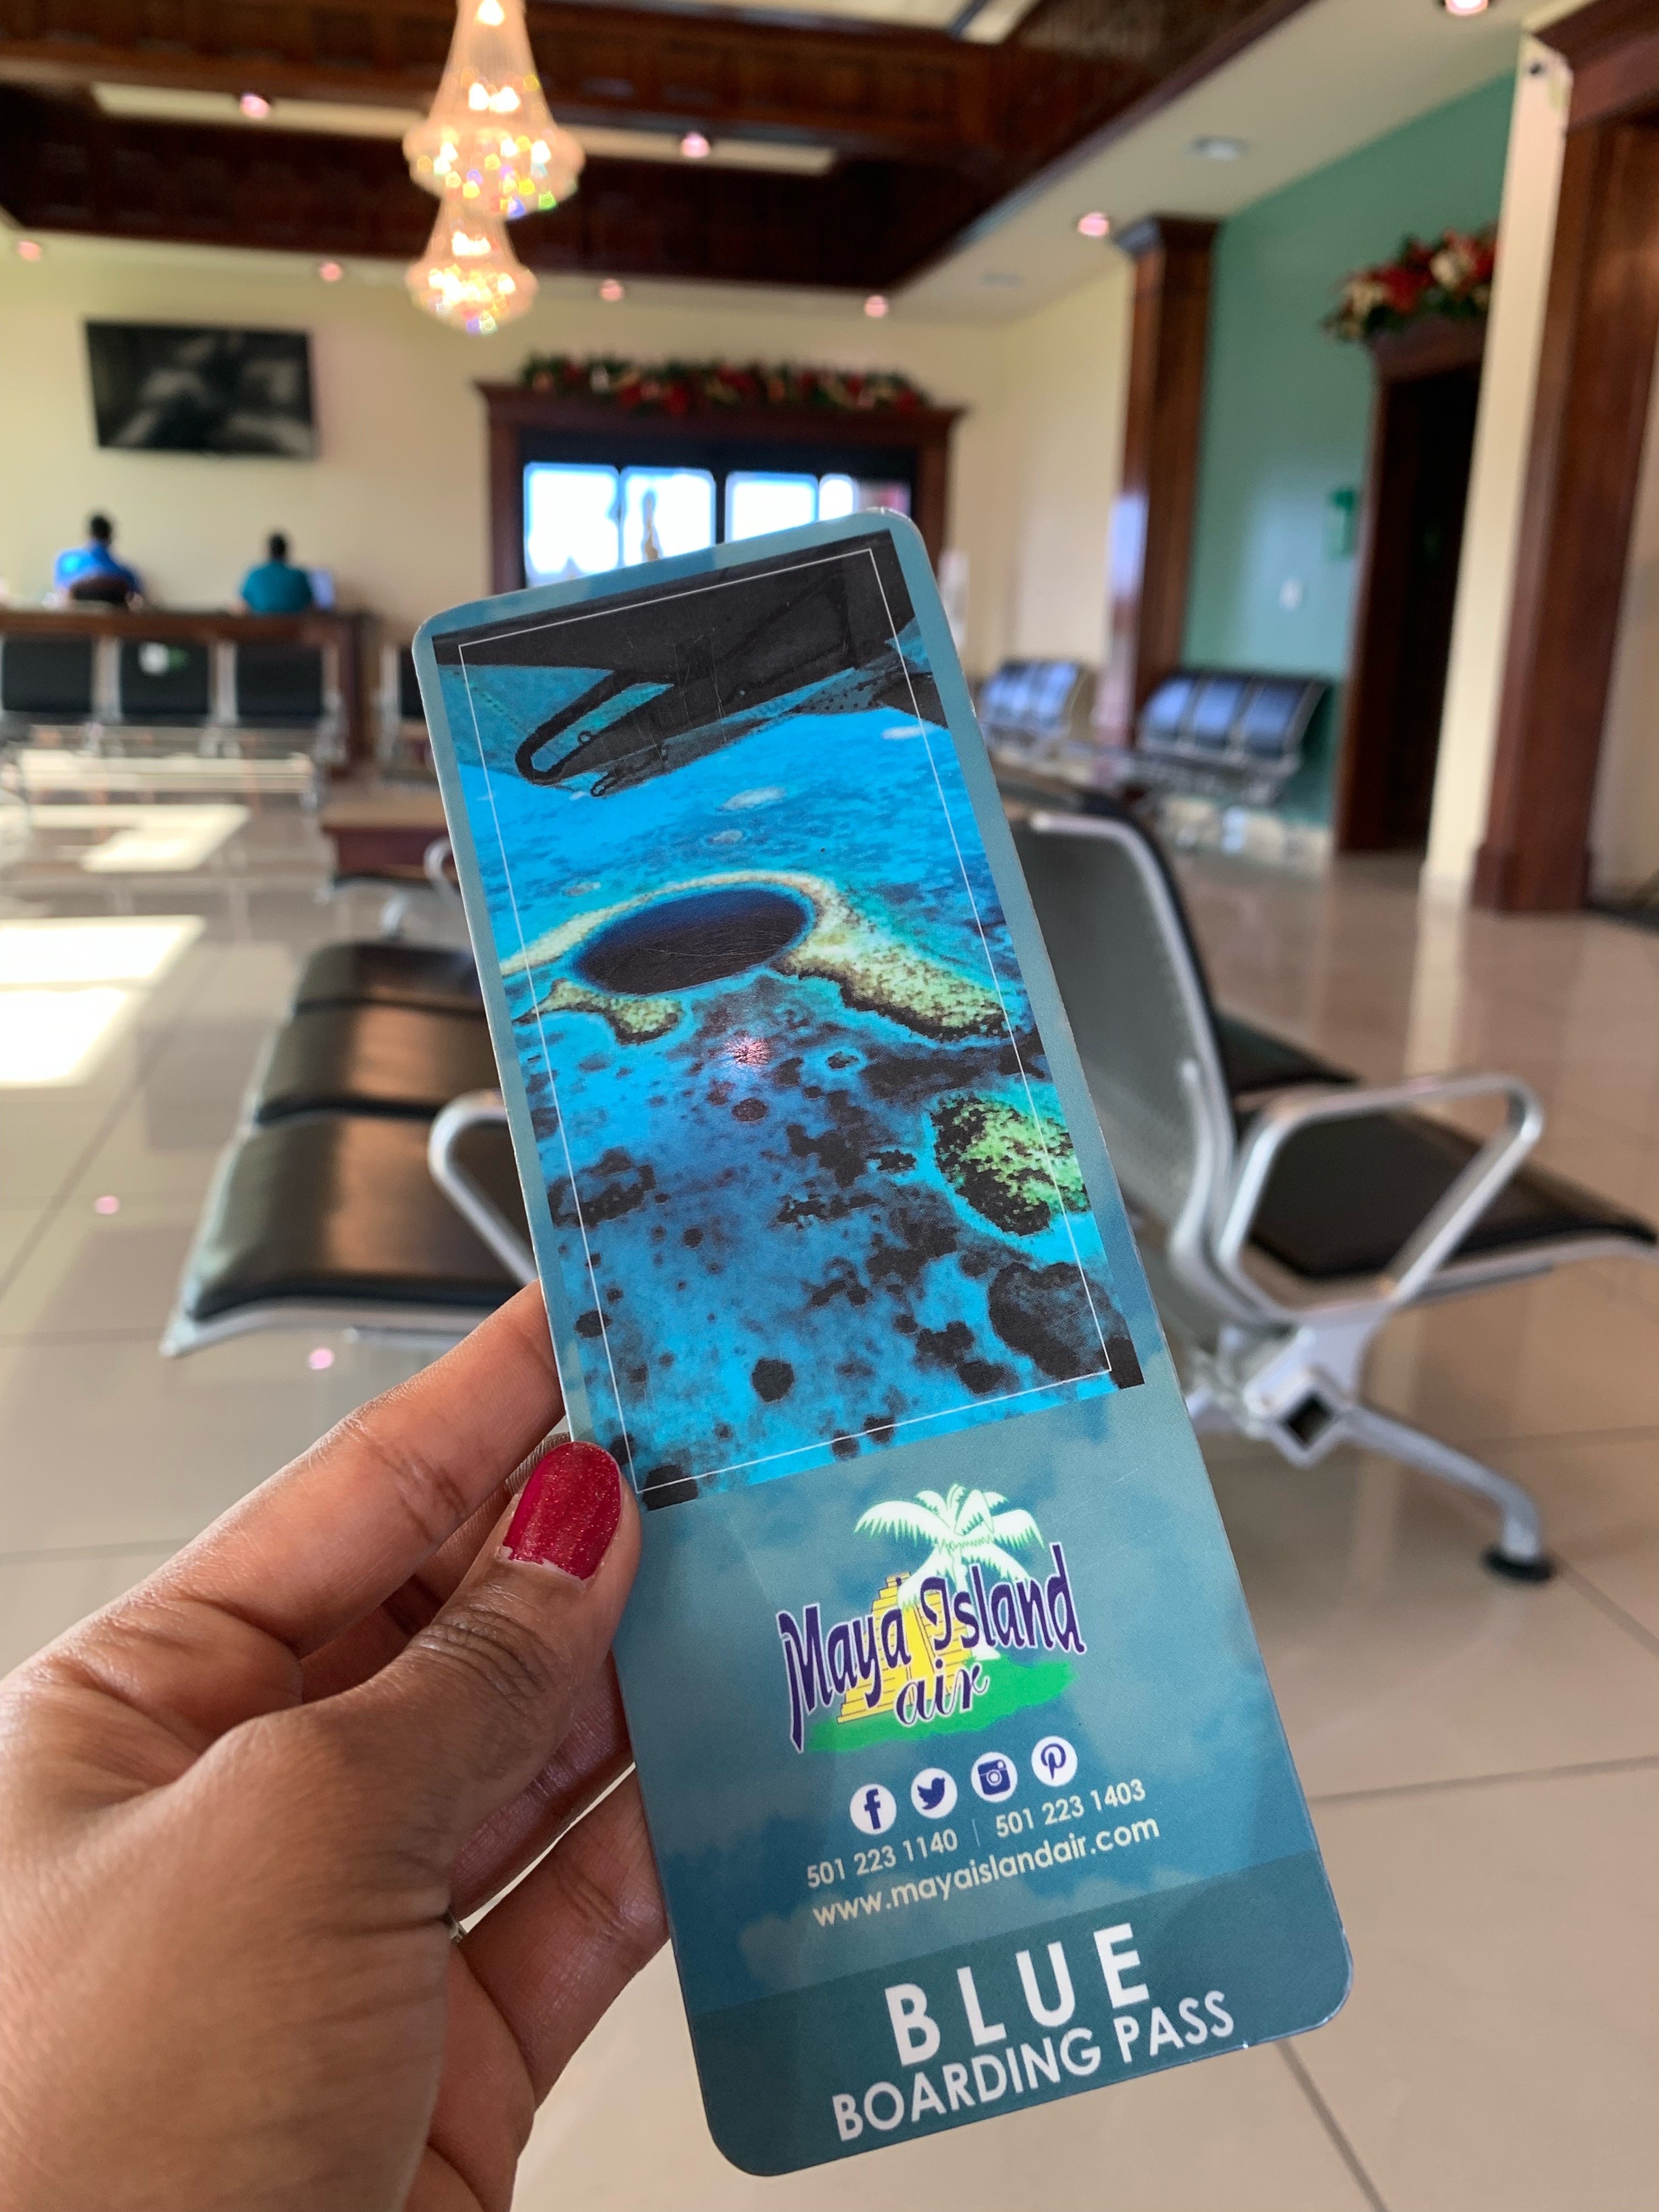
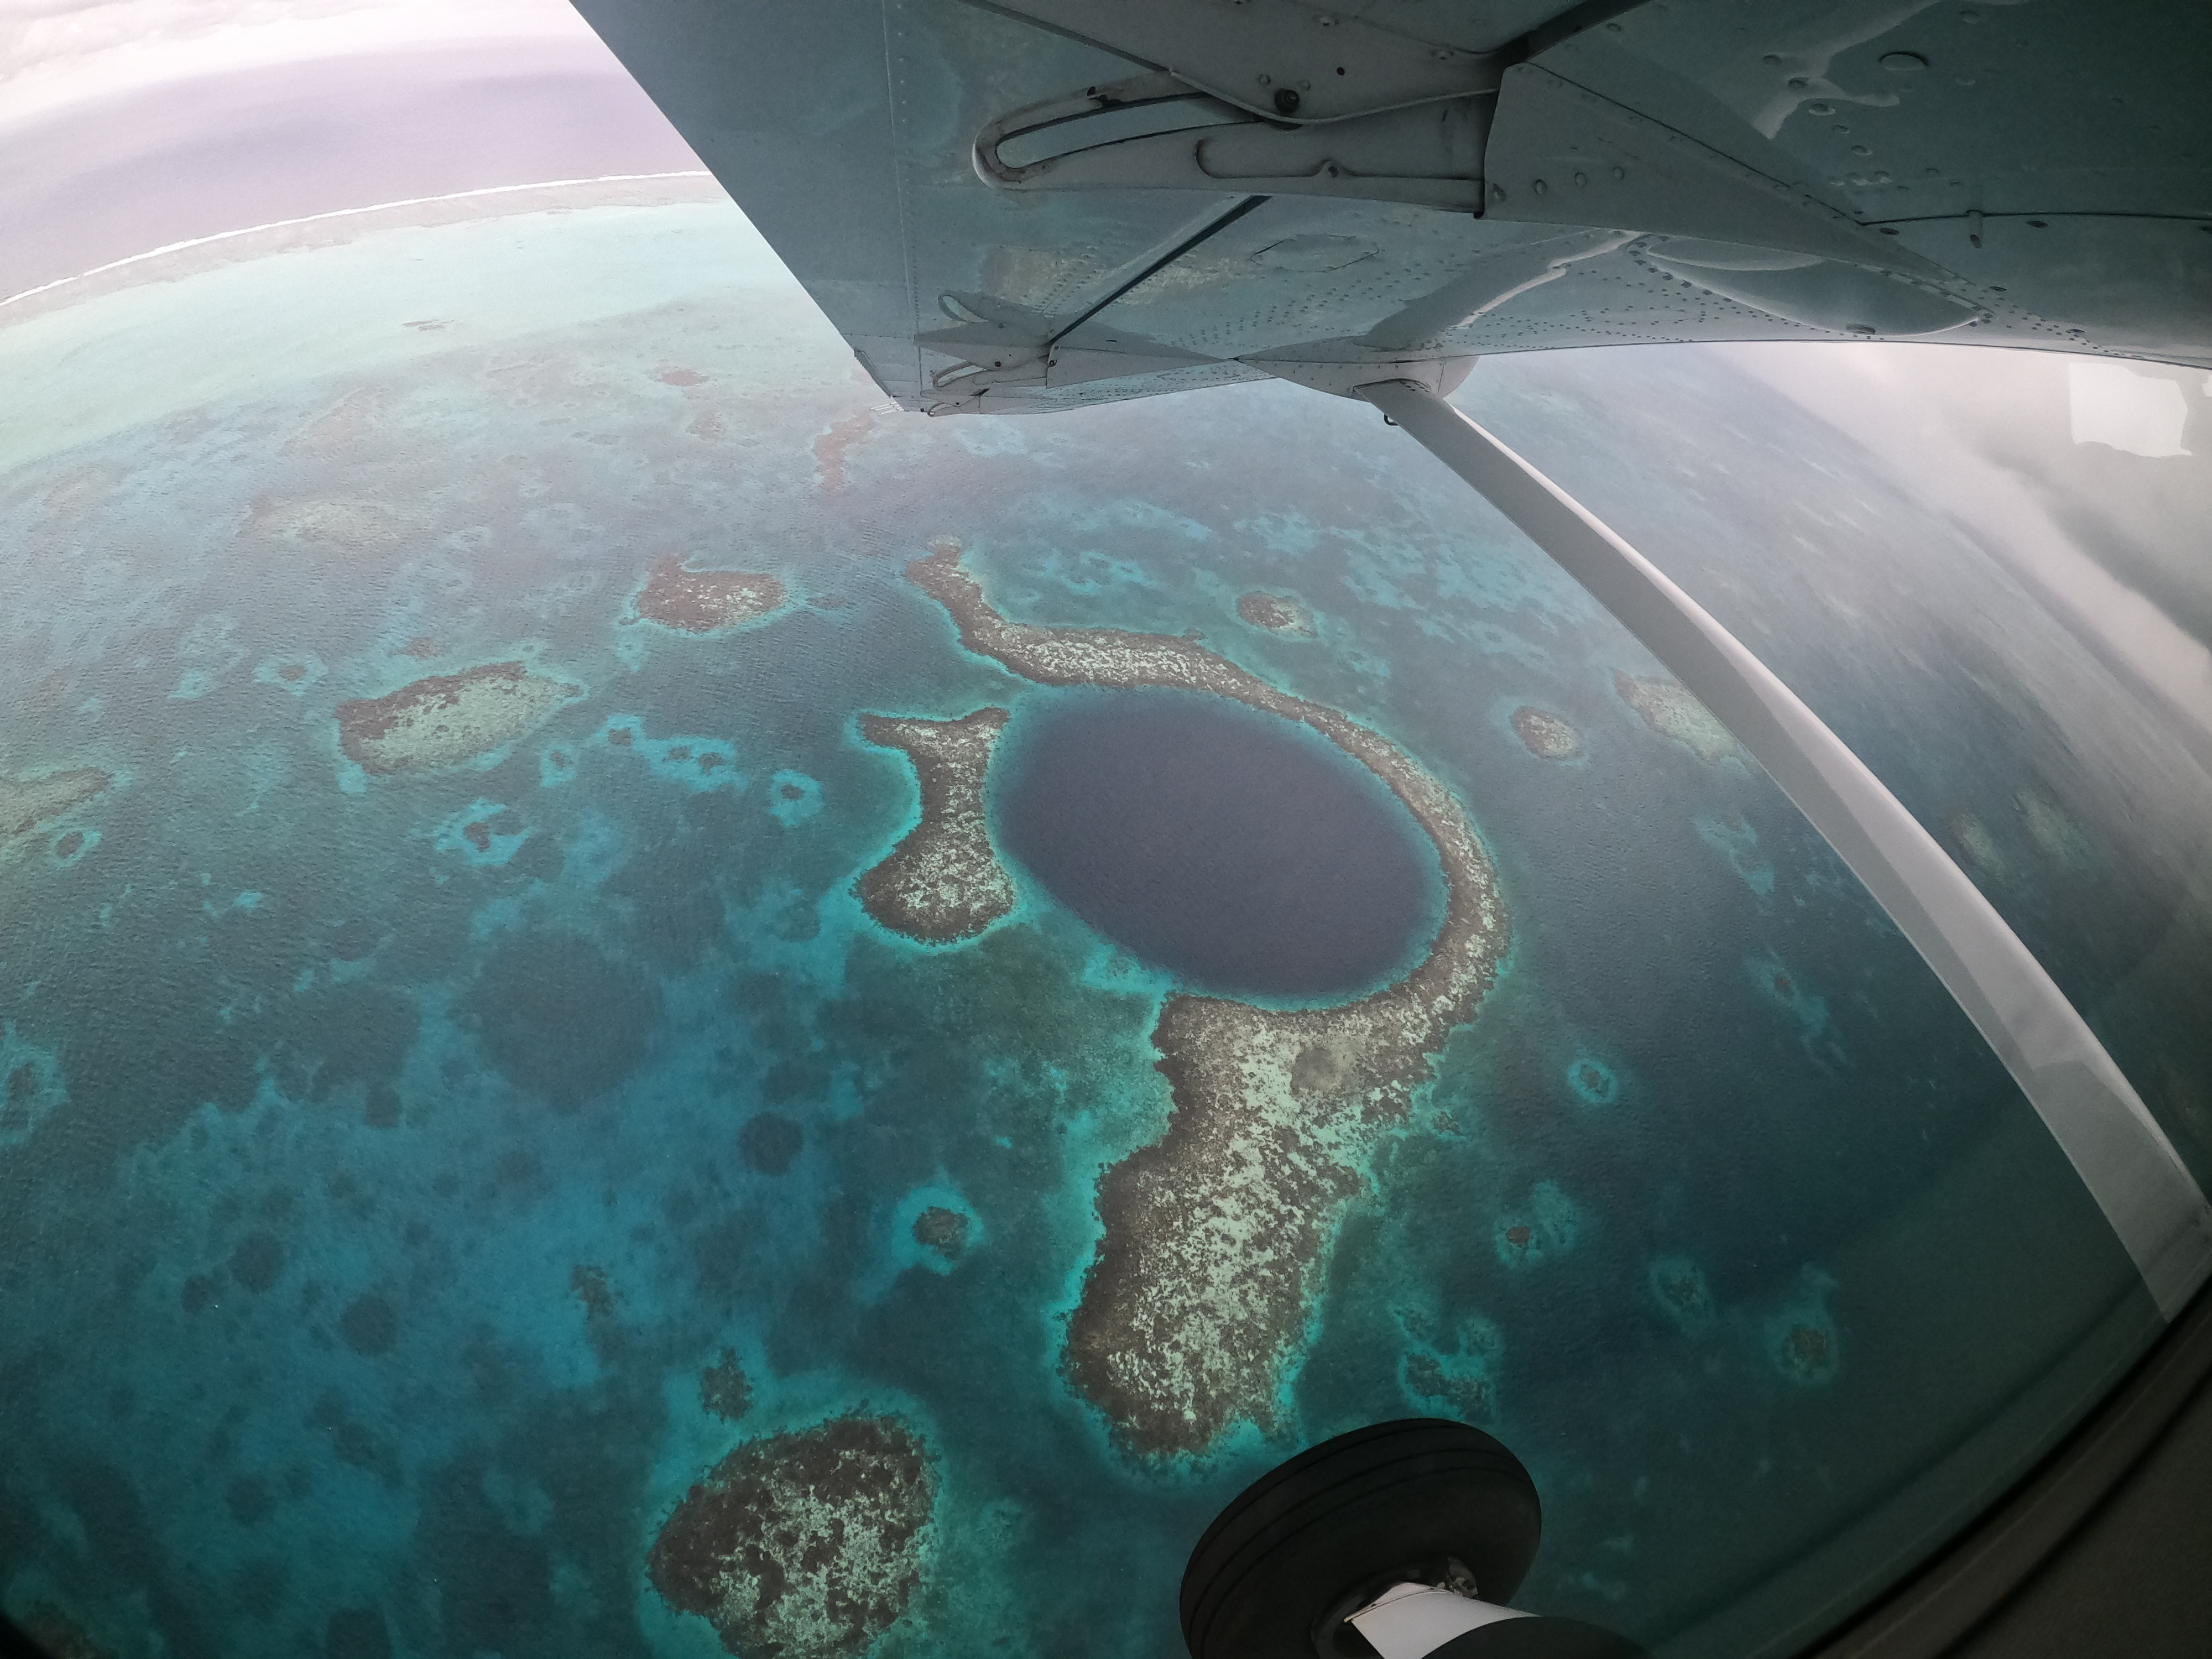
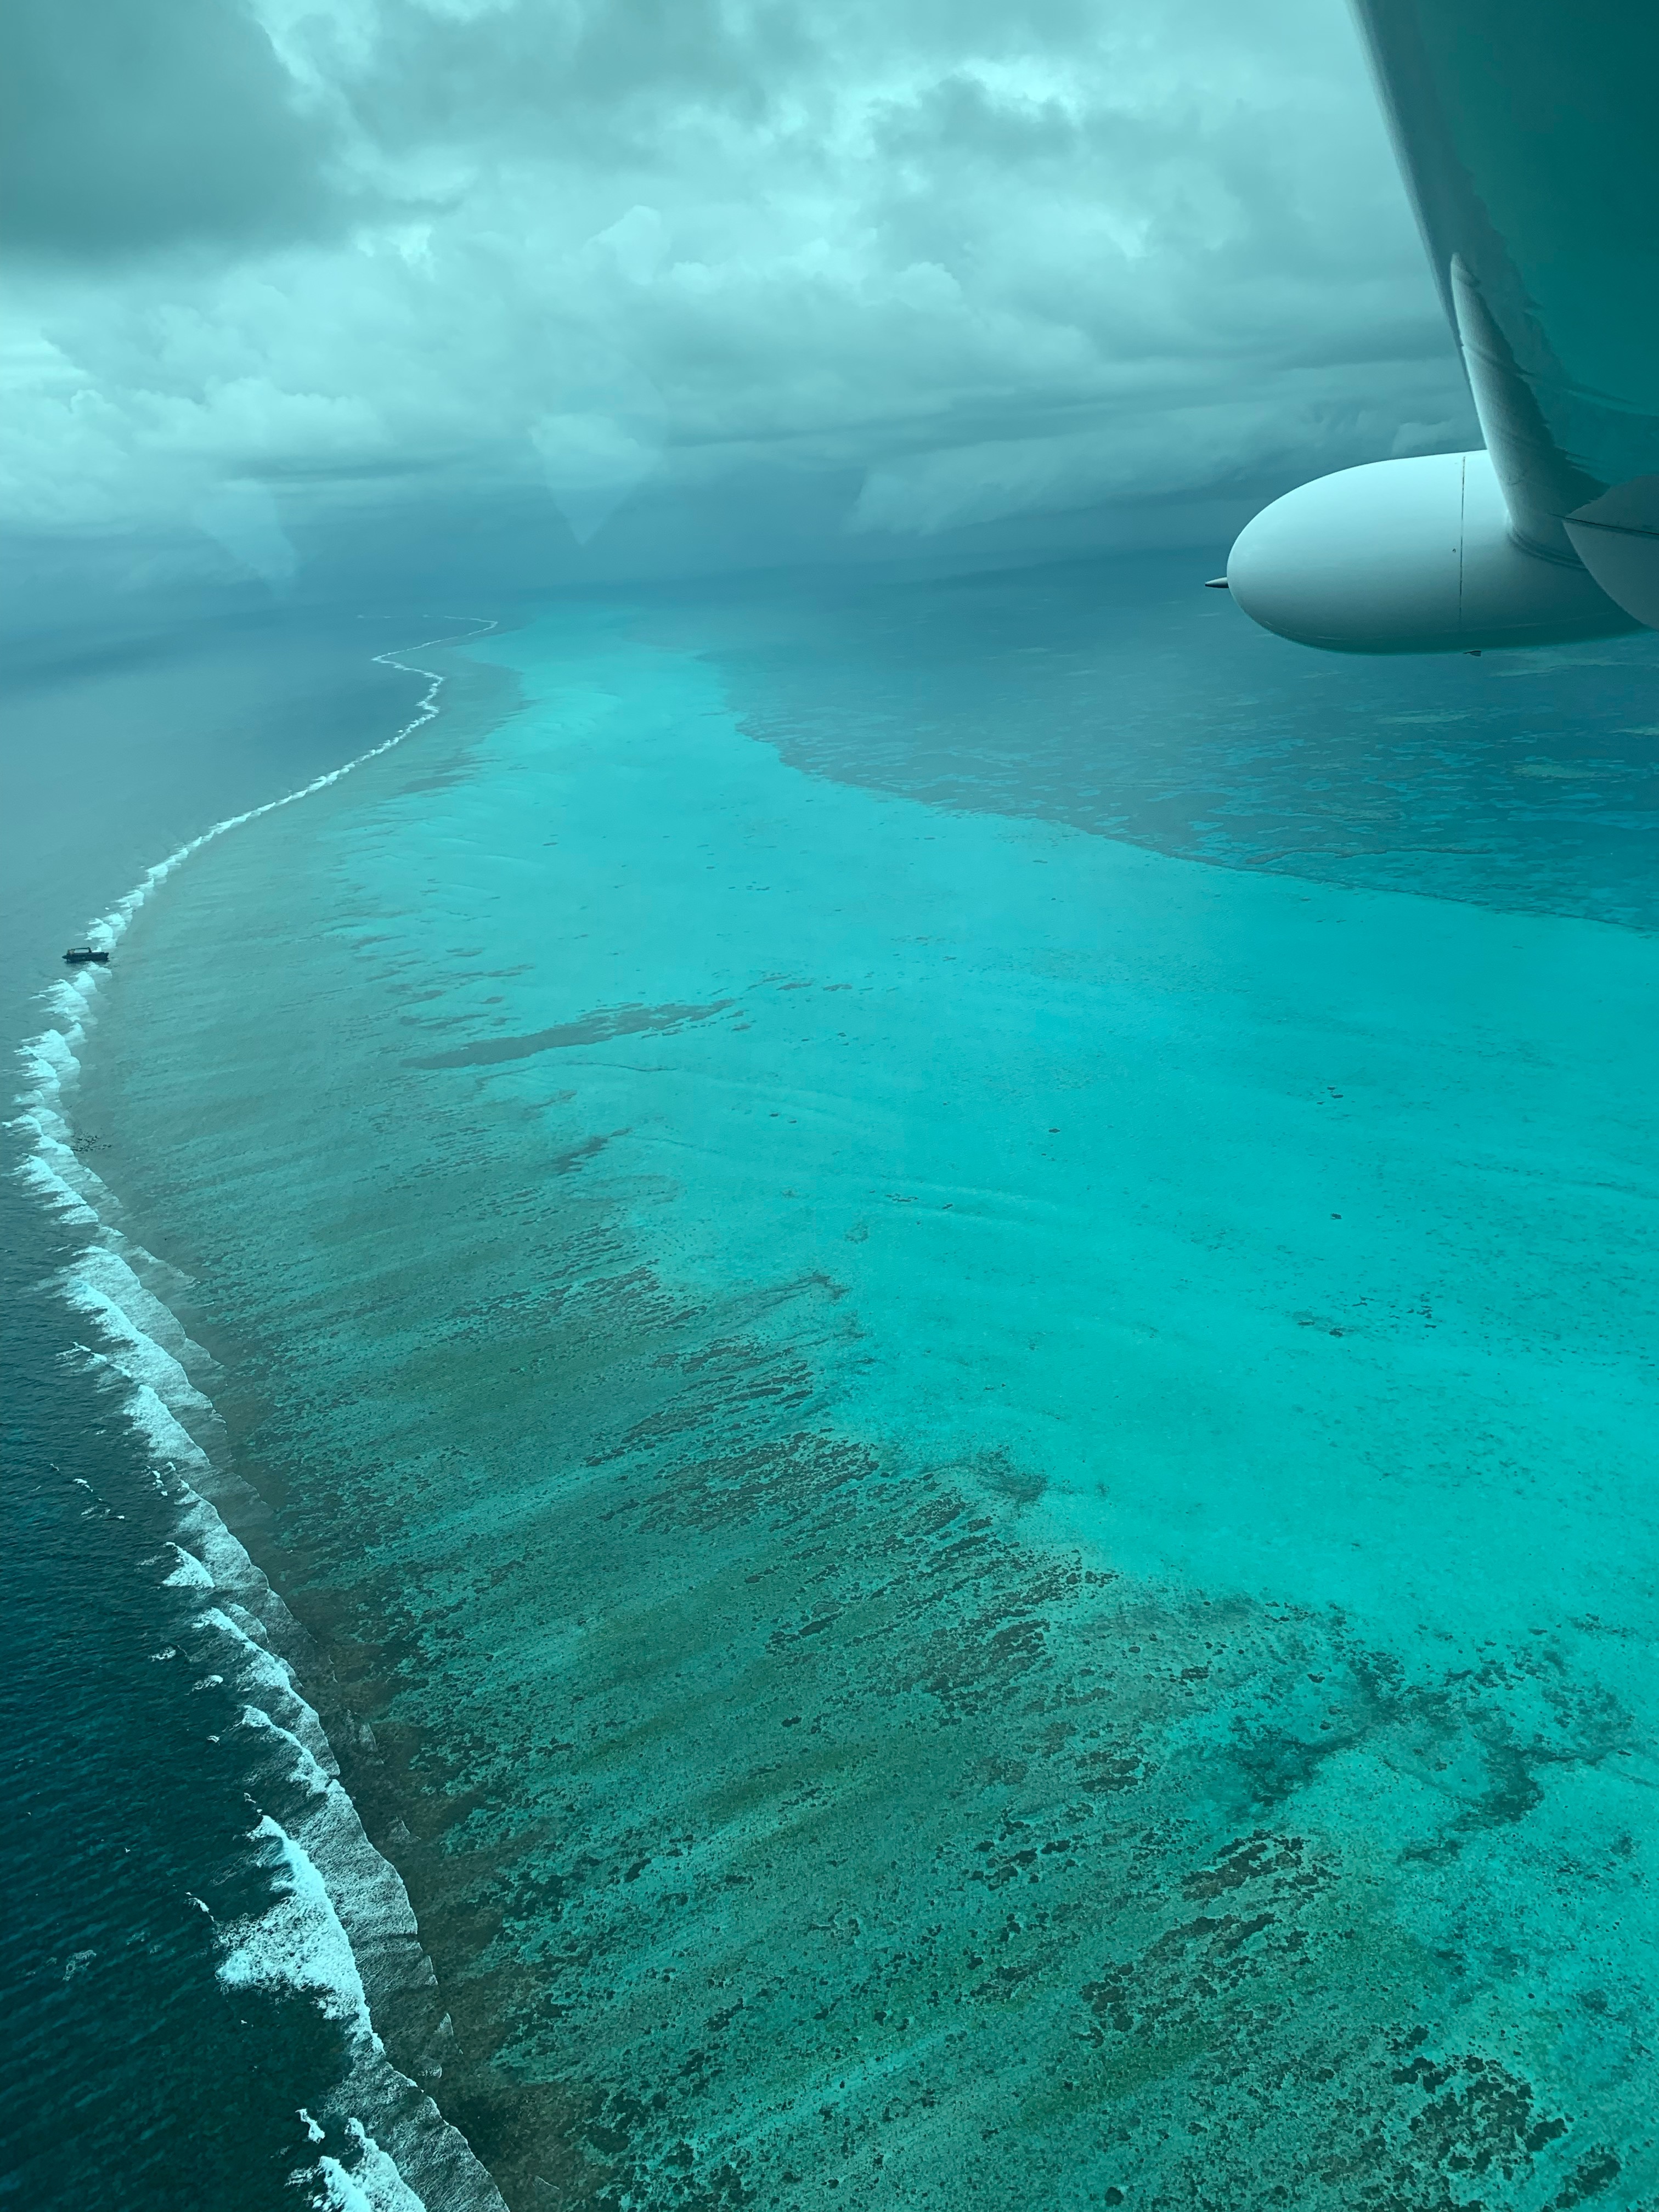
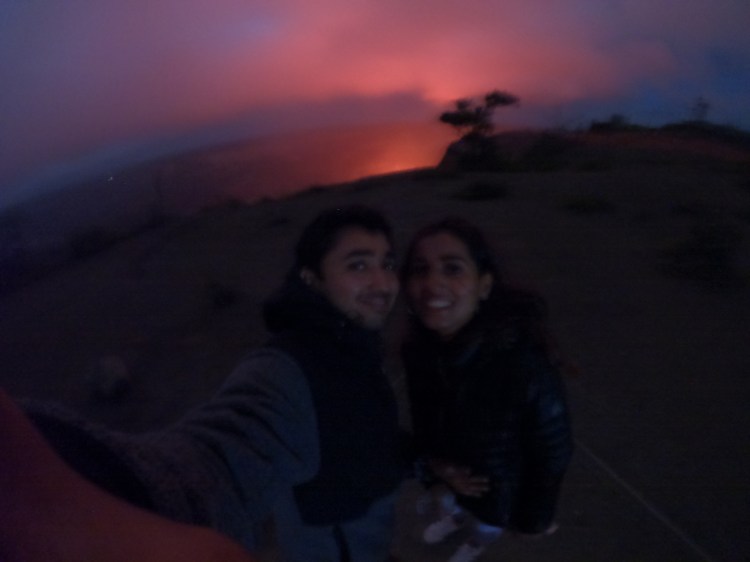
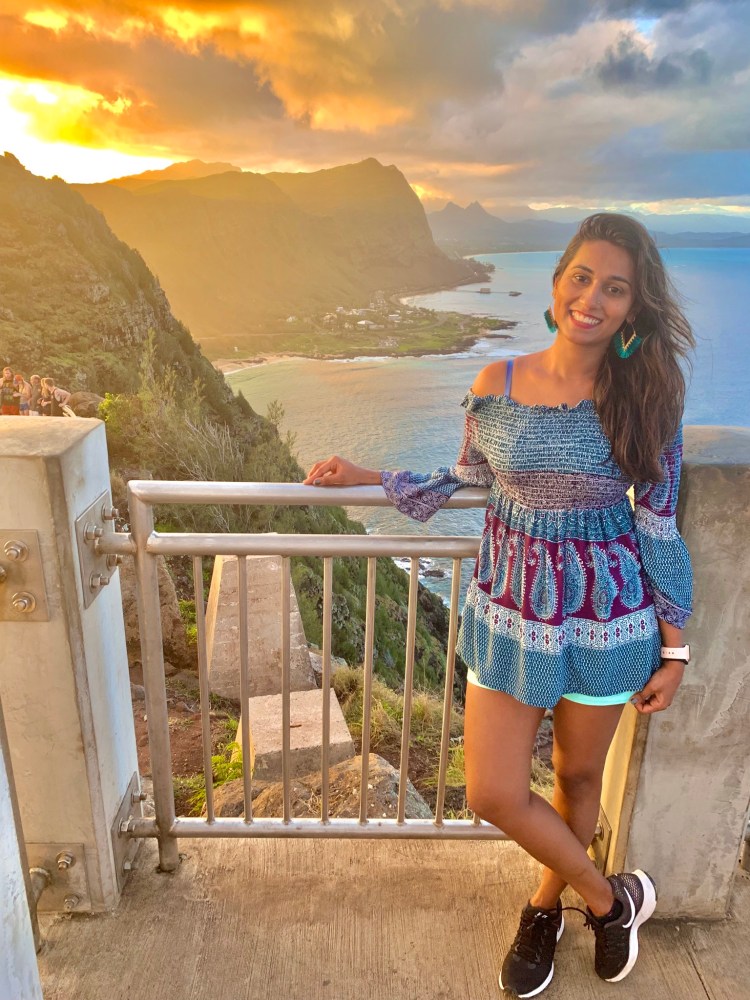
Day started bit gloomy and there were signs of unavoidable rains. November is just the end of wet season so we expected this. We opted Mayan Island Air Blue Hole Tour from San Pedro which was also walking distance from our Airbnb. The Blue Hole was much more beautiful than what I had imagined. The reef atolls, the shipwrecks, the various shades of the Caribbean all added to an amazing flight. The tour costed us 165USDpp which seemed bit high considering there was no guide, no one was describing to us what we were seeing, unlike other air tours we had taken in the past.

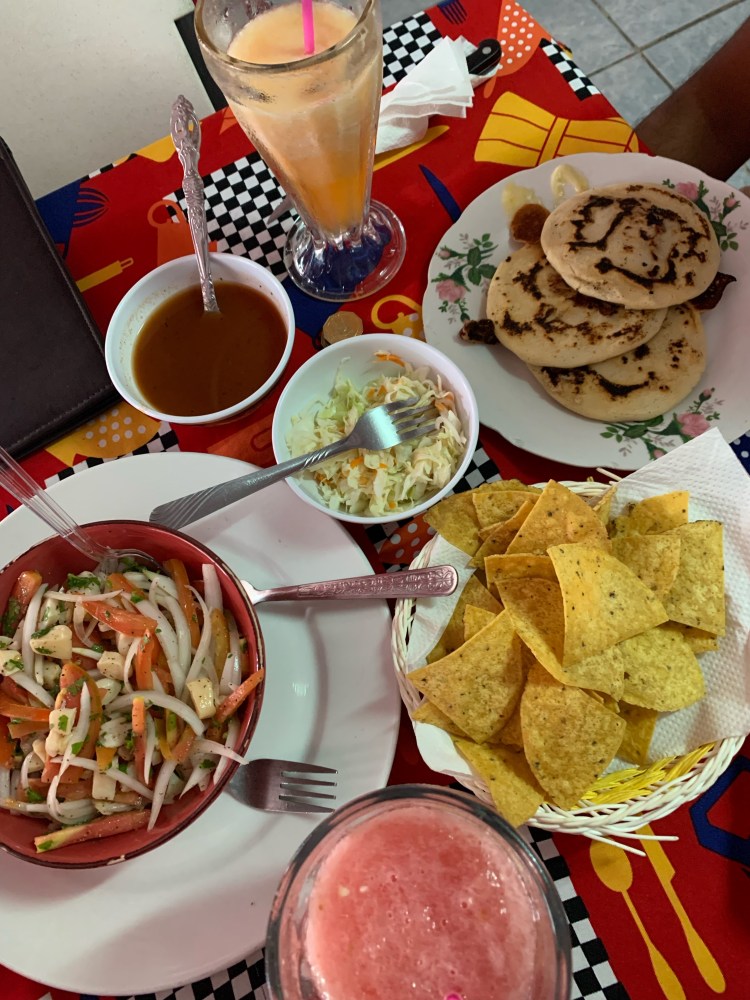
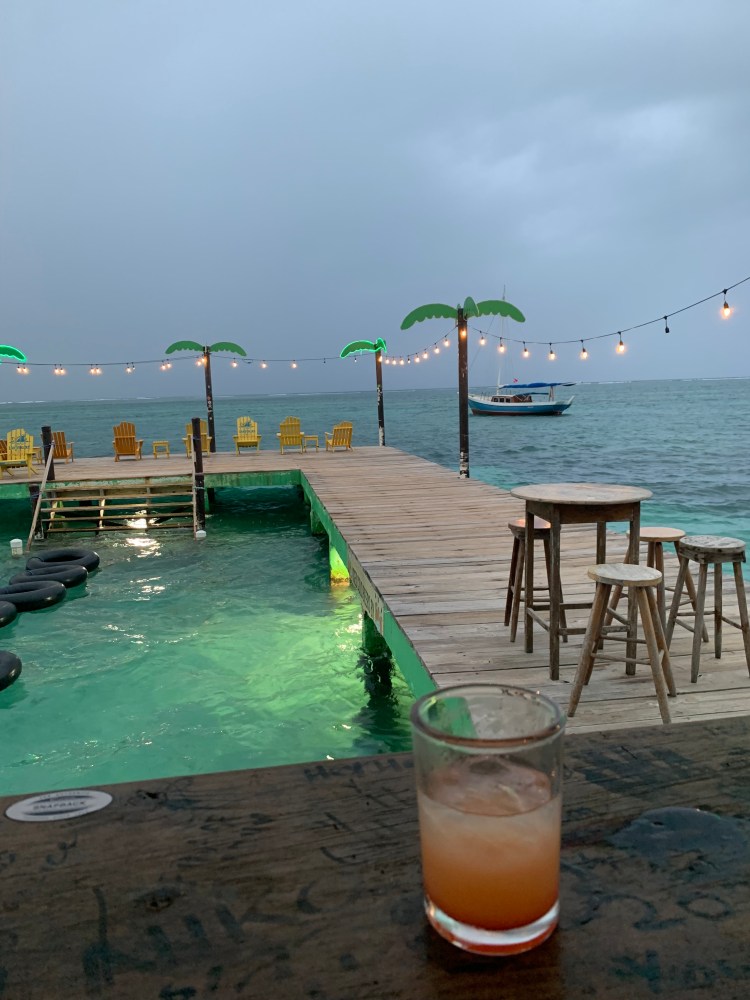
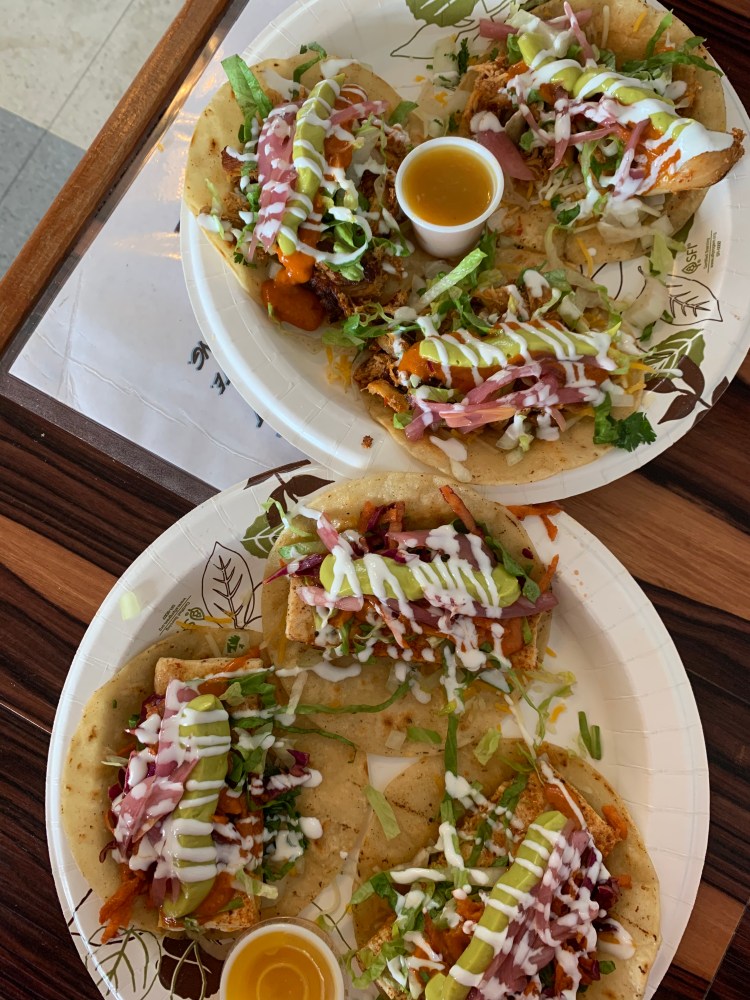
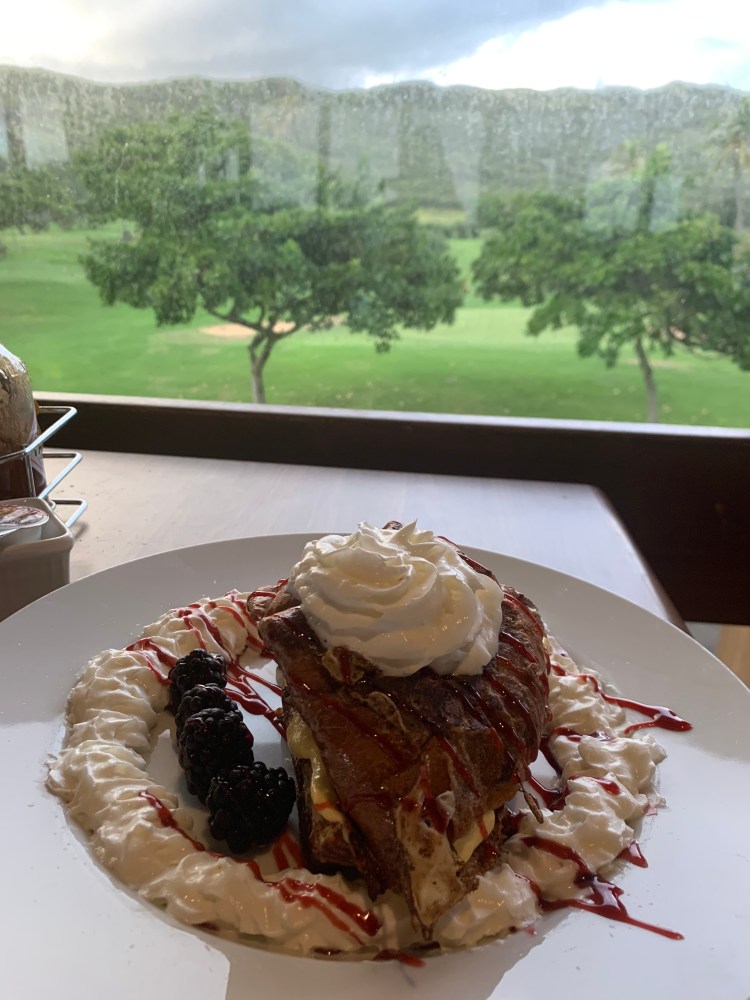
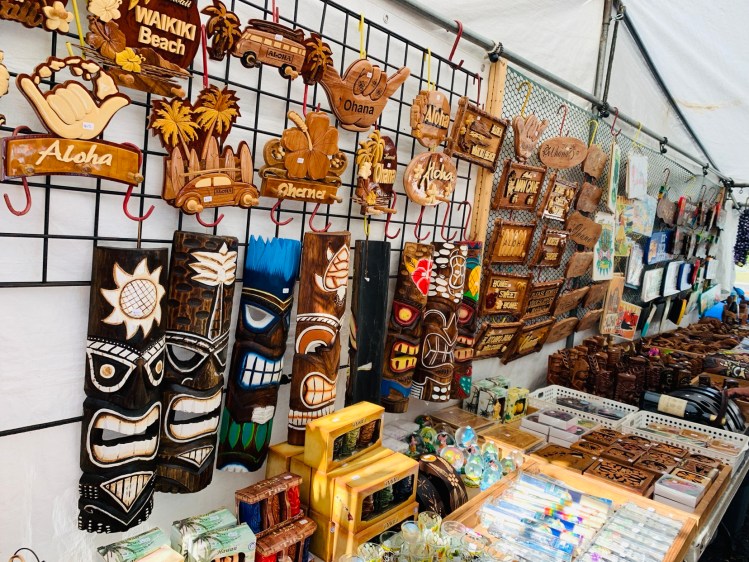
We had lunch at local and tourist’s favorite – Pupuseria Salvadoreno. Pupusas were a blast and fish too. It was so great we went back there again for dinner. It was still gloomy day and things looked pale everywhere. We just walked around the town, shopped some souvenirs and finally ended at Palapa Bar and Grill. More north American vibe but best spot to chill on a gloomy day. They had live music going, amazing view of the ocean, great food and drinks. On a sunny day they also have a small section below deck with floaties so you can chill in the water and sun having Belkin(Belizean bear that they swear about!).
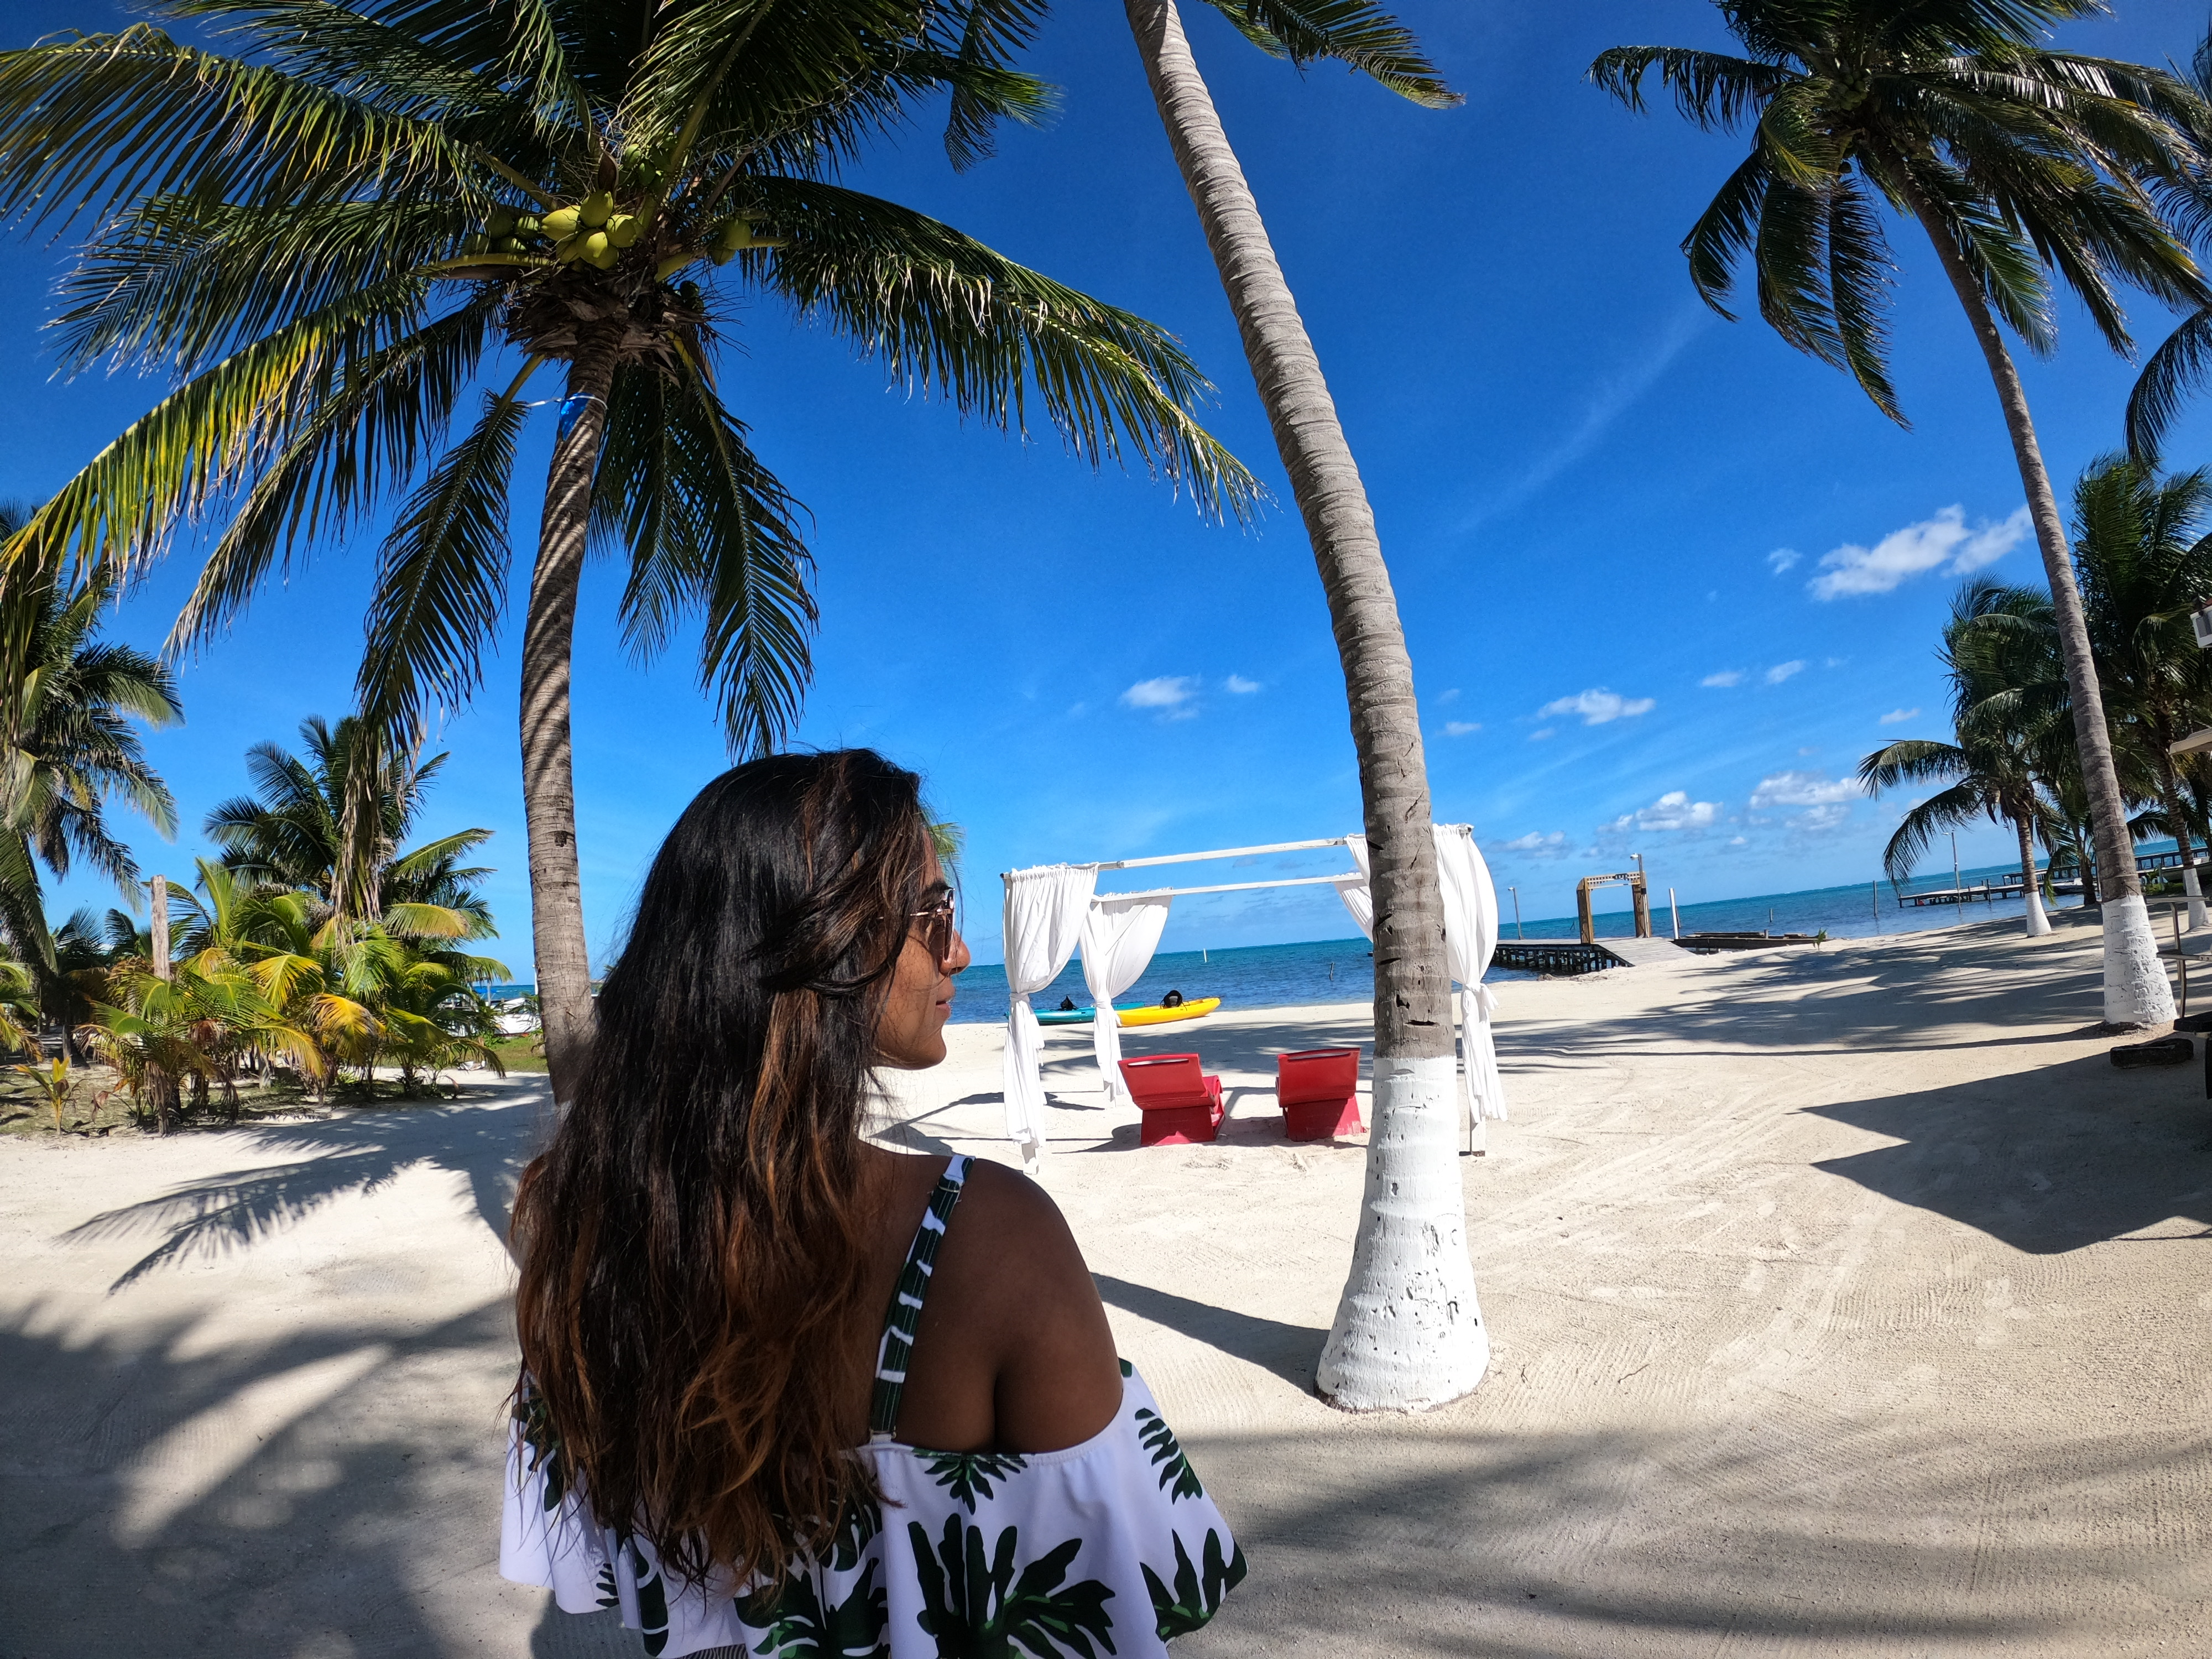
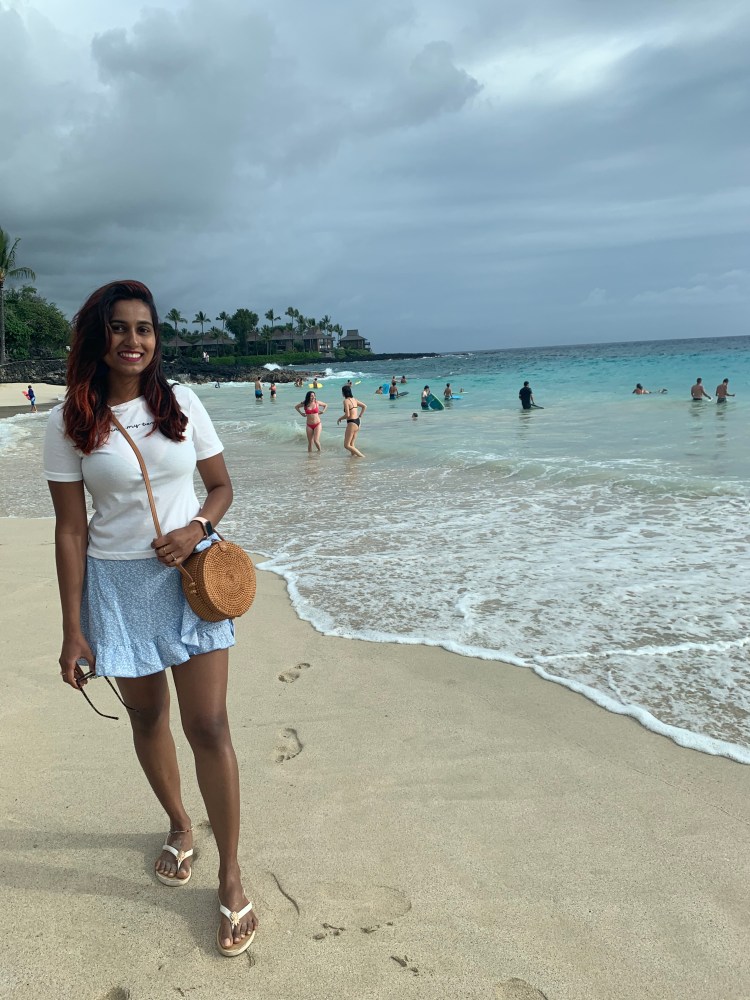
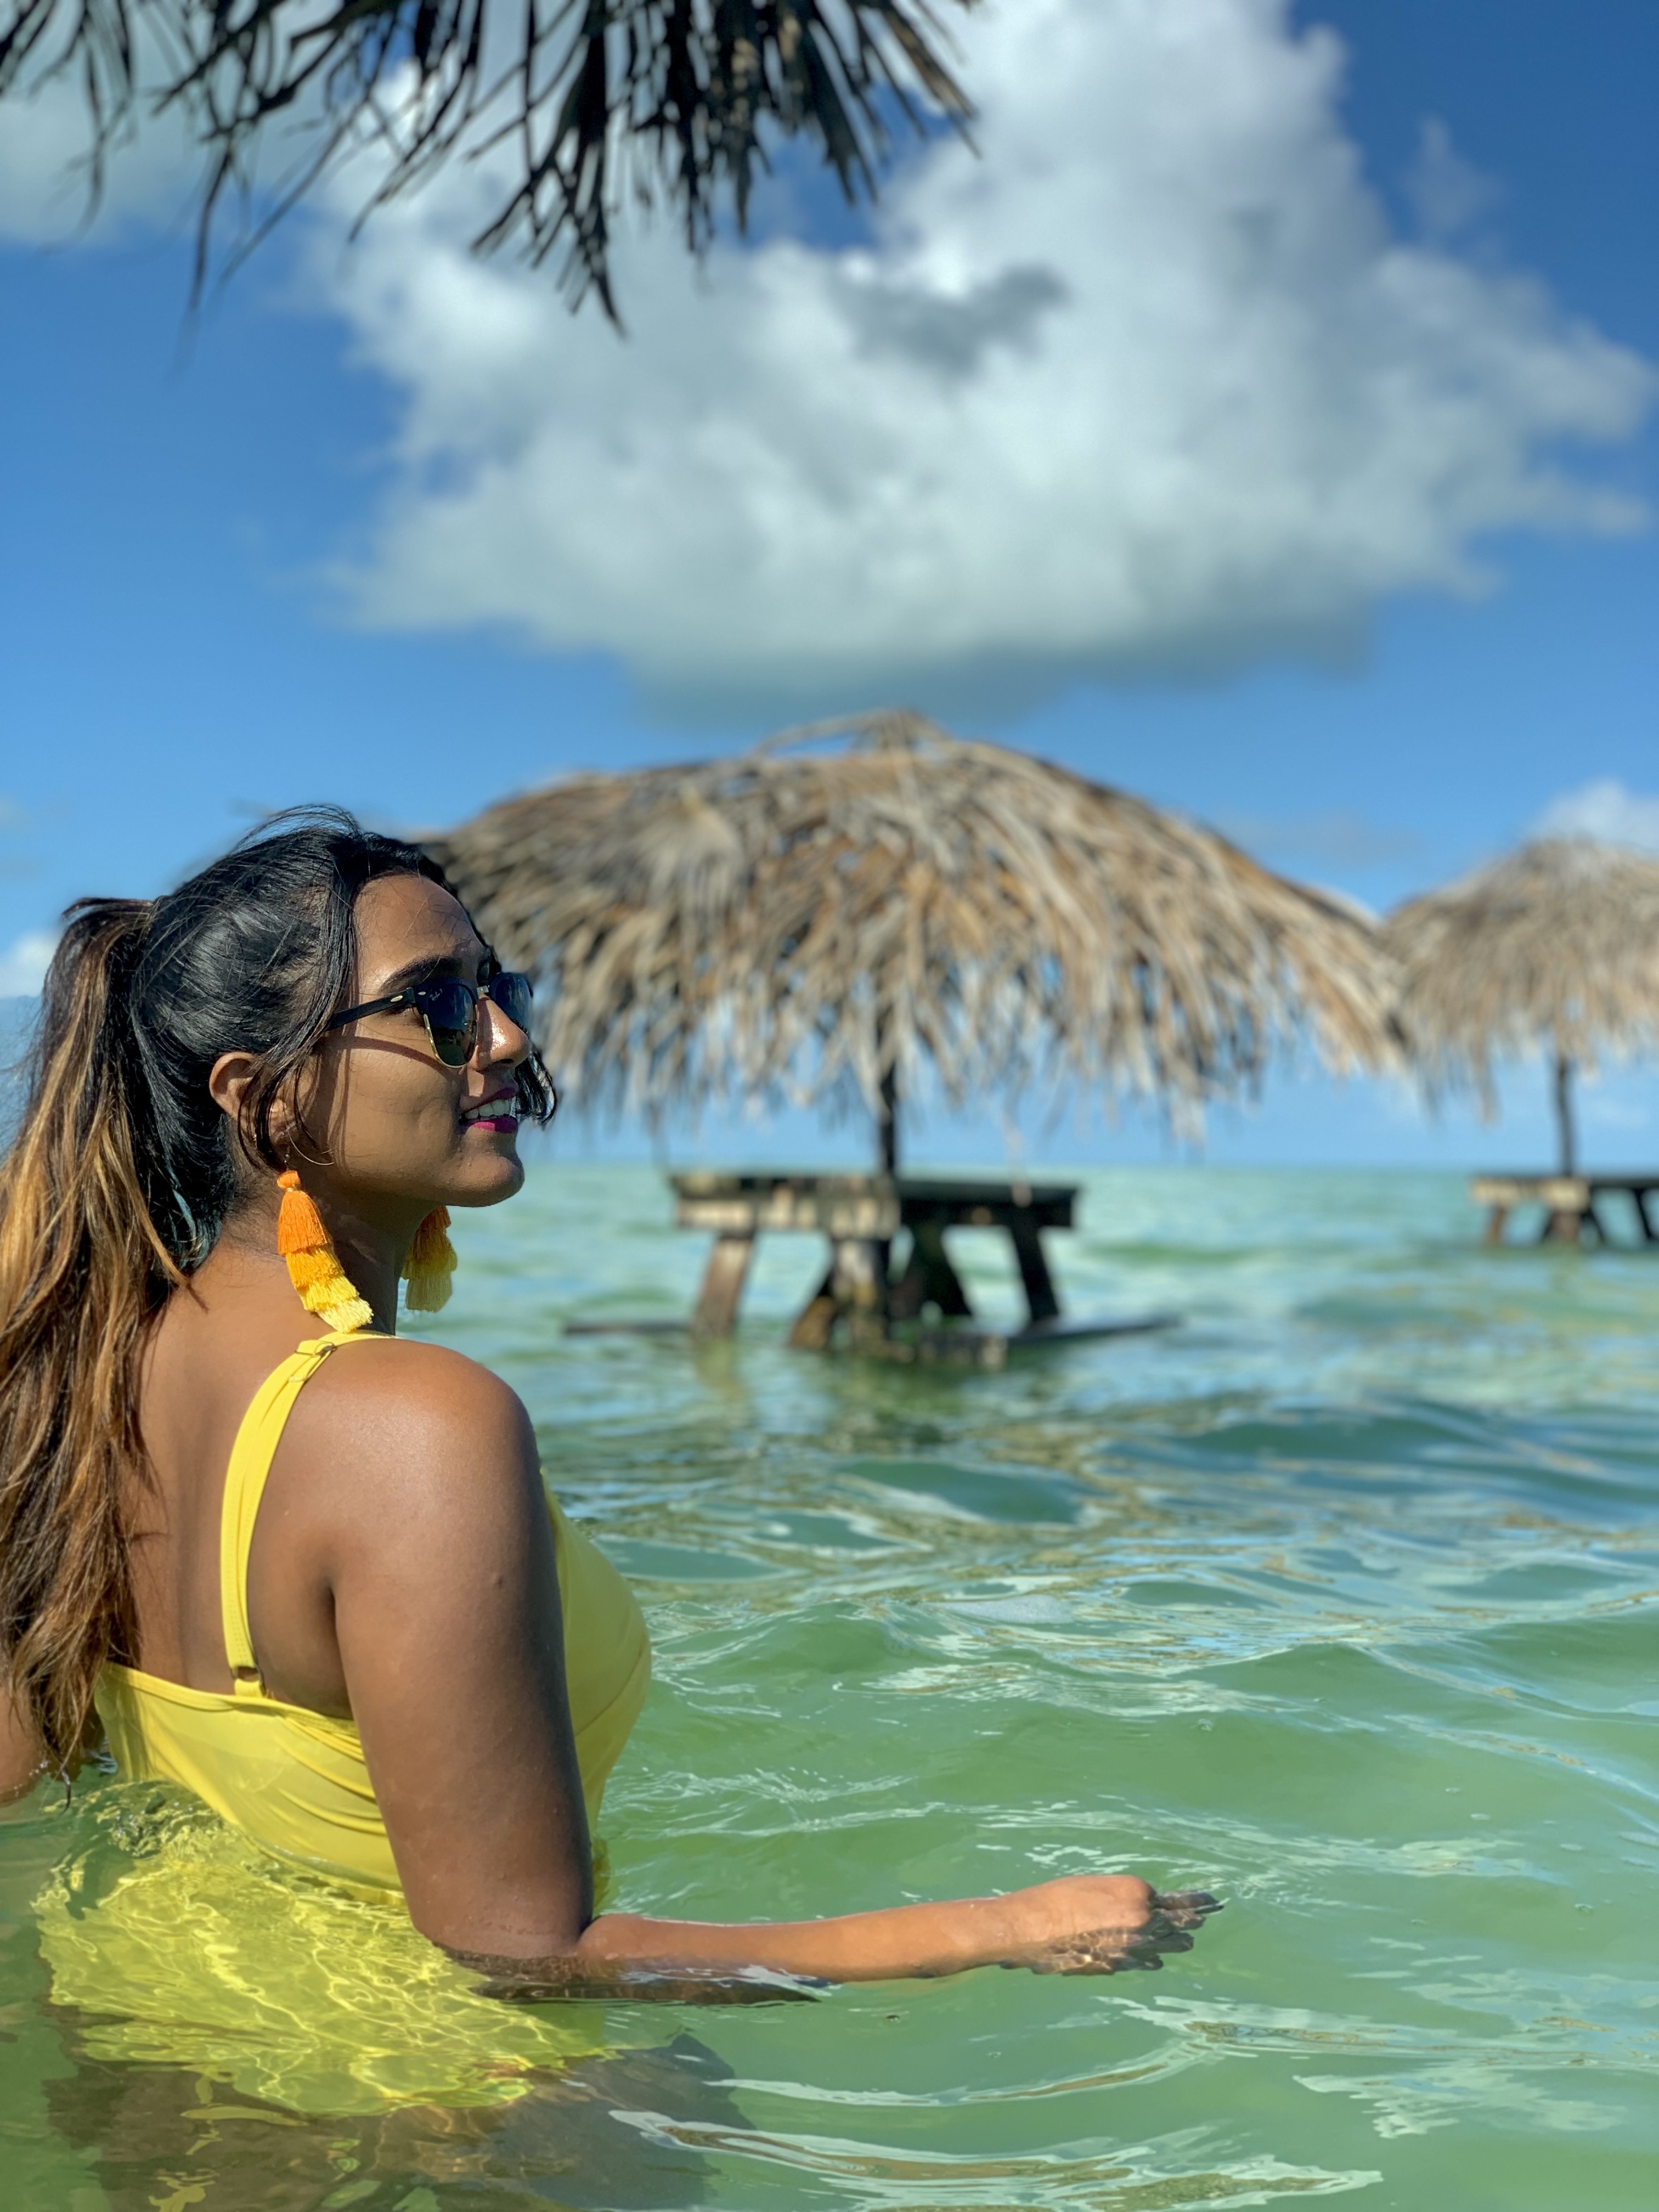
Day 4: Secret Beach

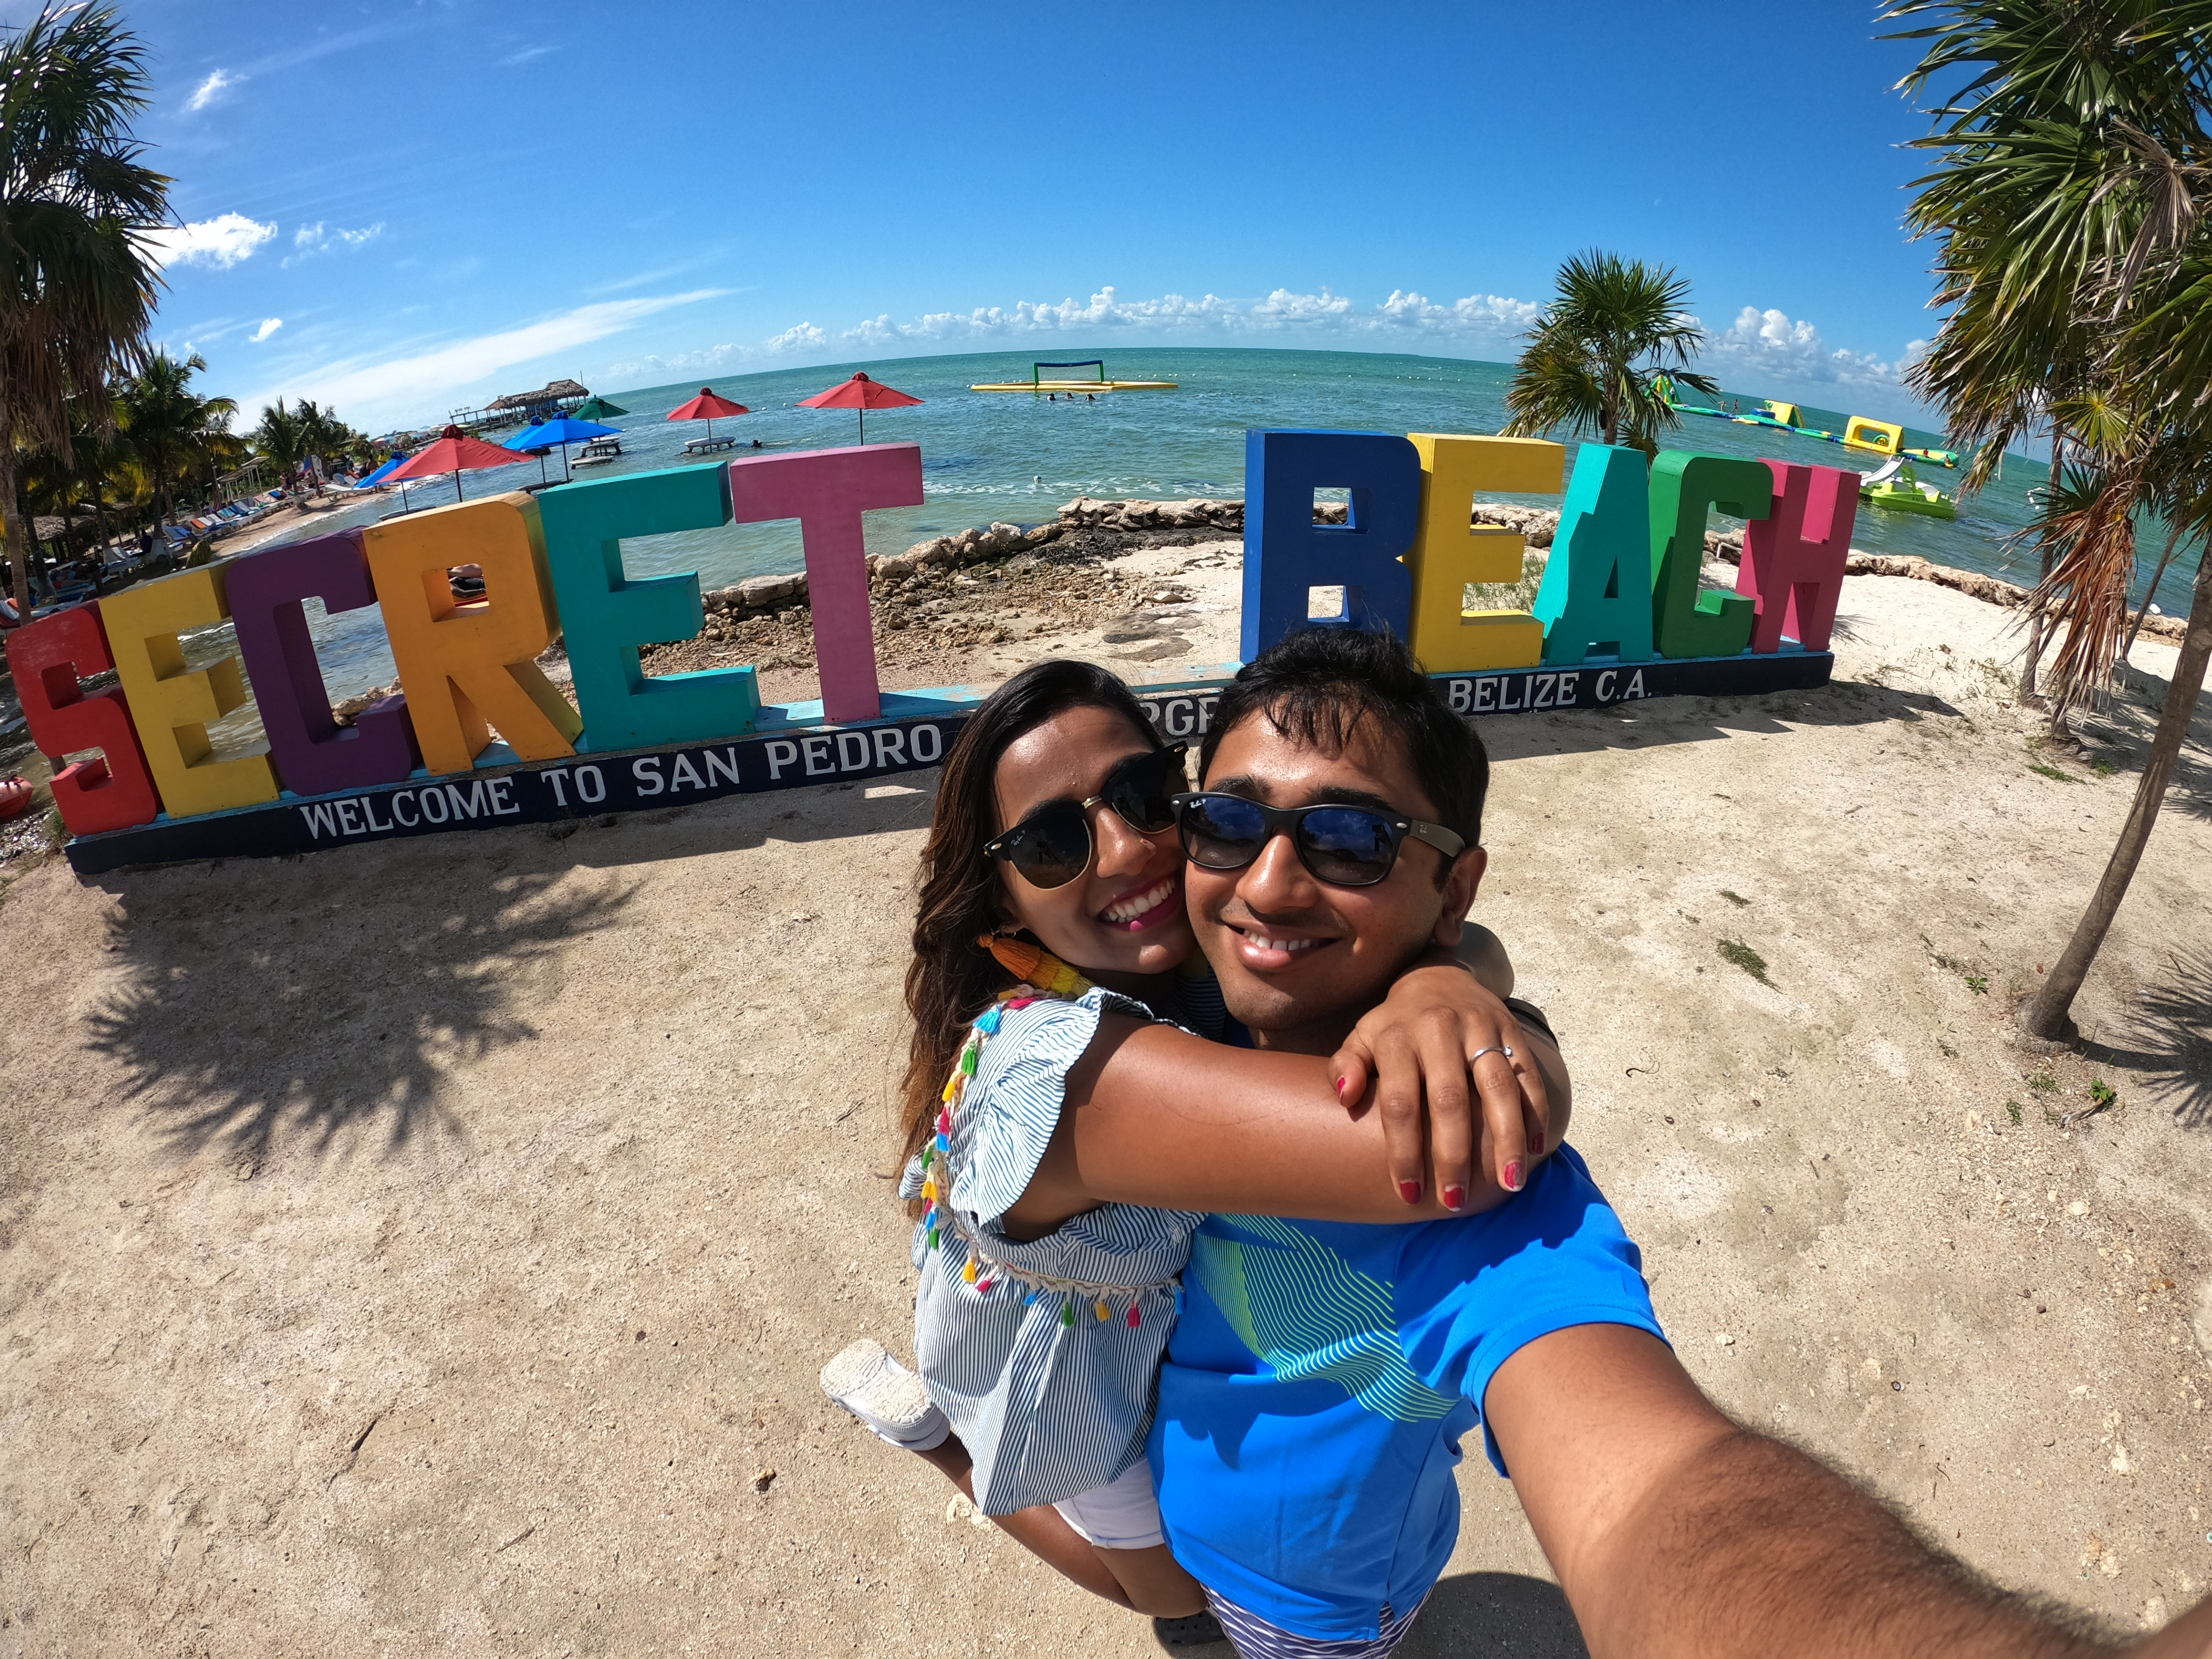
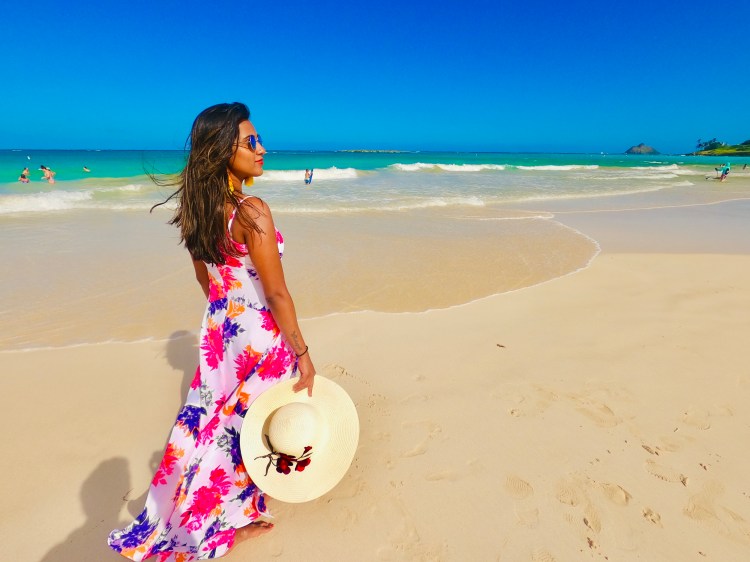
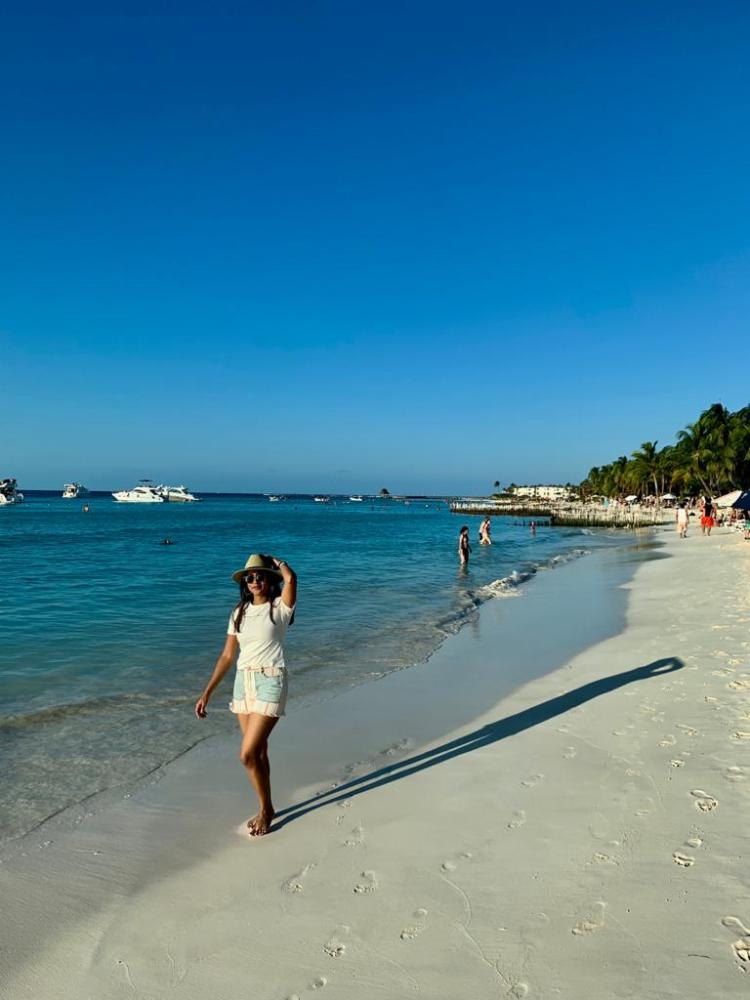
This was the day we needed golf carts to explore places outside San Pedro. We rented one and drove to the most famous spot on the island – The Secret Beach (Well, not so secret in anyways). It takes about 30-45mins to reach this location from San Pedro town and you will not be disappointed. So this is what I know of the place from my research from different blogs and searches. As you know San Pedro area does not have a nice sandy beach shore since it is surrounded by reefs. Also, although Ambergris Caye is huge, most of the area other than around San Pedro is unhabituated, filled with mangroves. But some guy created some routes through the mangroves for some reason and people realized there is a great stretch of land on the north-west side that people could make do for a sandy shore with calm waters! Voila.

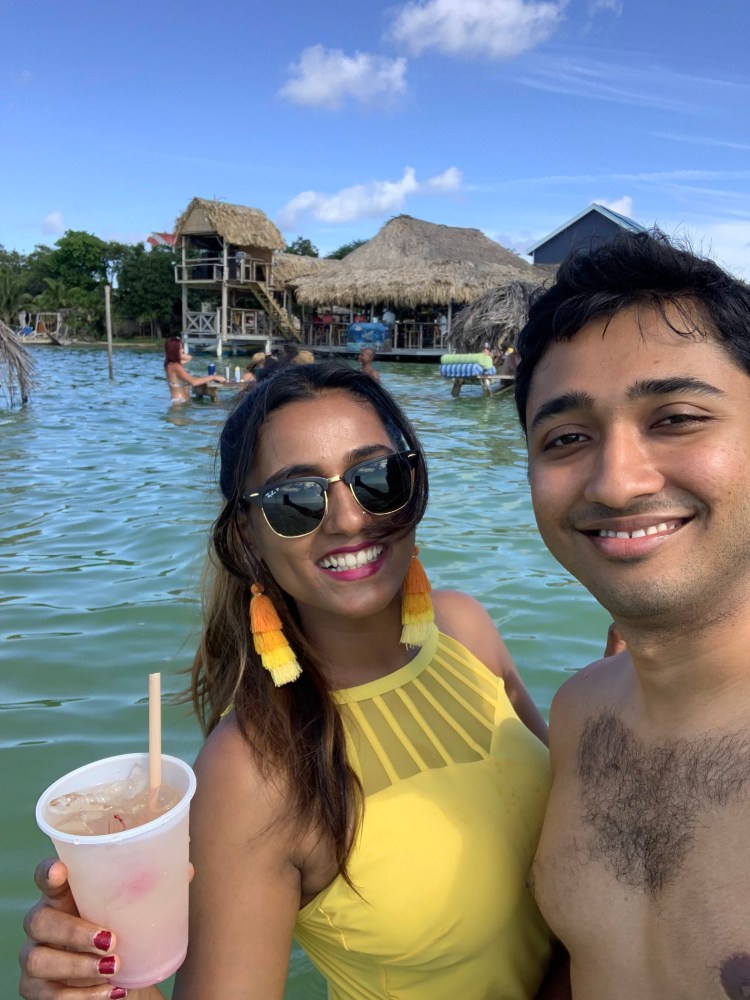
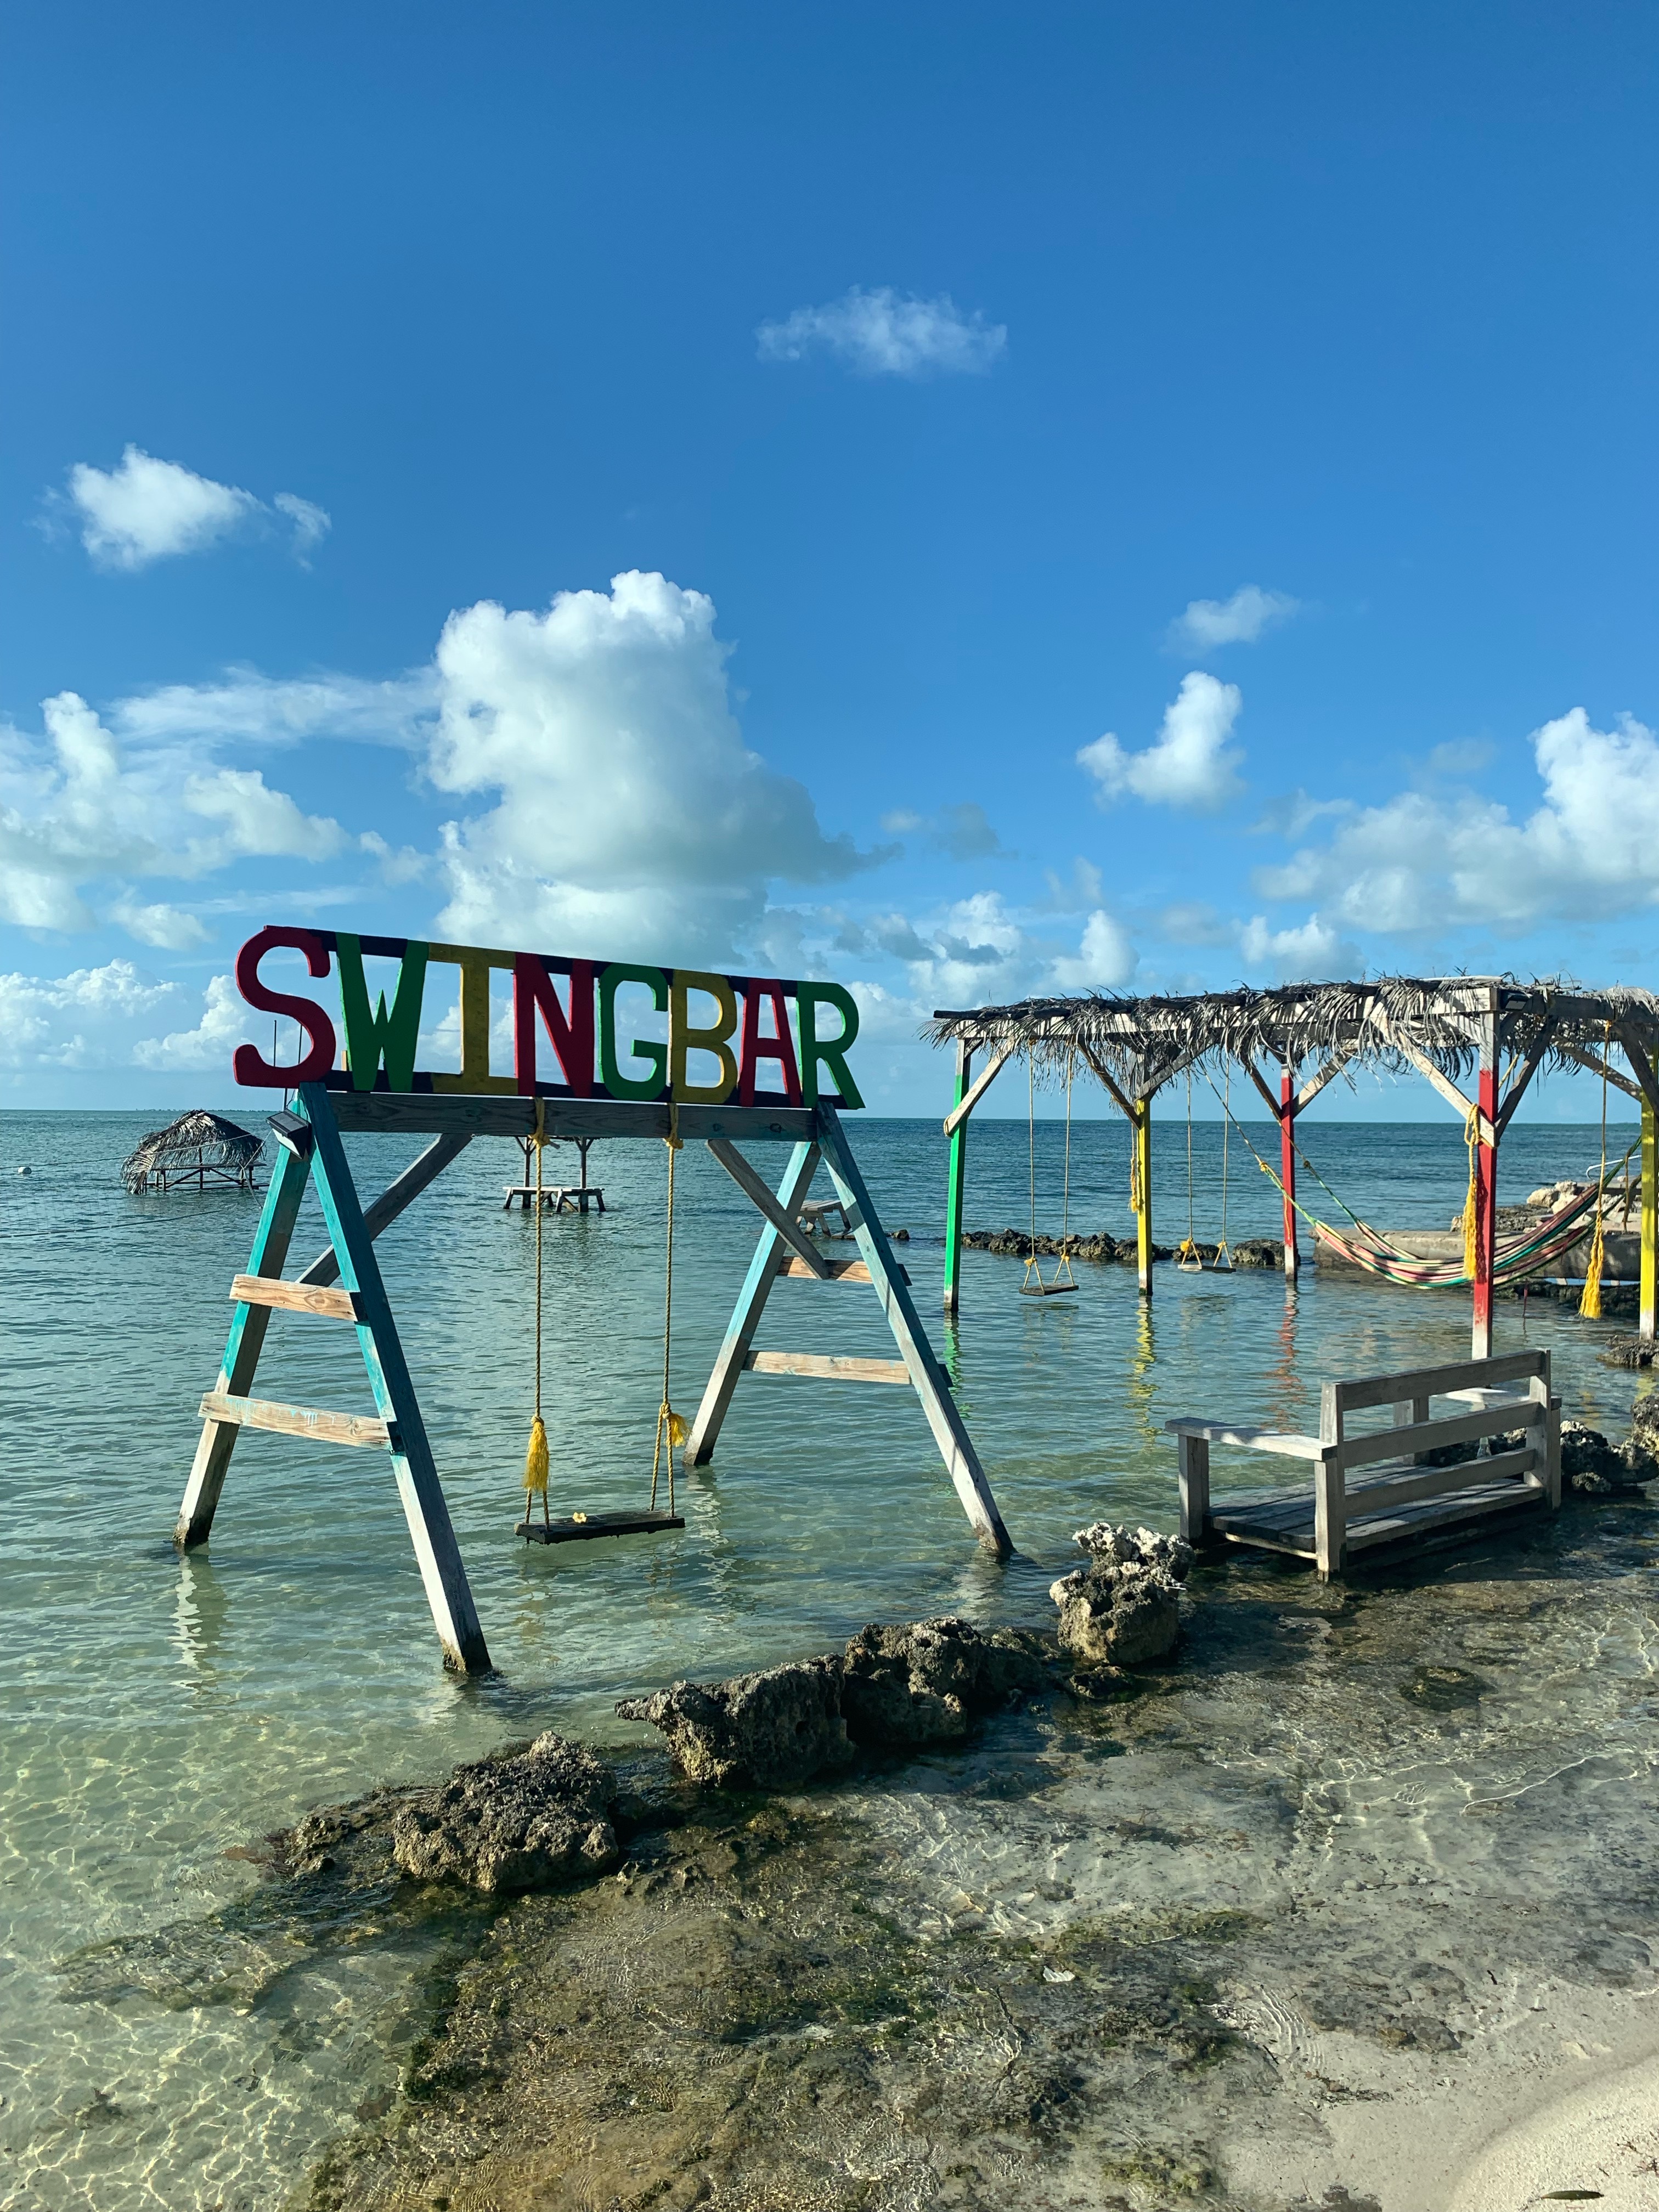
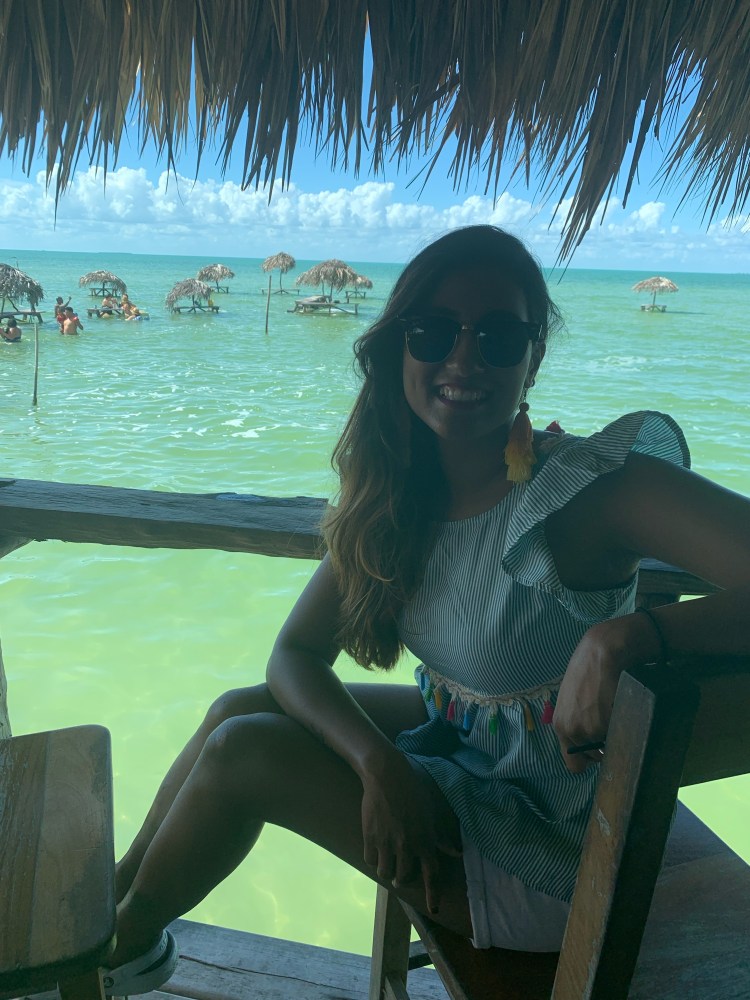
As more and more people came to enjoy the area, many hip bars and restaurants came up to provide complimentary services to enjoy the beach while sipping amazing cocktails and having delicious food. Now, you will see complimentary cabanas, over water tables and chairs, swings, deck, DJ/live music, over water table services, hammocks all provided by competitive restaurants of the area to enjoy this cool place. We picked Blue Bayou , which is said to be a new and upcoming establishment and we were not disappointed.

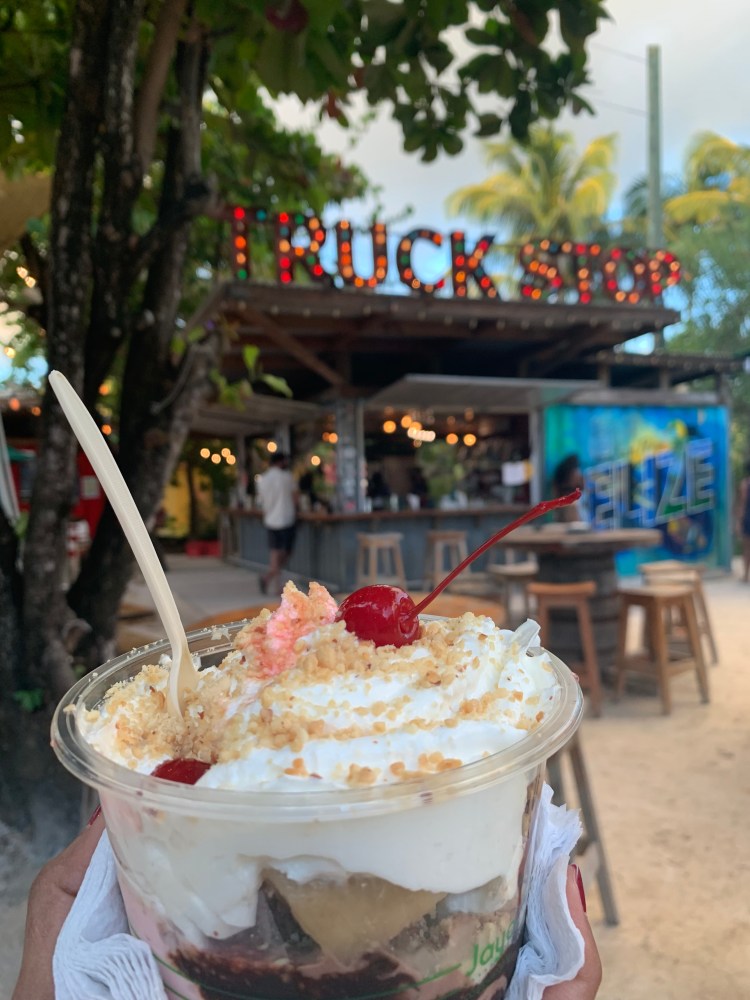
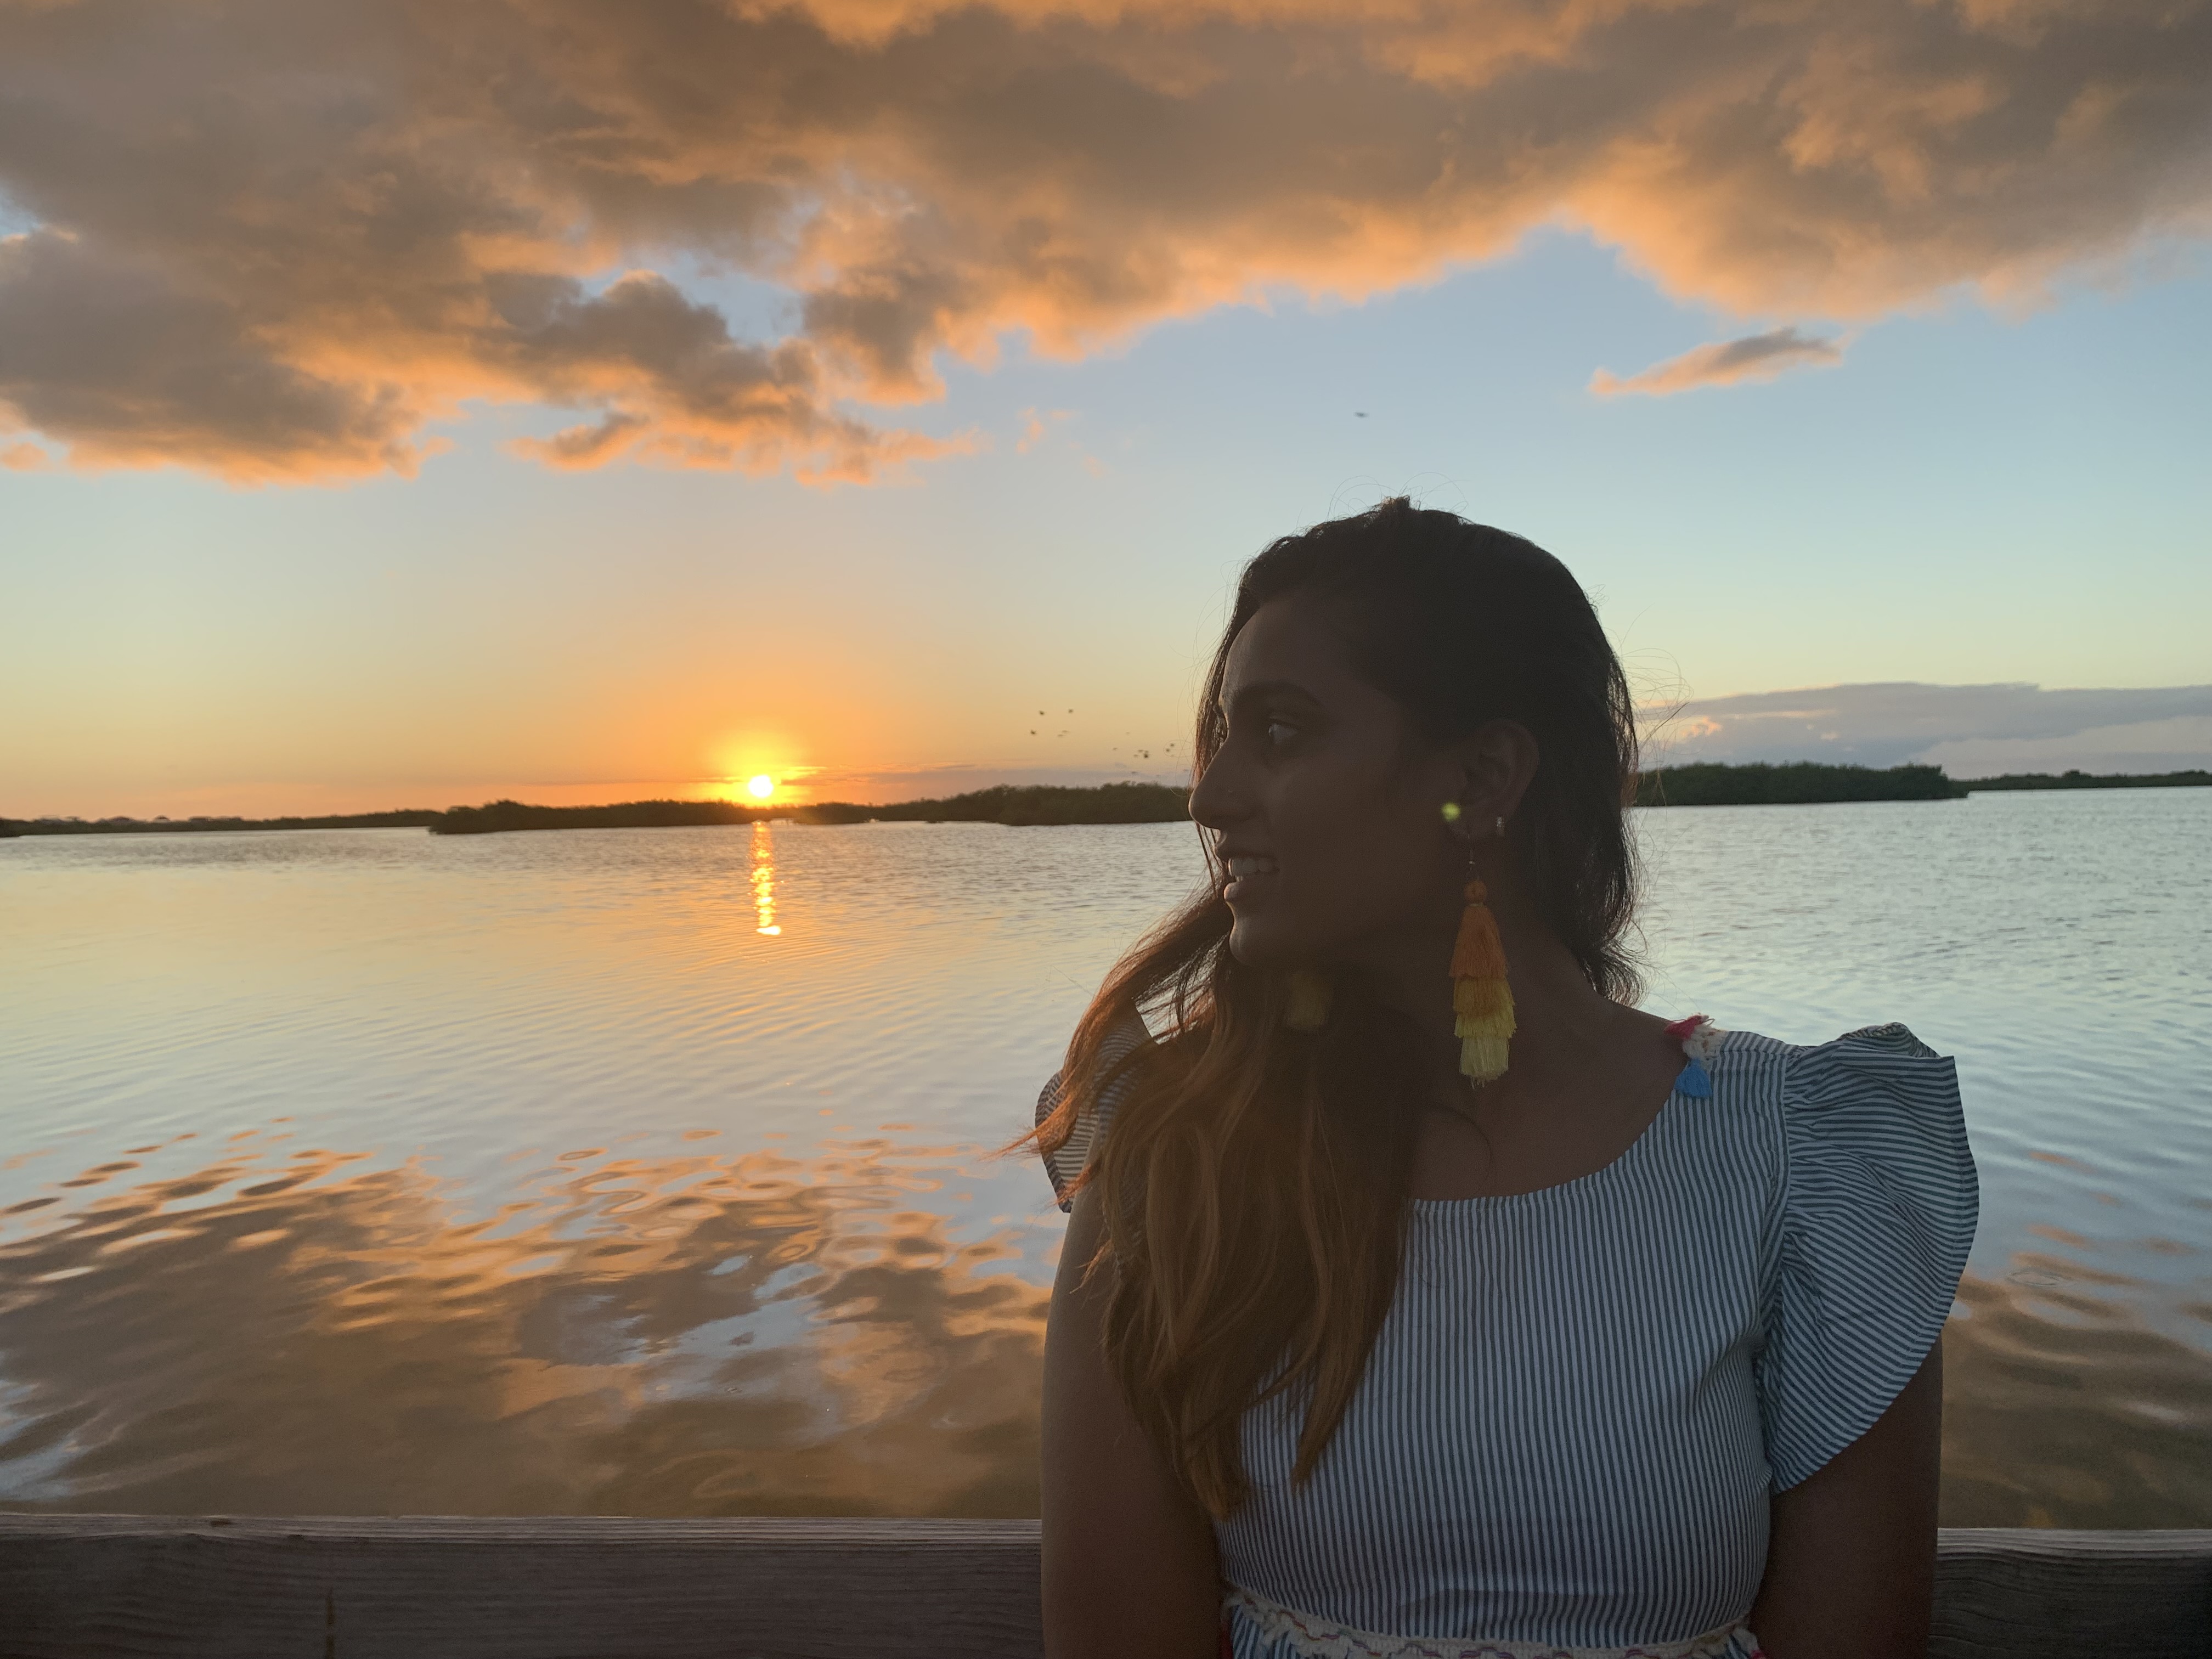
After spending the whole afternoon, we decided to drive back towards the city before dark (was not sure how safe the connecting area would be after dark; also – mosquitoes ! ). We stopped at Truck Stop, which is a cool food truck spots with clean restrooms, live music in the evenings, big screens for movies, pingpong and cornhole area etc. We got icecream and went to their deck to watch the sunset over the waters and mangroves. We had dinner at Caramba Restaurant & Bar – very busy and service was too slow. Would not recommend this one.

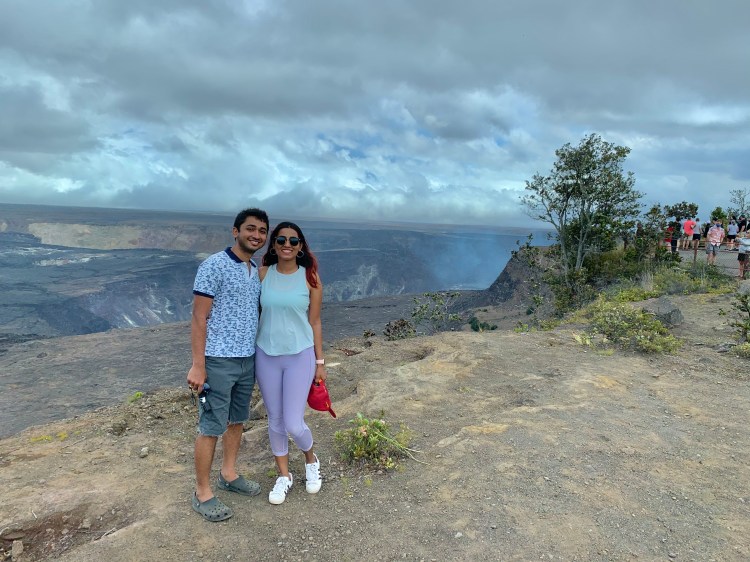
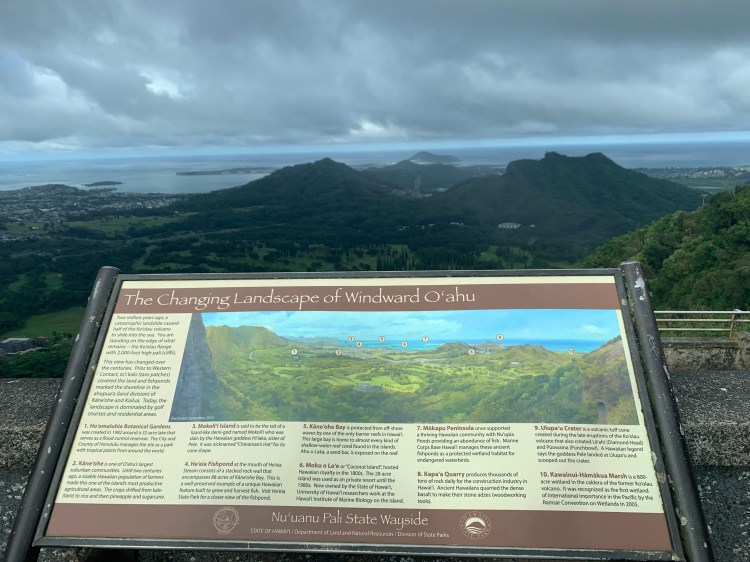
Day 5: San Ignacio via Blue Hole National Park

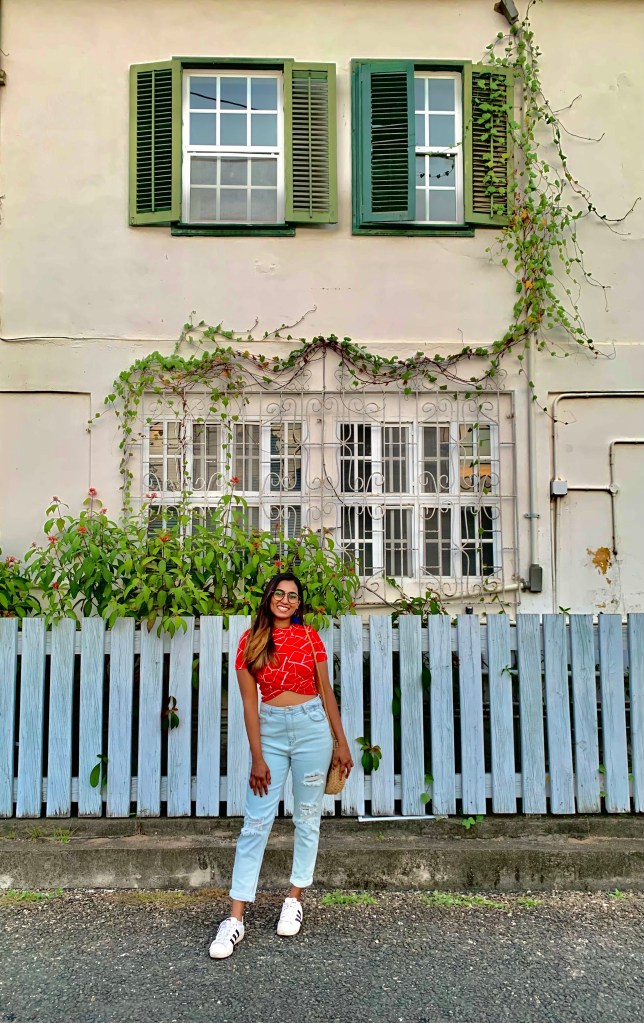
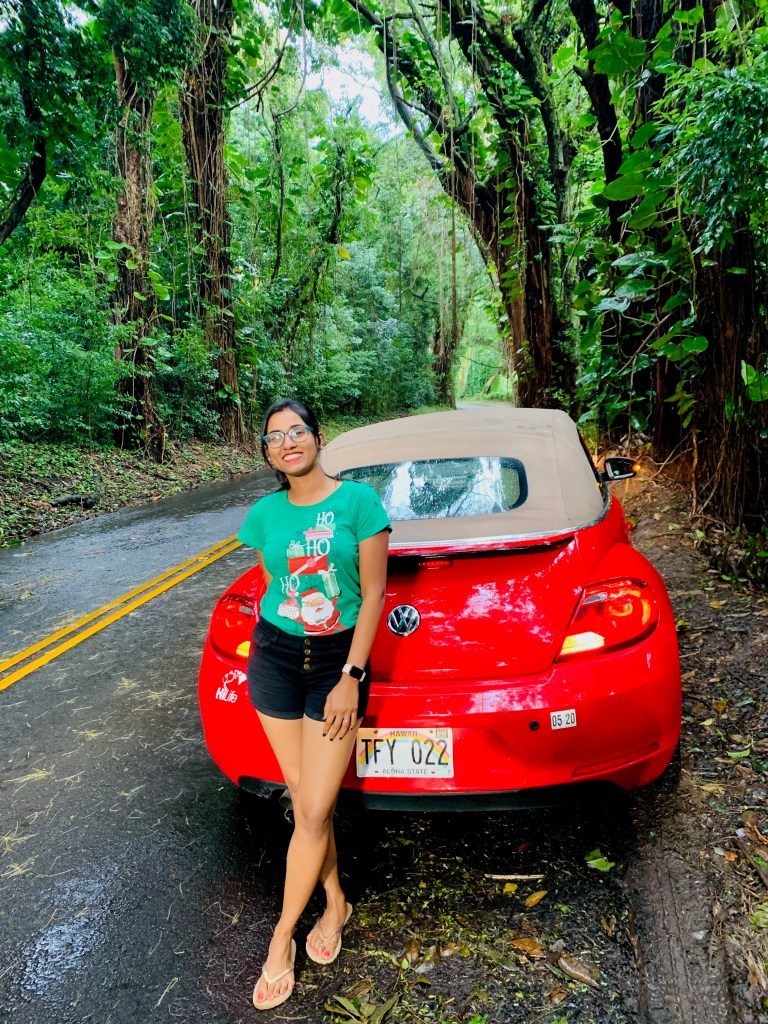
Took an early morning water taxi ride to Belize city where we picked our rental car. We then started our drive to San Ignacio which was about 2hours away. We just got a economical car rental but looking back, it would have been better if we had a 4×4 since not all roads and destinations are reachable with 2WD in Belize. There are couple of things to do on the way – one of them is Nohoch Che’en Caves Branch Archaeological Reserve. You will need a guide to do this with or a tour company. Since we had similar excursion already booked for ATM caves we didn’t do this one.

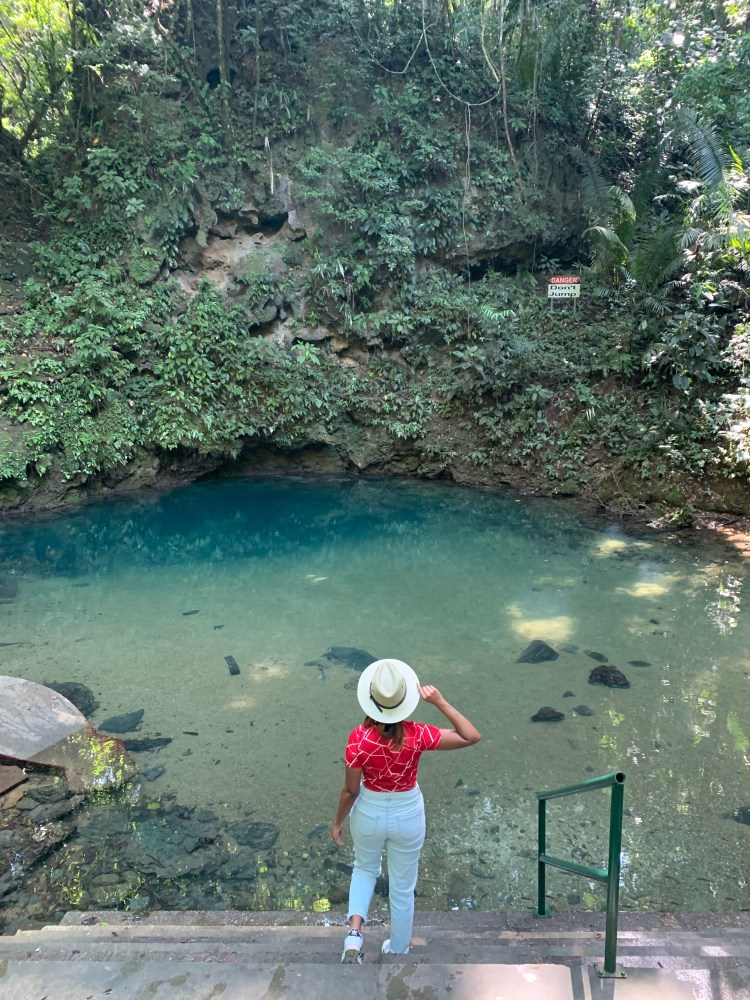
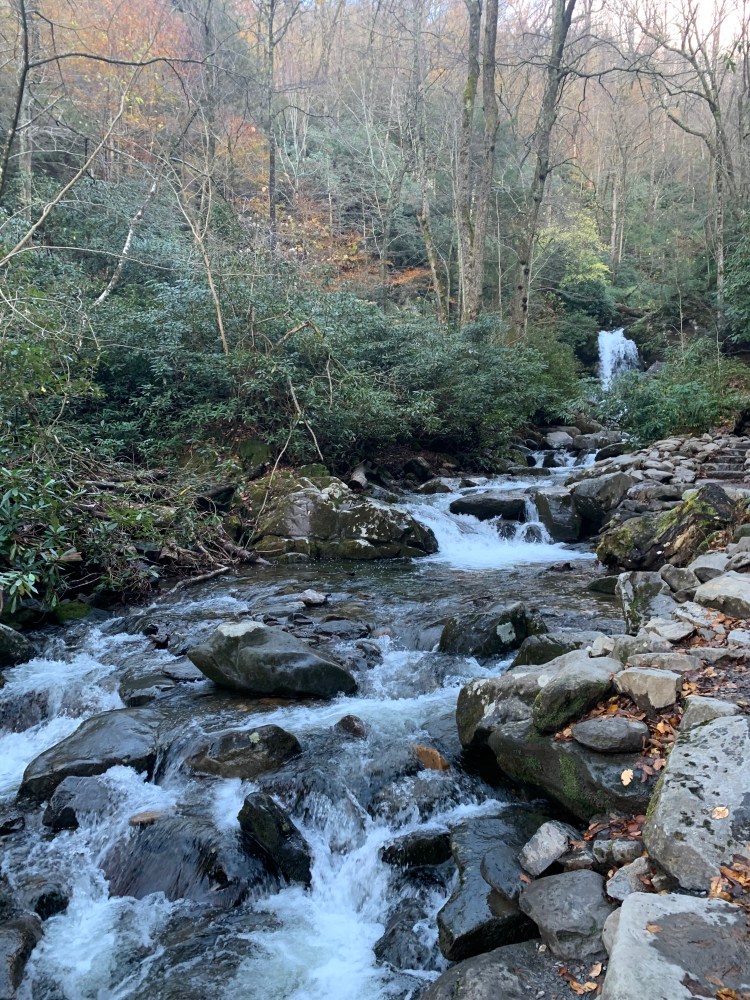
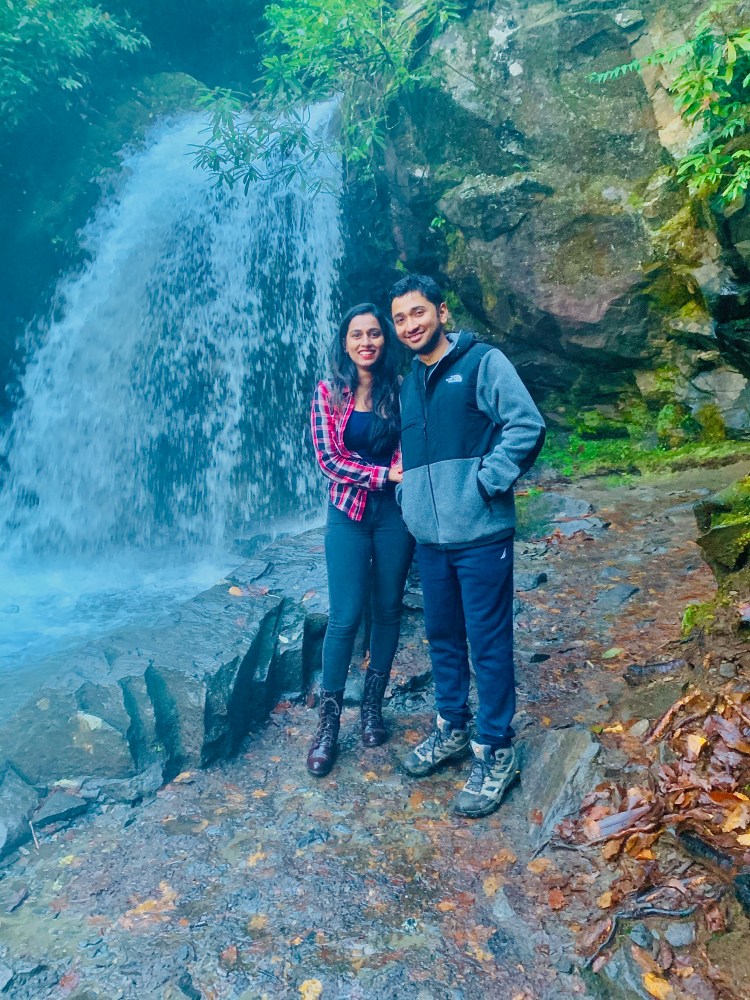
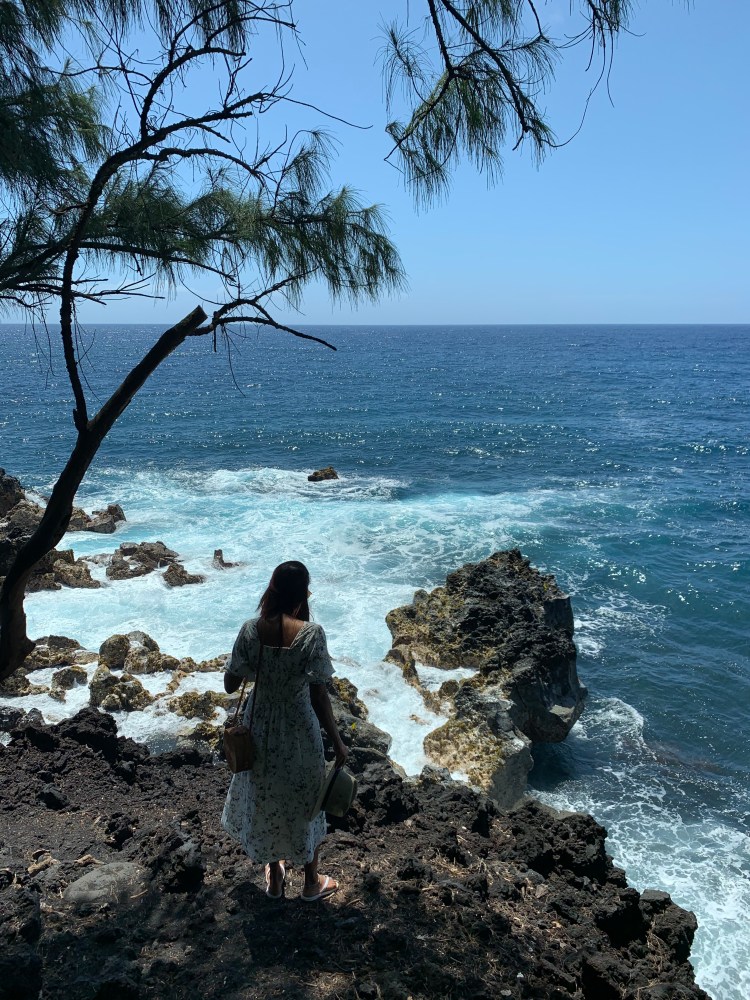
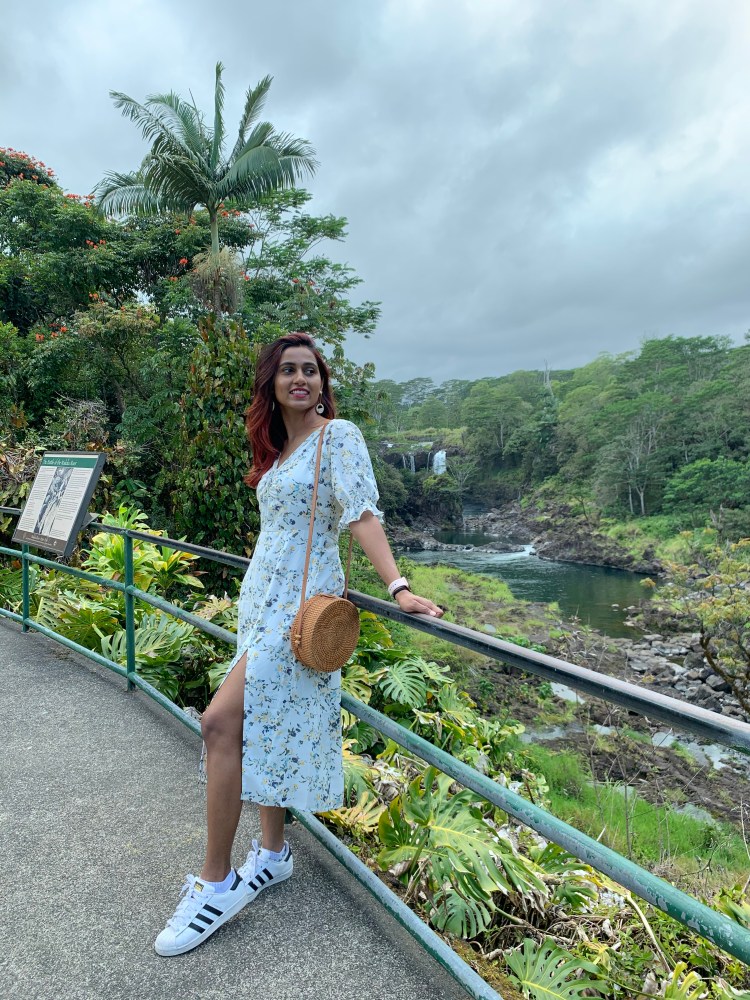
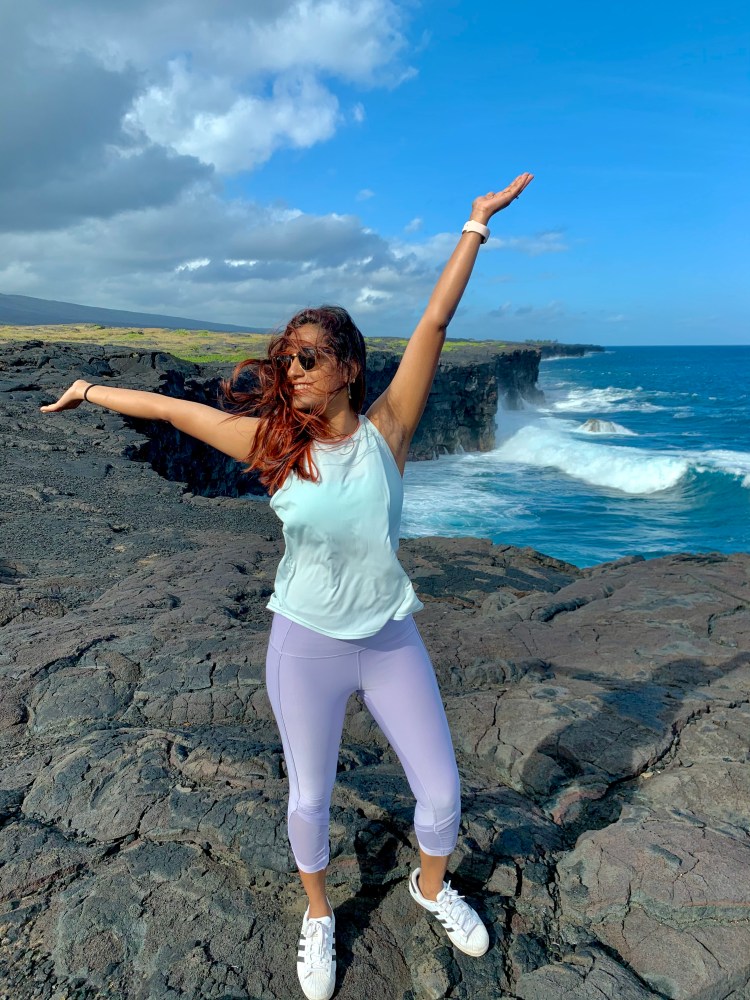
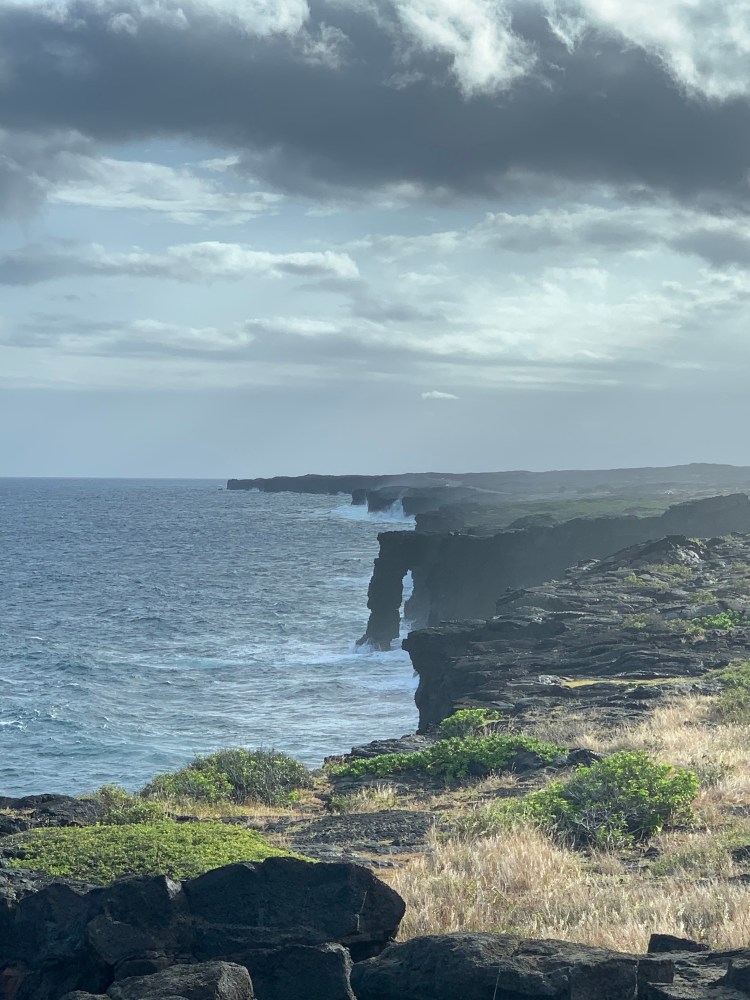
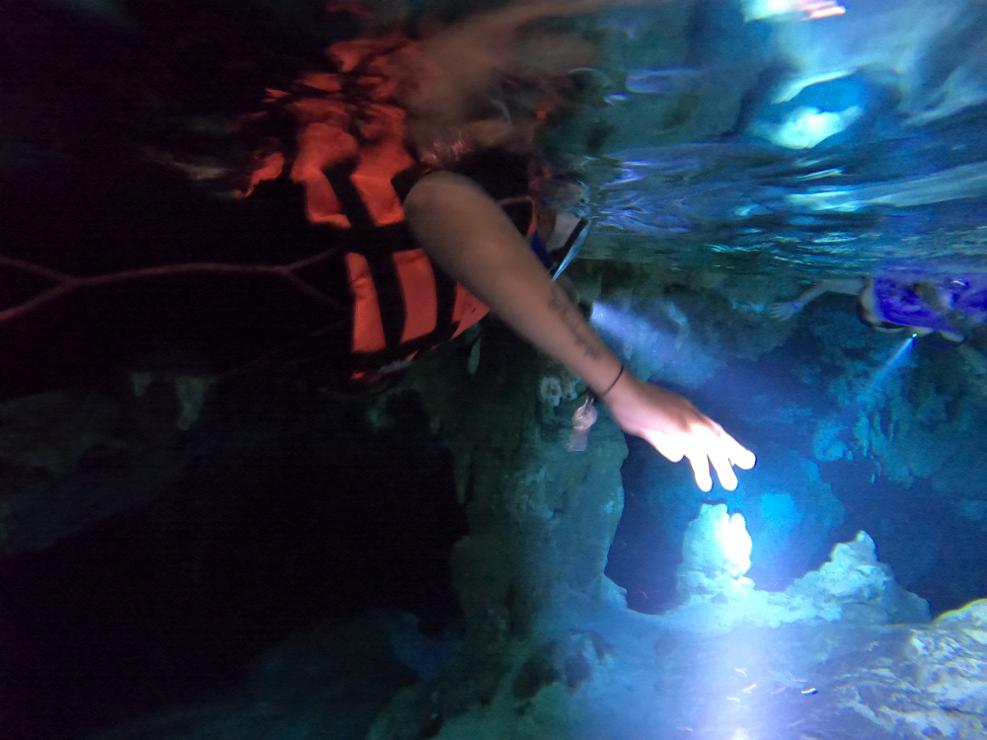
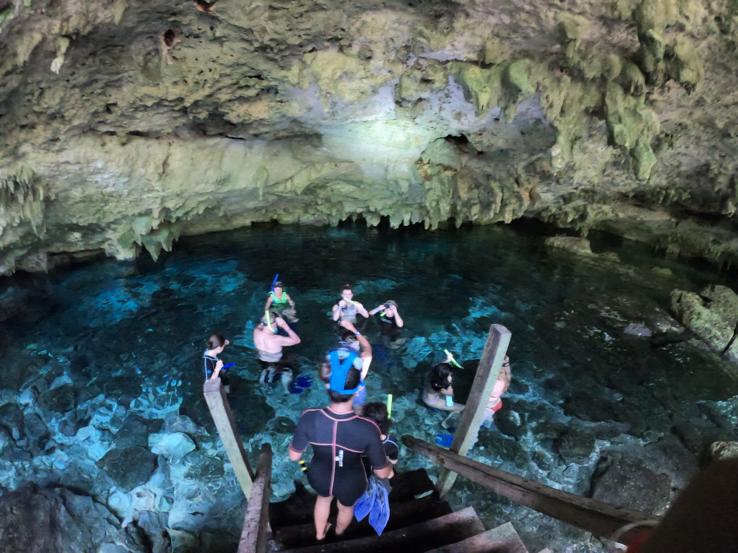
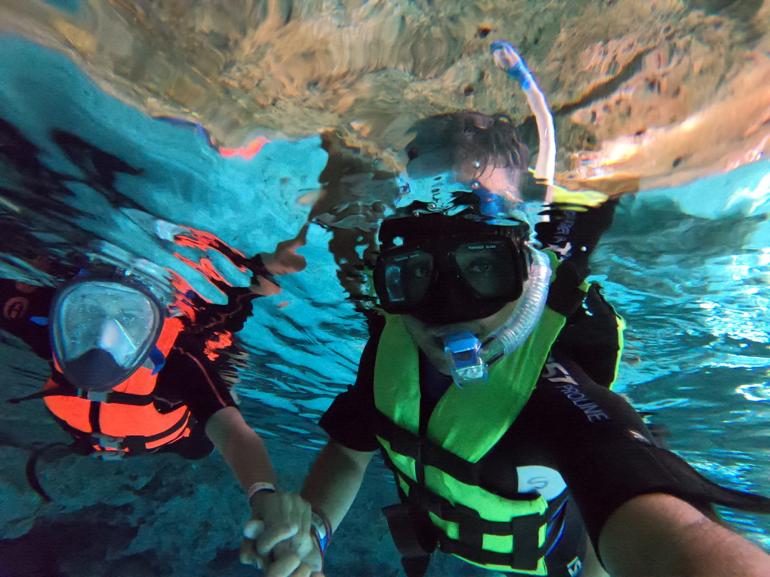
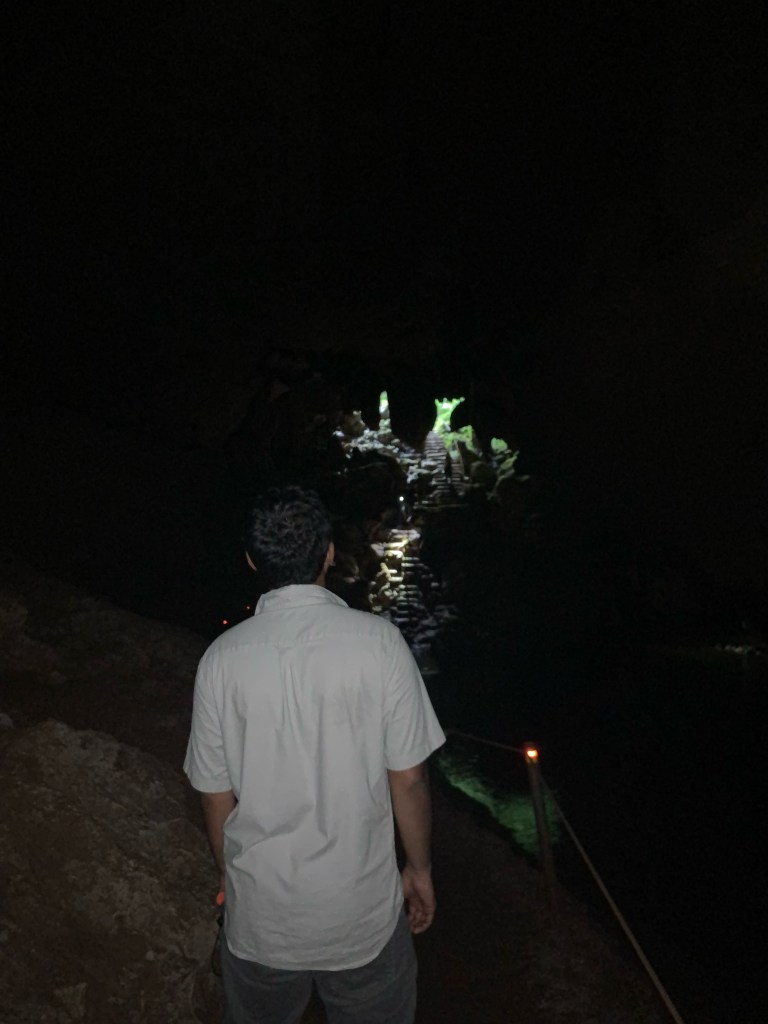
We did visit St. Herman’s Blue Hole National Park which although not as impressive could be a good place to explore a little into the rainforests of Belize. There is a natural water blue hole (more like Mexican Cenote) in this NP where you can swim. We didn’t get in water but the whole natural setup was beautiful. We then went on a hike to see the St Herman’s cave – hike was about 2 kms round trip to the cave. Inside the cave you can self explore to about .75km after which a licensed guide is required to be with you. Dont forget to take flashlight if exploring the cave – its pitch black inside and you will miss how beautiful the inside is. There is another more famous and challenging cave – The Crystal cave” in this NP which can only be explored with a guide. I heard it is much more rigorous hike with lots of scrambling and squeezing through tight places. We later drove to our airbnb in San Ignacio and rested the whole evening. It was much hotter and drier in San Ignacio than in San Pedro. For dinner we went to Ko-Ox Han Nah – their lamb dishes were amazing!

Day6: Actun Tunichil Muknal caves – ATM tour

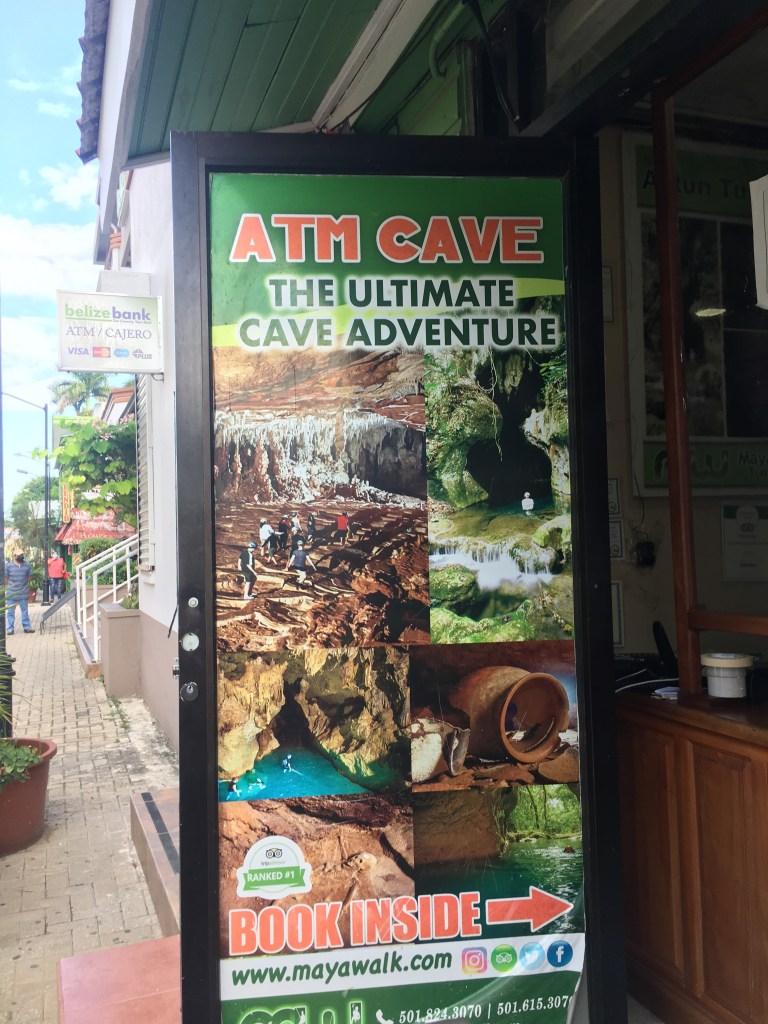
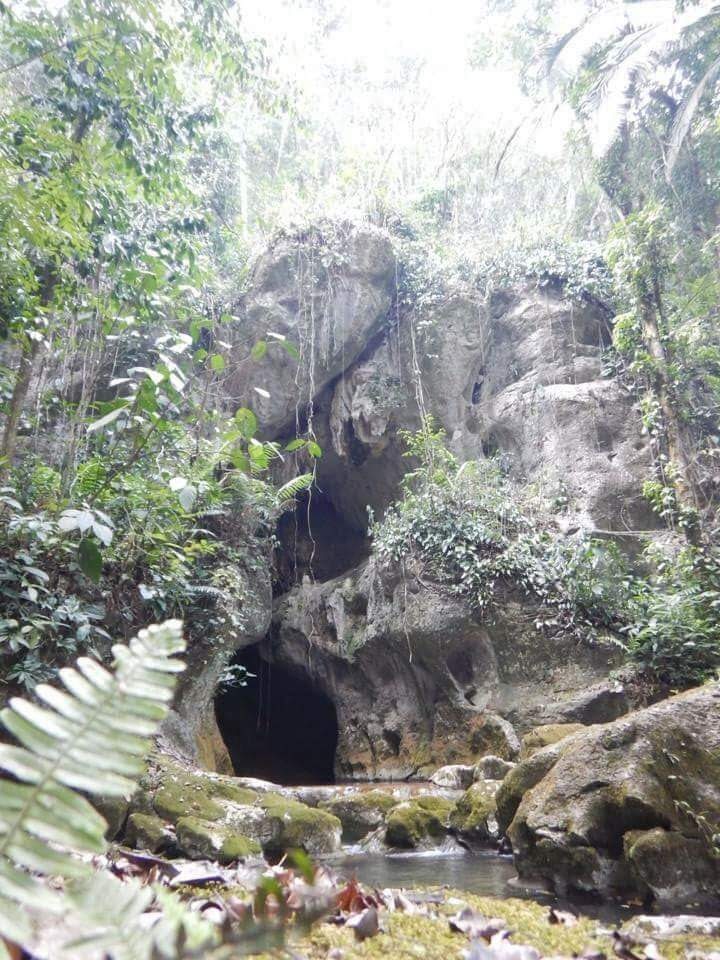
Another exciting tour to explore the ATM caves. We had booked the tour with Mayawalk Tours for 125USDpp including lunch and transport. This was a very unique experience that I had never done before. Cameras were not allowed inside the cave so we left all our gadgets behind and have no footage other than what is on internet. We geared up with helmets with flashlights and started our jungle adventure. We hiked about 2-3 miles to get to the mouth of the cave, crossing 3 creeks , with first one chest high. At the mouth of the cave you need to swim across to get to the shallower part. Life vests will be provided if you are not a confident swimmer but need to let the guide know before starting the hike.

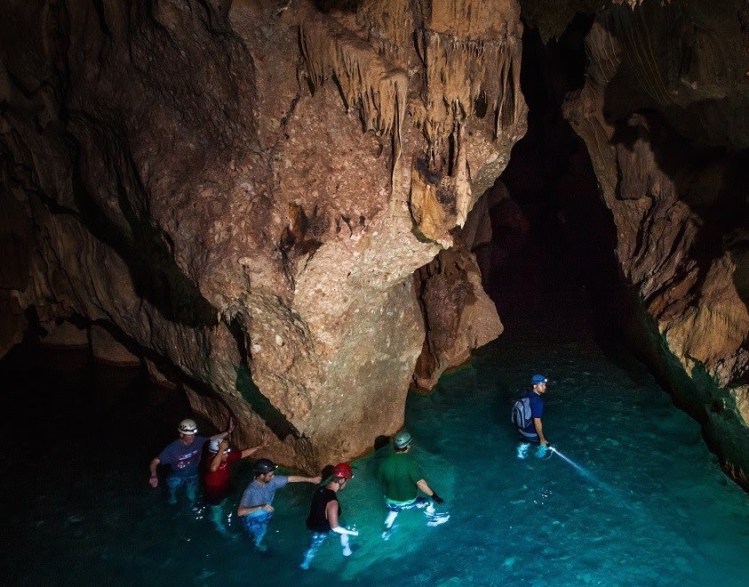
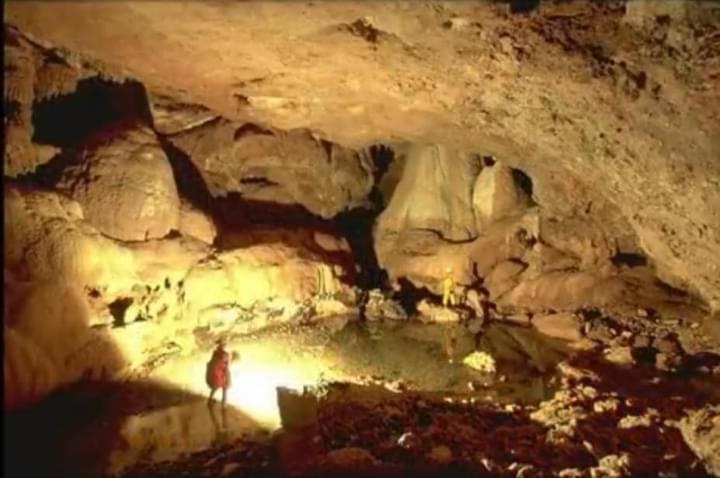
For the next 3 hours we waded, squeezed and scrambled deeper into the cave with water all around us, admiring the cave formations. We then climbed up to “The cathedral” – a huge dry chamber where Mayan artifacts still remained as is, unexcavated. Stoneware, ceramics, skeletons, weapons, tools all in their original position when these caves were discovered in 1989, probably how the Mayan’s left them. Apparently caves were sacred to the Mayans who believed them to be passage to underground where they would reside after death. They believed in life after death and performed sacrificial ceremonies in such caves for a better life underground.

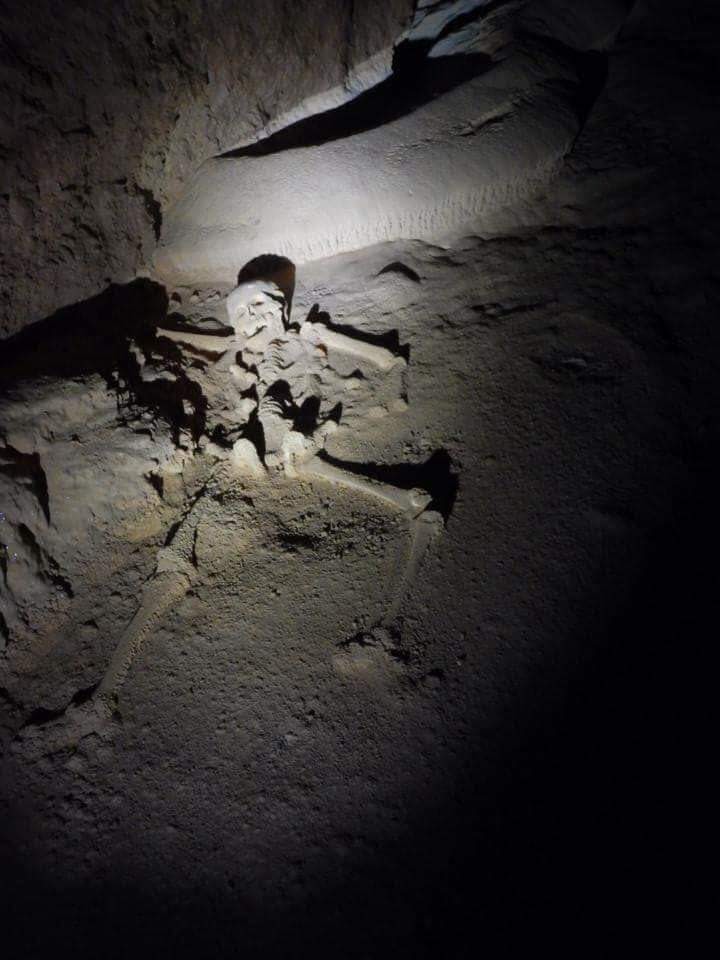
The finale of the tour was “the crystal maiden” – a full crystalline skeleton wrongly presumed to be of a women but now is proved to be of a man’s – Mayan human sacrifice! It all looked out of this world! Rice & beans with Chicken ( Belizean everyday food ) was waiting for us when we came back to the van . We changed , had lunch and headed back to the town which was another 1.5hours away. On our guide’s suggestion we went to Cenaida’s Belizean Food for dinner which was perfect after a long day.

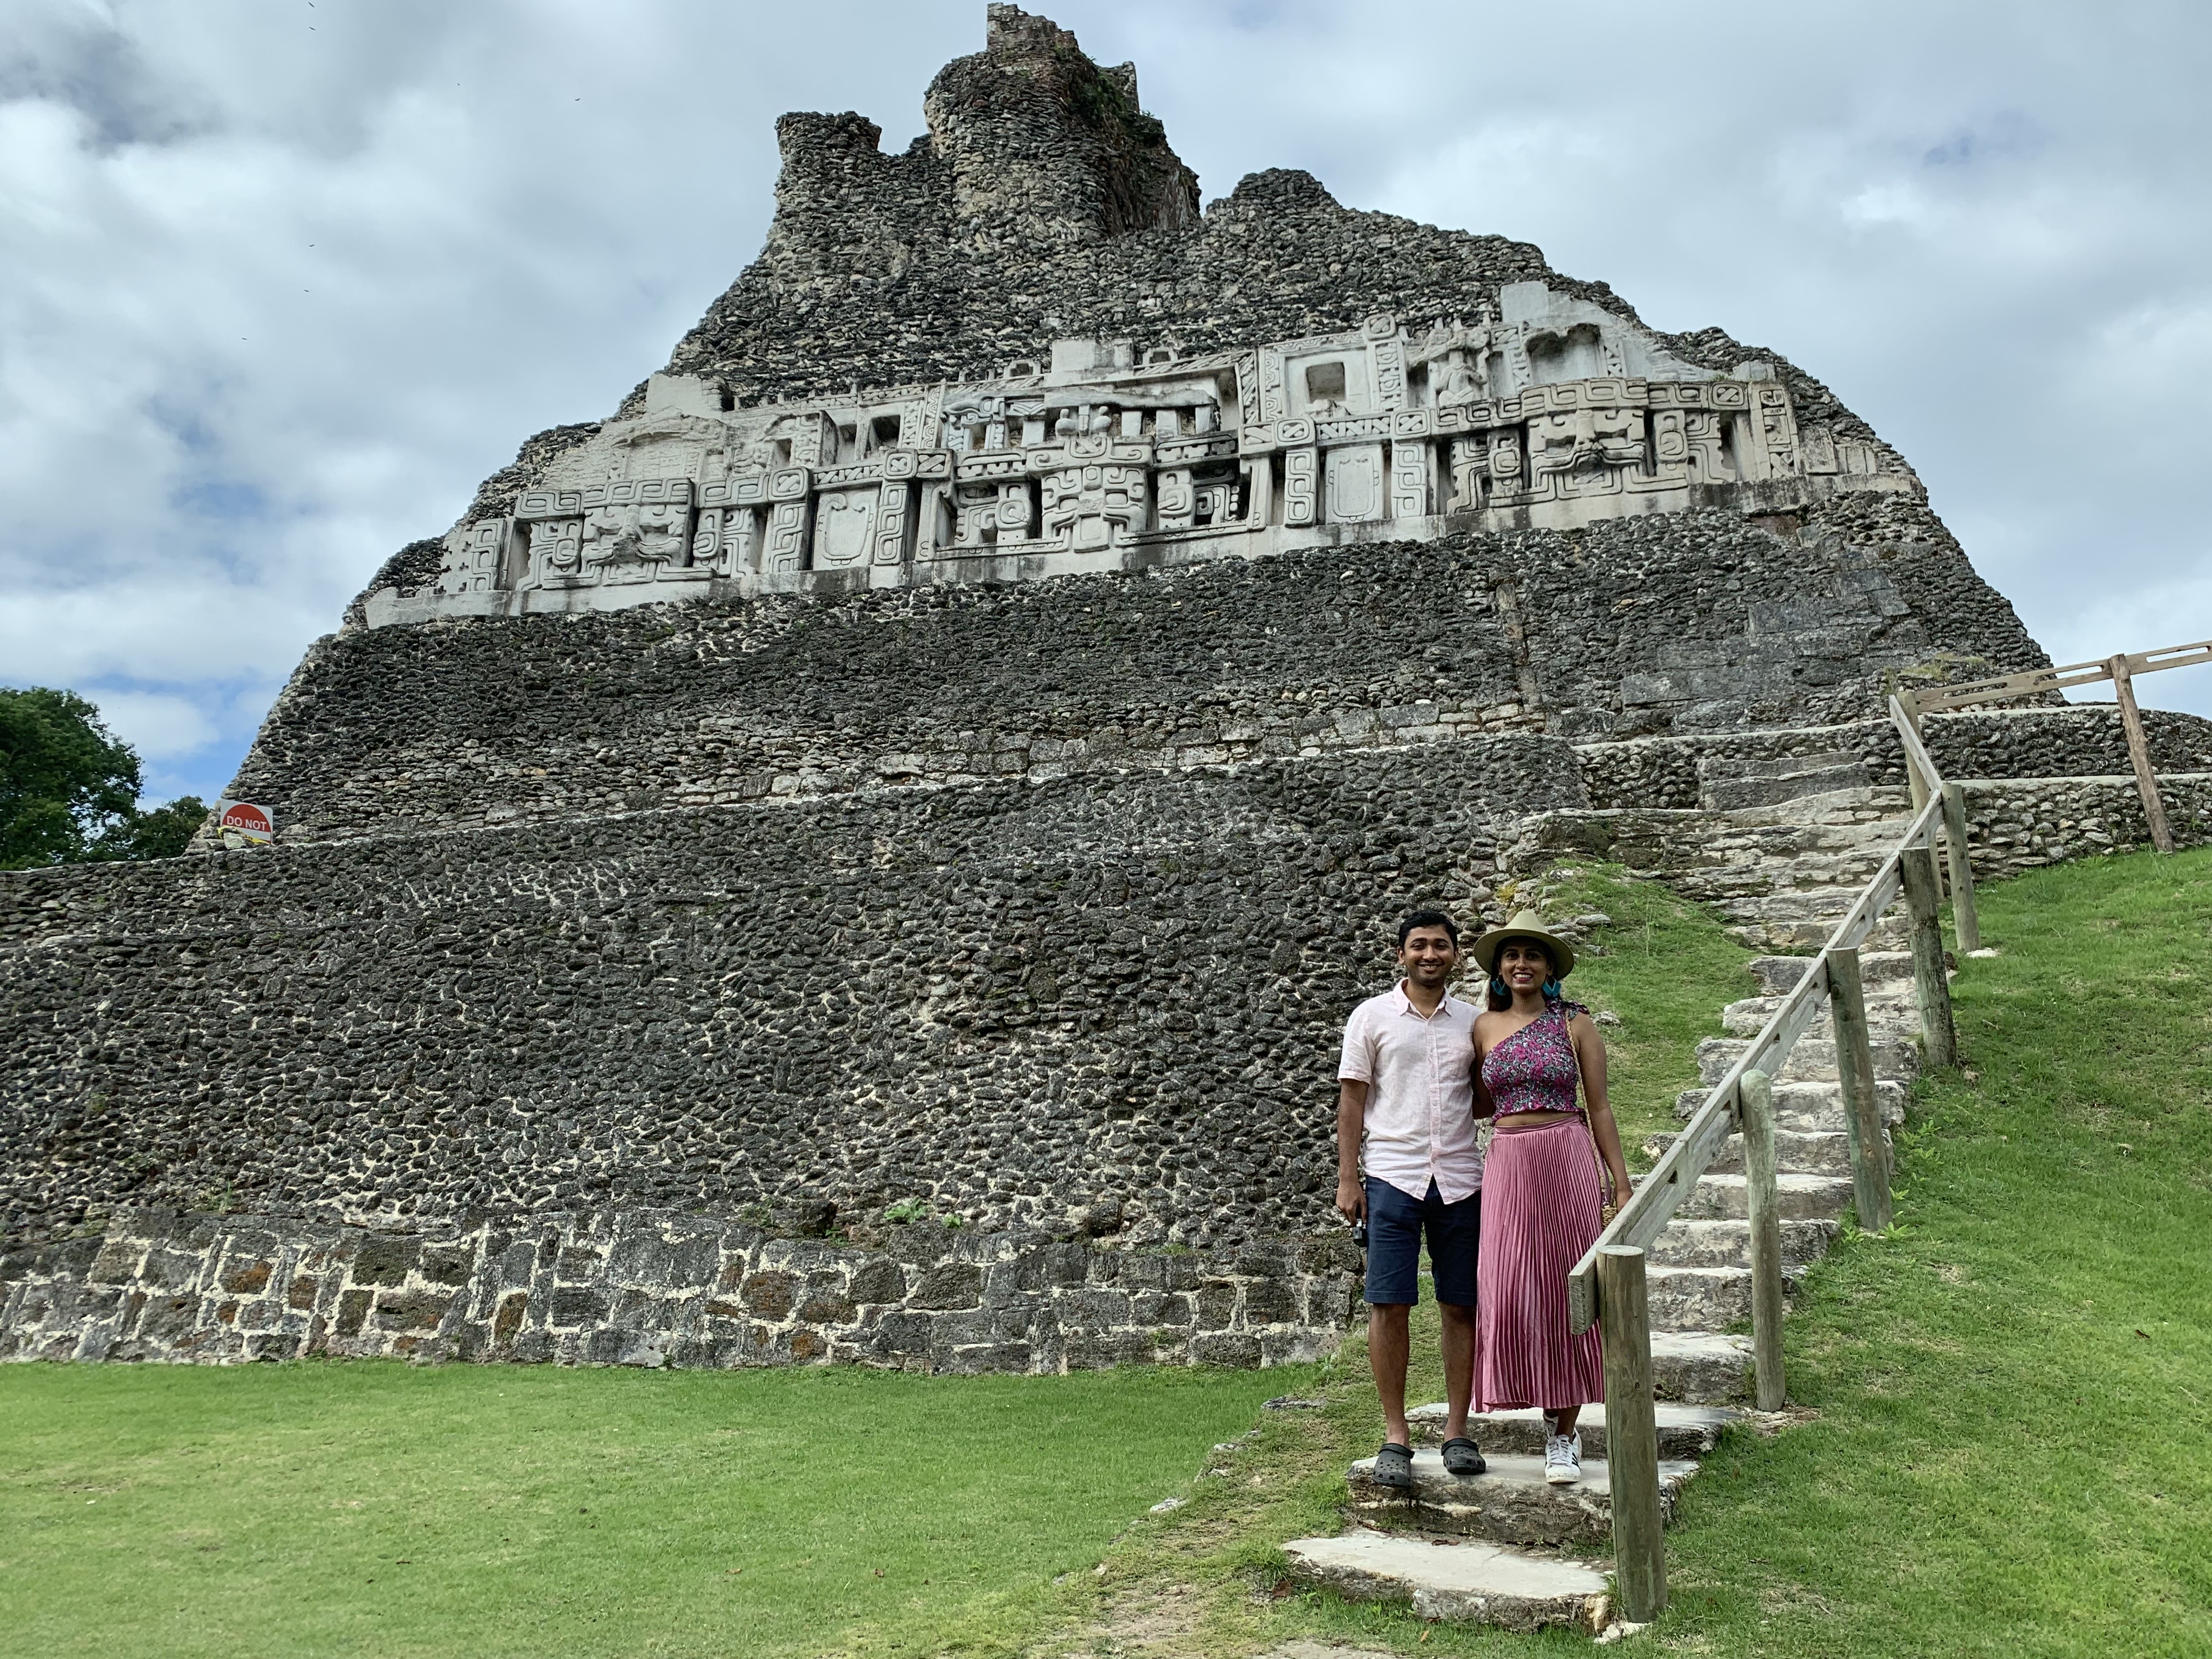
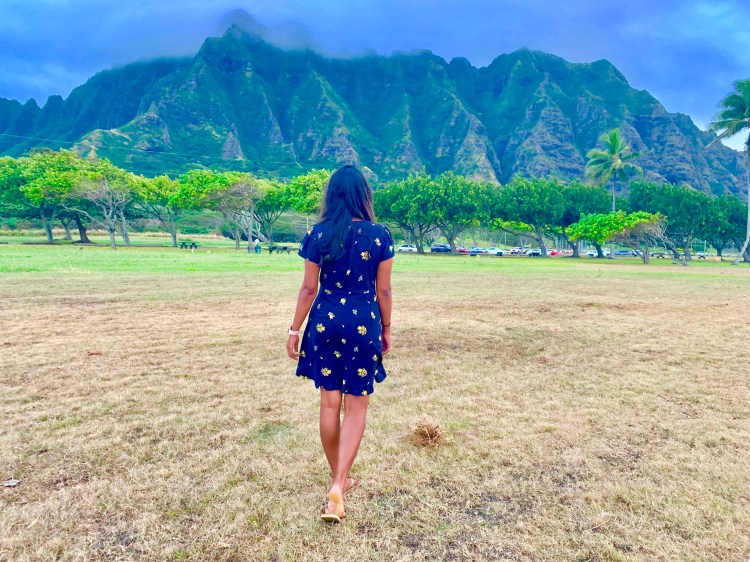
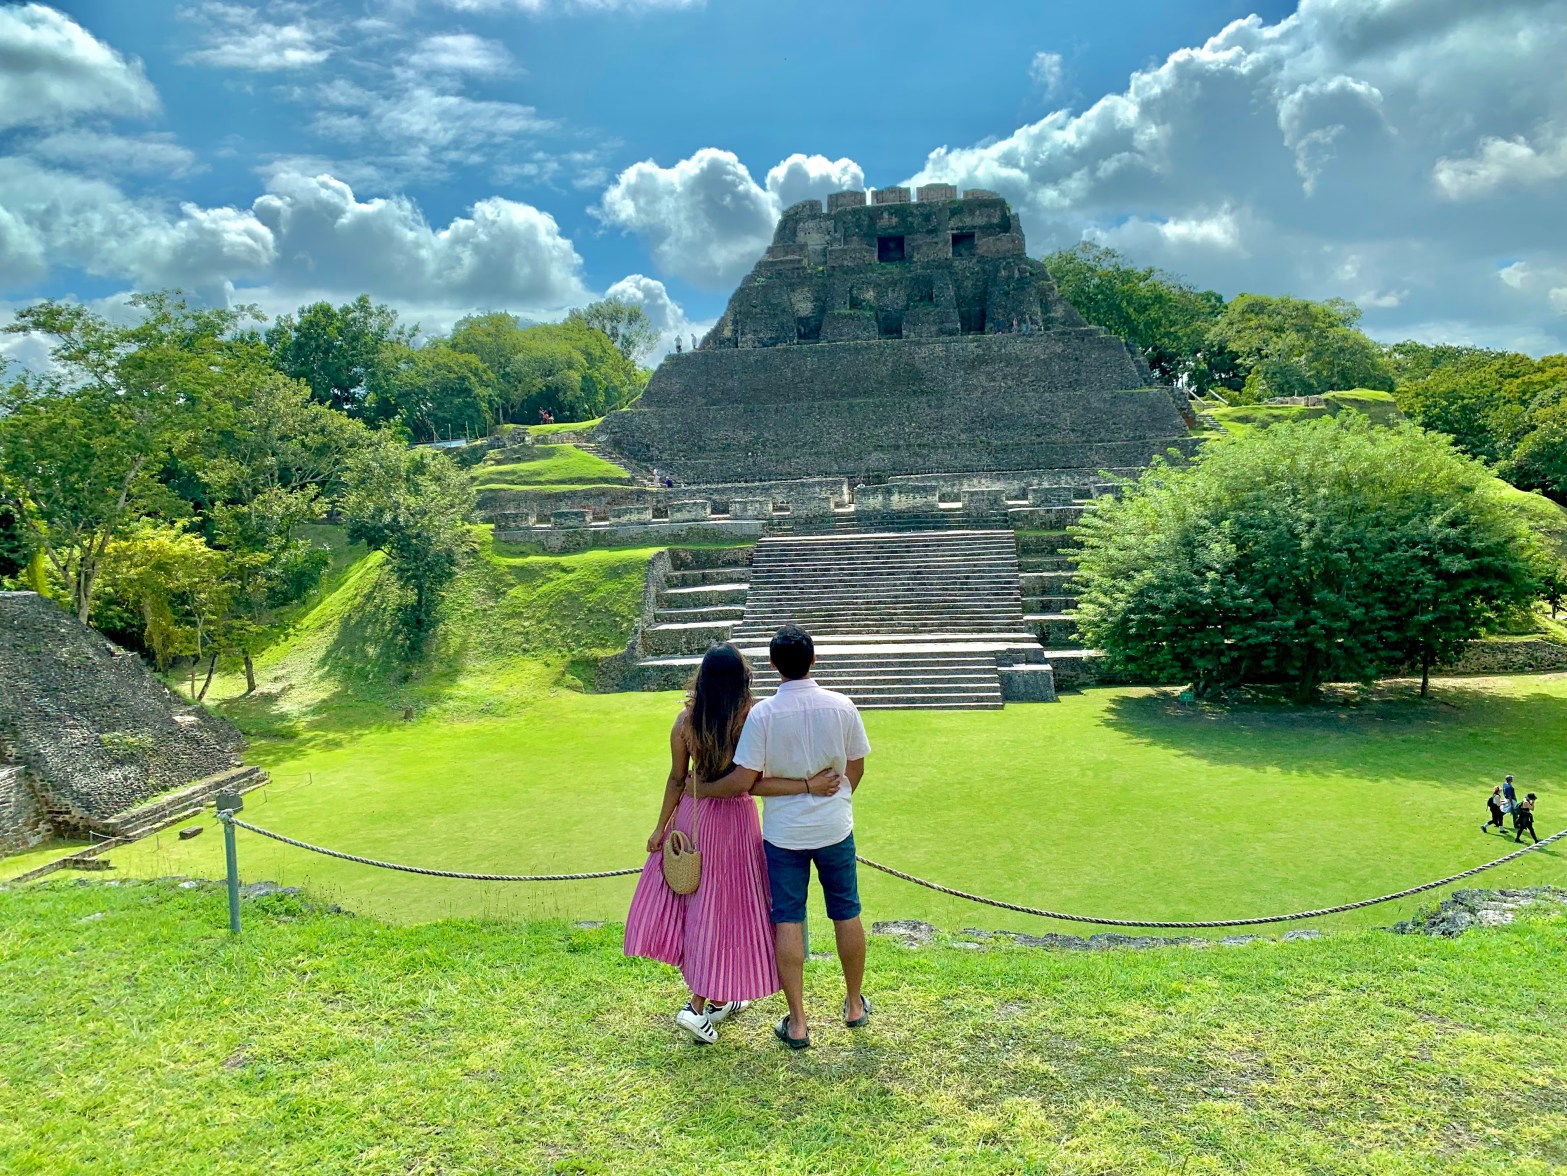
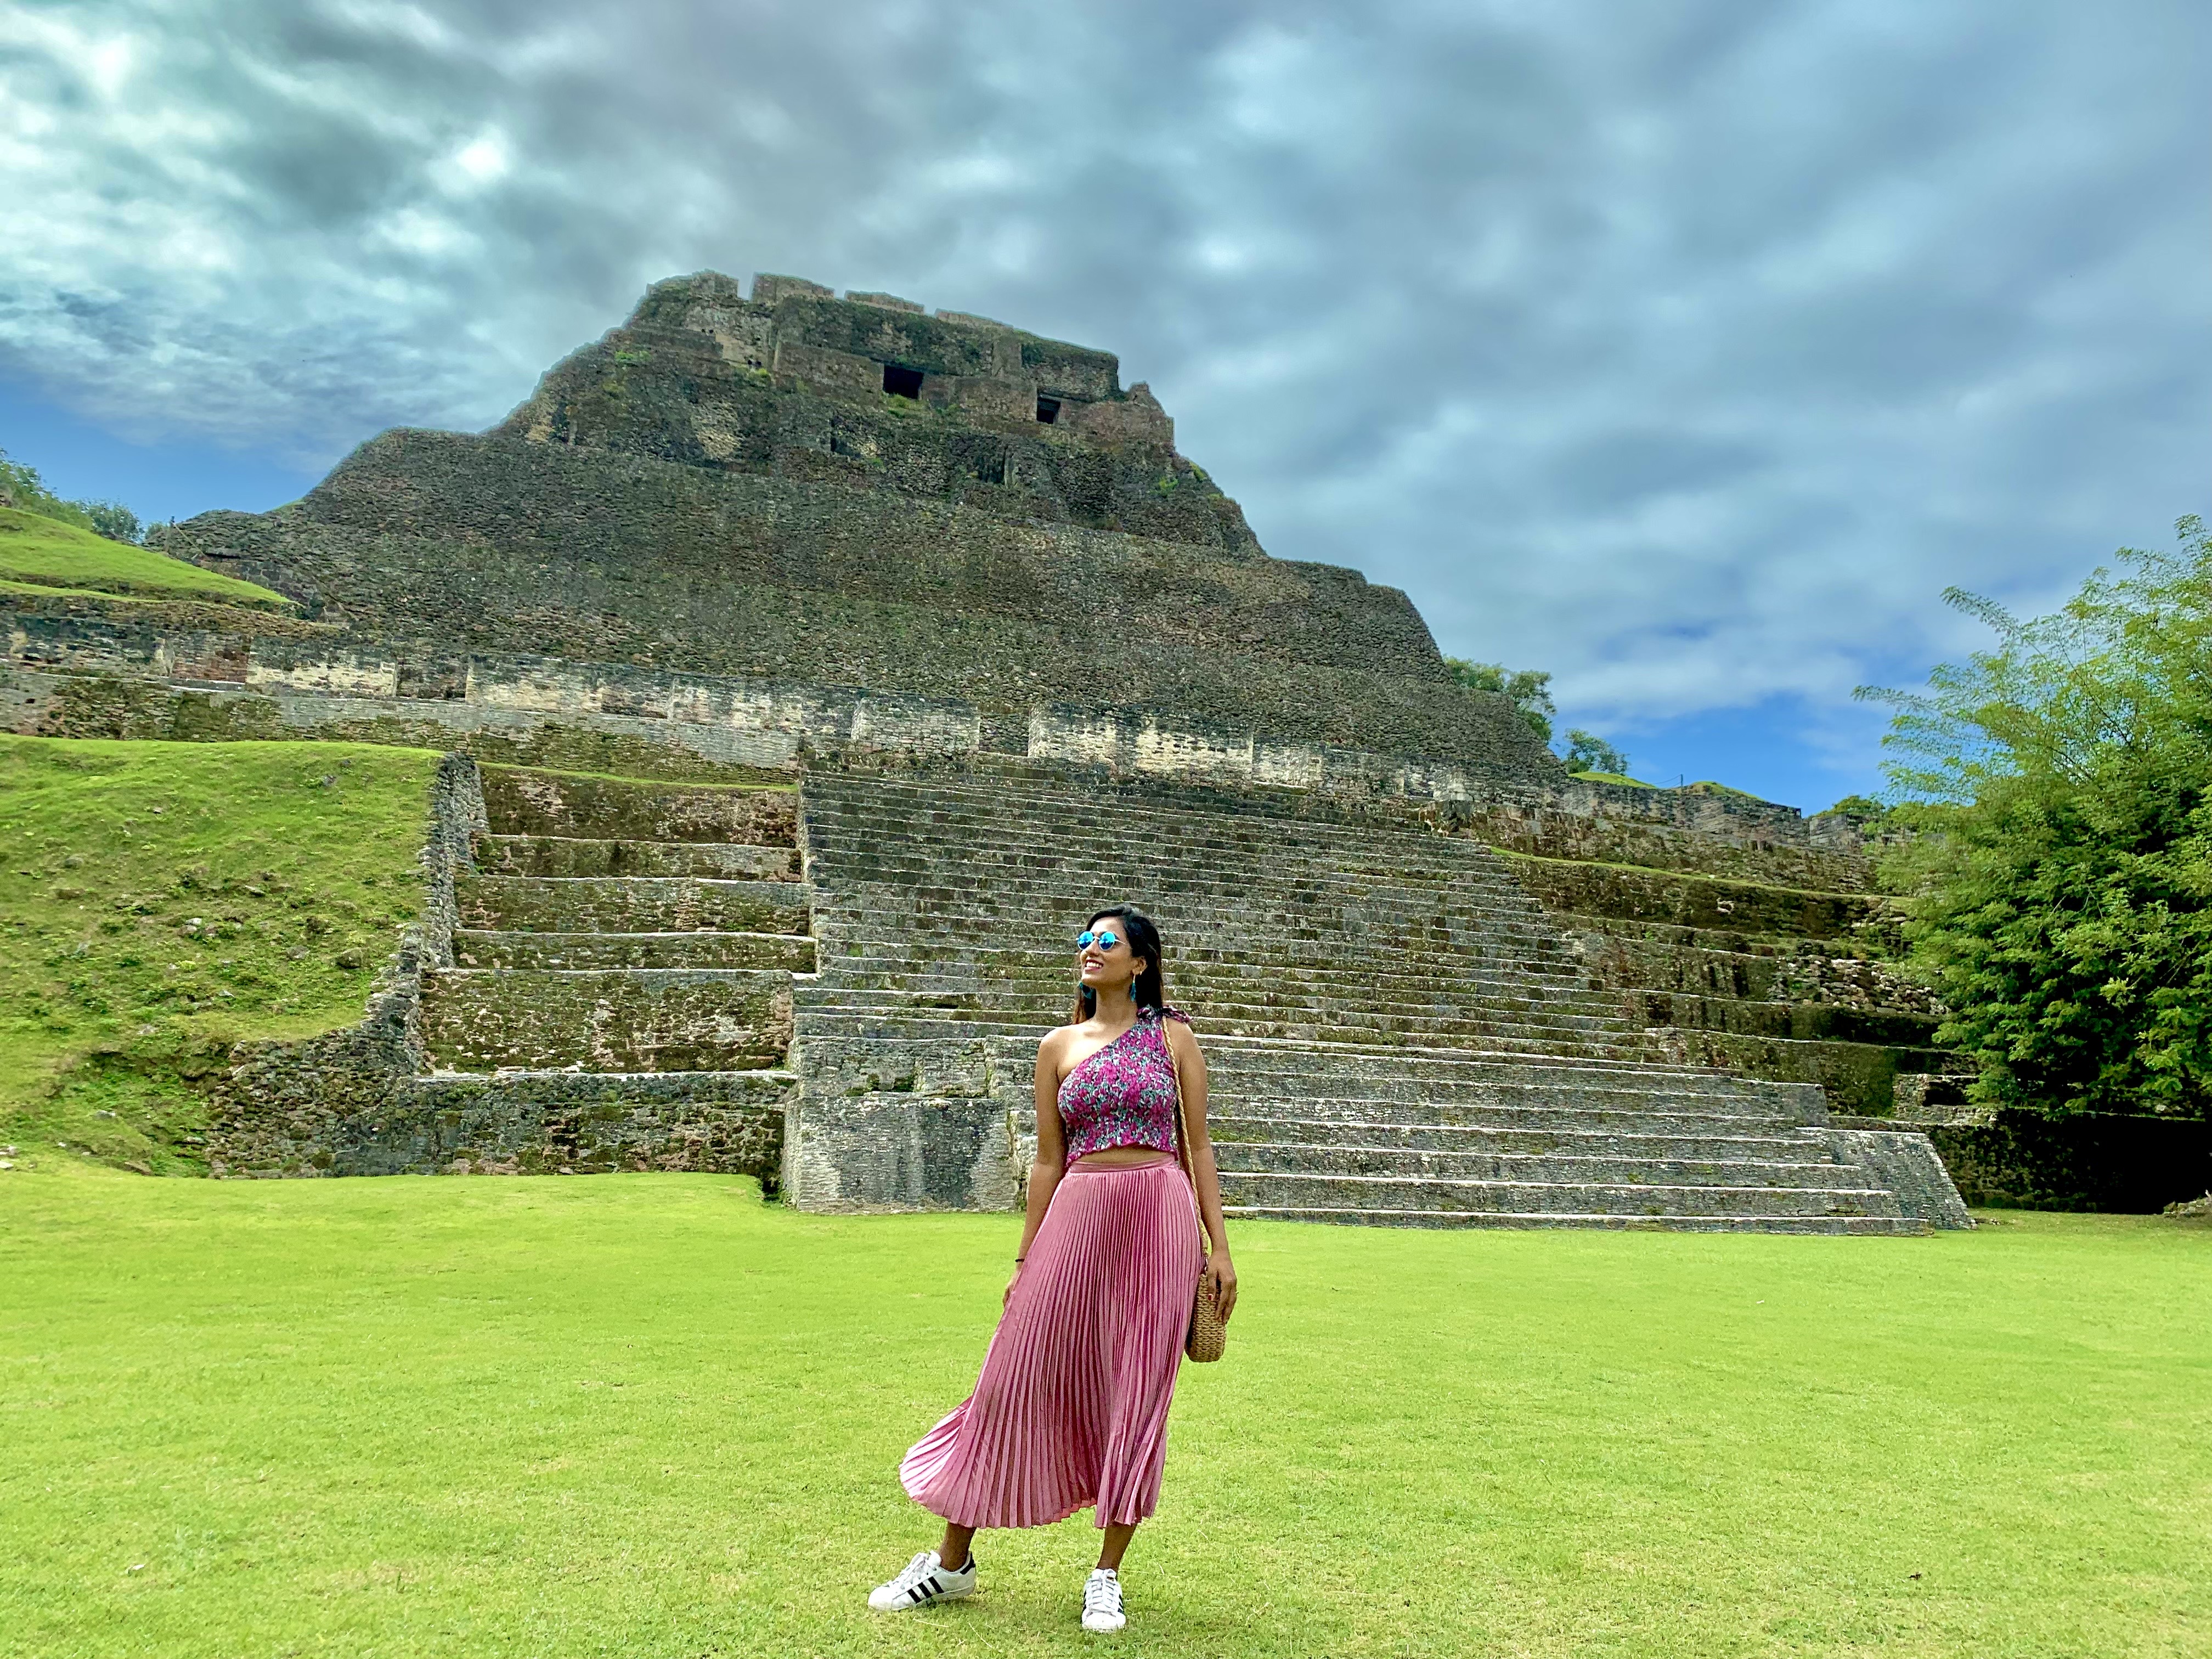
Day 7: Xunantunich Mayan Ruins & Cahal Pech Archaeological Reserve

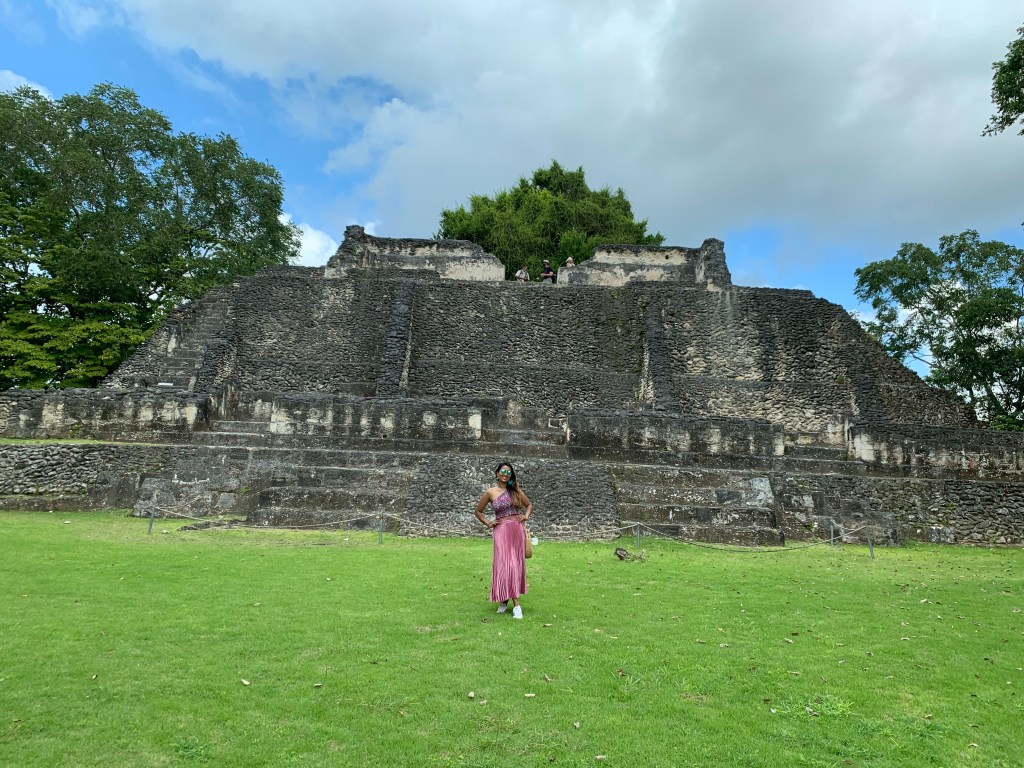
Went early morning to Xunantunich Ruins since this place gets filled with bus tours after 10AM. You have to get on a hand cranked ferry to cross the Mopen river to get to the ruins which was very interesting. I was told that since this place is at the border with Guatemala, this hand cranked ferry bridge is used to curb any illegal border crossing, trafficking, which is very frequent in the area. At night they disconnect the crank from the ferry bridge so the connection to the other side is completely cut off. Some preventive measures these guys have. Local guides are available at the ferry entrance for hiring. Please take one if you can afford. They live on that money and are badly hit due to covid.

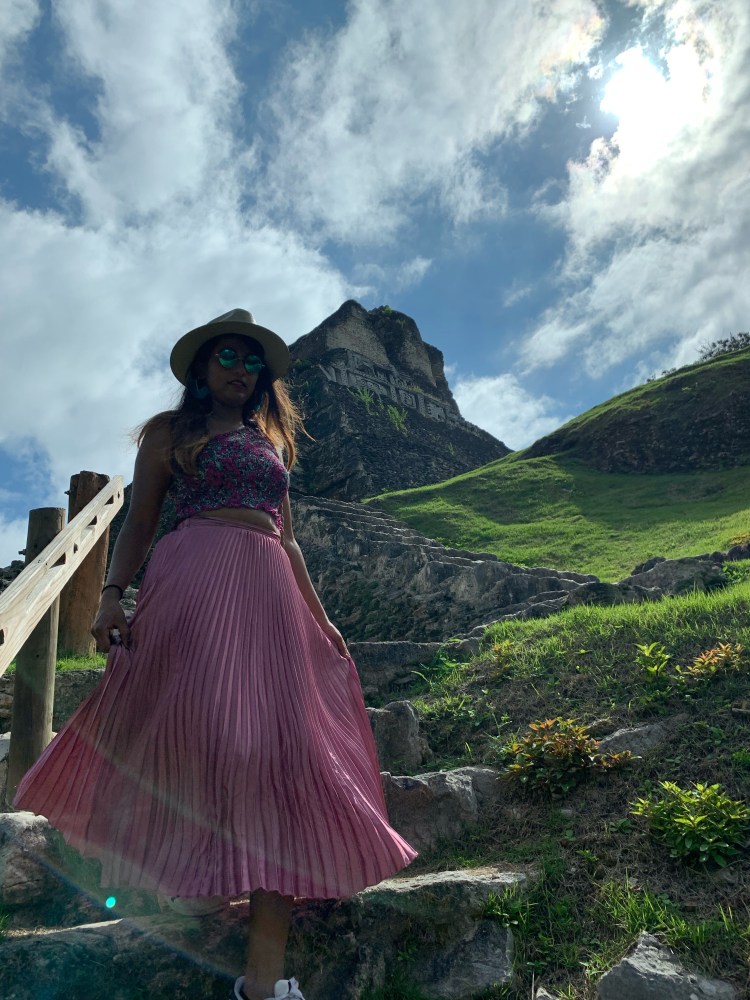
We spent our whole morning here, listening to many great stories, understanding Mayan culture from our guide and of course lots of photo ops. “Xunantunich” in mayan means “Stone Lady”. Legend has it that the neighboring villagers saw a mysterious lady at the top of the rock structure (now excavated to be the “El Castillo” – the main temple among the ruins) but disappeared when approached. Hence the name. We were allowed to climb the steep steps of the temple from where you can see Guatemala on the other side. The last part of the temple was also accessible before covid but now restricted since the rooms and isles are narrow.

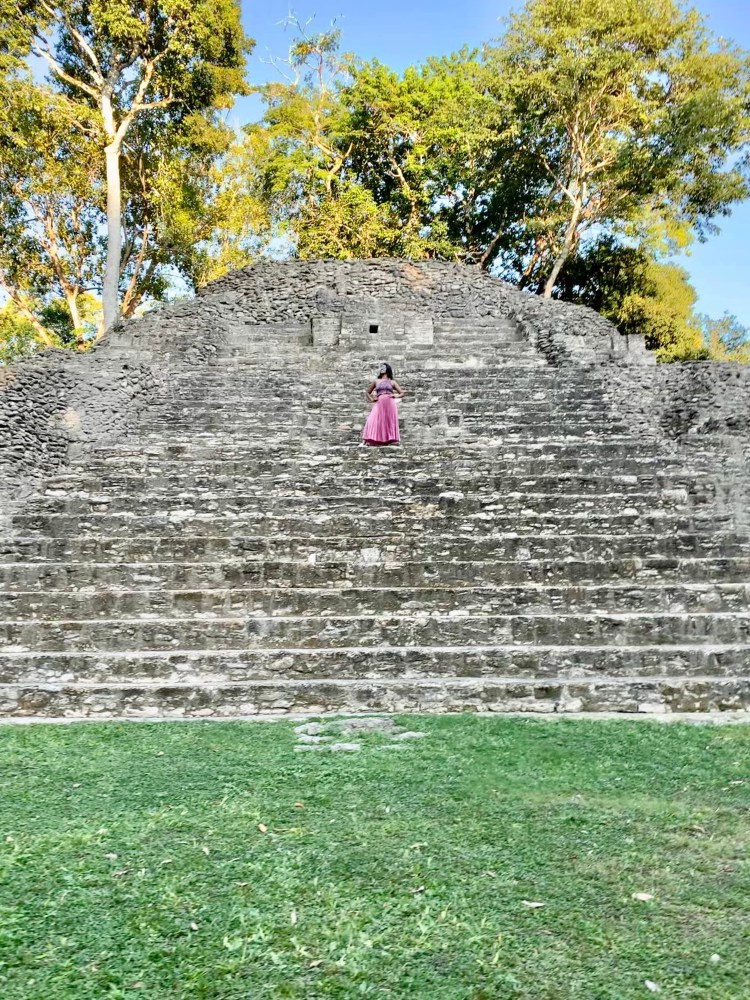
Afternoon we had lunch at close by Benny’s Kitchen on our guide’s suggestion, which was awesome. Later we drove back to the town and visited Cahal Pech Archaeological Reserve which is right beside the main area of the town. Much smaller in comparison to Xunantunich but still very pretty. For our last dinner we went to the most famous restaurant in the town, which was also right in front our our airbnb – The Guava Limb Restaurant & Café – more fine dining type setup with higher prices. Food was tasty though.

Day 8: Drive back to Belize City and Fly out.

That’s it folks! A small country with the biggest wealth of history, people, culture and nature. I highly recommend Belize to be your winter tropical destination. It is totally worth it!

Featured

7 Days Itinerary For The Great Smoky Mountains

Smokies was our pandemic road trip when people had just started moving around. Couple of us friends decided we should be able to explore the wilderness while being socially responsible and distancing from others and Smoky Mountains was the right spot for us. Last weeks of October is the best time to visit smokies for excellent fall foliage. As all of our group trips, this was also bound to be memorable and epic. Remote cabin space all to ourselves, work from home for first few days, barbeque, games, movies in the night and loads and loads of chitter-chatter.

There are lots to do in and around Smoky Mountains National Park based on how long you are planning to explore. We only did the NP since we had to work first half of the week and long drive from and back to Austin. But fall was at it’s peak so there were beautiful colors all around us which was an absolute visual treat and completely justified the 15hr drive. As I mentioned before, ours was a pandemic safe – Remote work friendly – Relax type of trip so we missed a lot of things due to safety and time constraints although we were at Smokies for a whole good week. Down below I am modifying our itinerary and providing a better plan than what we did.

Here is my suggested itinerary for The Great Smoky Mountains National Park.

Day 1: Drive/Fly to Gatlinburg

Reach destination and settle in. The best place to stay closest to park is in Gatlinburg. But, that comes with some disadvantages – huge crowds, expensive stays and best places get booked very quickly. As it was still peak covid (October 2020) we decided we wanted to stay away from all of that, even if it means driving a little extra every day. We booked a remote yet accessible cabin via Airbnb in Sevierville 20 minutes from Gatlinburg and we did not regret much. Pigeon Forge is another place to stay which is in between the two towns above; also funky – multiple dinner theatres and huge but weird looking buildings. You will know what I am talking about when you pass by, you won’t ignore the vibe. If not for covid, we would have done at least one of their dinner shows – they looked so fun! I would encourage if your time permits.

Day 2: Cades Cove

Missionary Baptist Church
Those Pretty horses on Cades Cove
Biking this loop was so nice
John P Cable Grist Mill

Started late morning since we arrived late previous night. Also lots of catching up so you will never leave out of the stay on time. We drove to Cades Cove after lunch on the way which was about an hour drive for us; will be more closer if you stay in Gatlinburg. You will need at least half day for Cades Cove so plan accordingly. On the way you will also pass Cataract Falls (hike details), Laurel Falls (hike details) and The Sinks . We skipped them since we were already late. Cades cove is a 11 miles one loop road via some of the most picturesque mountain backdrops of Smoky mountains. It was home to European settlers and still hosts some historic buildings along the way. You can explore it with your cars, hike or rent bicycles – (Note that all will use the same routes so it might get annoying at times for drivers, riders and hikers). Be prepared for frequent traffic jams caused by the special visit of the host animals. We rented bikes at the parking lot, at the entrance and started exploring few famous spots – John Oliver Cabin , Primitive Baptist Church and Cemetery , Cades Cove Missionary Baptist Church, John P Cable Grist Mill, Cades Cove Visitor Center, Tipton Place . There is also trailhead to Abrams Falls in the loop if you want to add a hike in between. Spent nice evening cycling along the loop and absorbing the beauty of the valley. Got back to Airbnb later for a fun games night.

Day 3: Alum Cave Trail to Mount LeConte

Alum Buff Cave
The trailhead
Up and Up we go
Myrtle Point

We always try to get on some hard hike during any National Park visit. Especially when it is the #1 hike in the park. Alum Cave Trail to Mount LeConte is one of the top hiking trails in the Great Smoky Mountains and rightly so. Hiking 11miles (out and back) with 2,896 ft elevation gain, not unreasonably difficult but yes you will burn lots of calories and the views keep changing as you ascend and will not disappoint. And then add fall colors to your entire trail – you can imagine the beauty around the hike. Start early to beat the crowd and to get a good parking spot. Parking lot is smaller and we had to park somewhere on the side of the road since we couldn’t reach there early. At 1.3 miles you will find the naturally formed arch and around at 2.5 miles you will get to Alum Buff Cave – this is the final point for many hikers and is the most crowded section of the trail. Past this point keep climbing Mt LeConte up to reach your summit. Primitive cabins style lodging is available at the peak of Mount LeConte, the end of this trail, but spots fill up very early so plan accordingly if you want to add stay here in your itinerary. I would imagine sunrise and sunsets would be fantastic at such altitude and view. Restrooms are located at this point too and a small coffee shop. We were so stocked with our accomplishment that we decided to hike a bit more further to Myrtle Point – a great view point to see the Great Smoky Mountains stretching far until your eyes can see. We had our lunch at this point and headed back down the trail – much much easier. Went back to our cabin for great barbeque night.

Day 4: Exploring Smokies on Car

Keep the day easy after a good hike the previous day. We just worked from home and covered some places in the evenings from this day on but I am putting out the places and itinerary we would have followed if we were not working. This could be the day to explore the beauty of Smokies from car (except for one steep but short hike).

Clingmans Dome
NewFound Gap

First stop: Newfound Gap – at the boarder of Tennessee and North Carolina this spot is usually crowded for those picture perfect Smoky mountains. The Appalachian trail – one of the longest continuous foot trail in the world runs through this spot. Next is Clingmans Dome – The Clingmans Dome Observation Tower Trail is a short (1.2miles) steady inclination hike that takes you to the highest point on Smoky mountains. Try to do this hike during sunrise or sunset for those spectacular panoramic 360 degree views. This is the most popular spot in the Smokies so can get crowded. All though the tower is open year round , the road leading to this place is closed seasonally (usually mid December to March), so check nps website before you plan your trip here. It is also 20 degree Fahrenheit cooler at this spot so bring a jacket even in summer.

If you have couple more hours for the day I would highly recommend driving down some parts of Blue Ridge Parkway – one of country’s best scenic drives. The parkway south end can be found around 30 minutes past New Found gap near Oconaluftee Visitor Center. Have heard rave reviews about the drive, especially during Fall season. Unfortunately we could not visit this one although it was part of itinerary due to heavy rains owing to Hurricane Zeta. The parkway is about 469 miles starting at southern end of Shenandoah National Park, Virginia down to reaching this South end at Smoky mountains. So you will not be able to cover all of it – just take as much beauty as you can. On your way back, if time permits take a de-tour to Mingo Falls (too many waterfalls in Smokies. Pick and choose) for a quick look at the beauty using 0.4miles access trail, before heading back to cabin for a chill evening. If you don’t want to drive to blue ridge parkway this could be a good day to explore Pigeon Forge in the evening – may be Hatfield & McCoy Dinner Show or any of the other dinner shows or simply stroll around this funky little town.

Day5: Chimney Tops Trail & Gatlinburg

Stairmaster but between nature
So foggy and cold up top!!

Another hard but relatively shorter hike – Chimney top trail trailhead is located here on NewFound gap road. Although AllTrails marks it as hard we found it intermediate than the other hike. Steady uphill with elevation gain of about 1500ft, this is a 4.1miles out and back trail and views get better and better as you go up – and did I not say its a stairs master trail. Unfortunately, due to wildfire damage back in 2016, the last quarter-mile from the Chimney Tops is closed – that’s the best part of this hike and what made it popular. There is an observation deck just before a gate appears which blocks entry to the last stretch. On a clear day you should be able to see the chimney tops from here, along with those beautiful smoky mountains. We did not get to see any view during this hike unfortunately, due to thick fog covering everything around. But we still thought it was a great hike! I hope the Chimney tops open soon, I would love to do this hike again, to see those beauties.

Spent the rest of the day exploring the town of Gatlinburg. The eateries, the chocolates, the breweries (Ole Smoky Moonshine was recommended – we have not been), or wine tasting (found some best fruit based wines).

Day 6: Gatlinburg

Skybridge from when of the most cloudy rainy day
Galinburg from scenic overlook on a rainy day

There are many things to do in Gatlinburg depending on your liking. There are skylifts, mountain coasters, adventure parks like Anakeesta and so on. So you can spend as much time as you want here. We did not do most of the activities due to social distancing concerns and also since we wanted more of the nature than town experience. The one thing that I would recommend you do is the Gatlinburg SkyLift Park. We wanted to do this but the place was so crowded that we didn’t think it was safe at that point so had to skip. Unfortunately we had planned this the last day of our trip so didn’t get any chance later. The park’s main attraction is the longest pedestrian suspension bridge in North America- called the skybridge – from top of which you can see the small buzzing town of Gatlinburg and the Smoky mountains in the backdrop. With 30$ all day ticket you get as many as you want skylift chair rides up to the top and access to the skybridge. A must do while in Gatlinburg. I would recommend buying ticket online and visiting this place early mornings or evenings.

Grotto Falls
Closer view of Grotto Falls

After lunch this could be a good time to drive the Roaring Fork Motor Nature Trail. Just beside the town of Gatlinburg, this 5.5-mile-long, one-way, loop road follows the mountain stream based of which the road is named. Similar to cades cove, this loop is used by cyclists, hikers and cars so can get little jammed at times. Lots of great trails on this loop so make sure you hike at least one. The most popular one in this area must be Rainbow Falls Trail – 5 miles strenuous hike to the named falls. We did not do this since we were shot on time. Instead we hiked the Grotto Falls Trail – a moderate/almost easy 2.6miles hike to a nice beautiful waterfall. Due to hurricane Zeta that has crossed by past days, all waterfalls were gushing and streams were in full flow. It was a treat to eyes to be in between all this beauty on a nice day of Fall . We again came back to the town for dinner and souvenir shopping. Oh, also don’t forget to visit Ole Smoky Candy Kitchen(they have two of them on same street) , their chocolate selections are amazing and reasonably priced! We went there every time we crossed the town!

As I have mentioned earlier, there are too many things to do in and around Gatlinburg. For summer, another fun activity to do is white water rafting offered by companies like Smoky Mountain River Rat, Rafting In the Smokies, NOC Gatlinburg. Although we planned for one, we didn’t get a chance due heavy rains spoiling a lot of our weekday plans. If you visit in summer , see if you can try to add this in your itinerary.

Day 7: Head back home

We drove back to Austin visiting Nashville and Memphis (stayed over night at Memphis and celebrated Halloween!!!) . It was a lot of driving but we sure had fun.

Featured

7 day itinerary to Big Island, Hawaii

Third time to Hawaii and this time to the Big Island – literal to its name. Post covid travel is as crazy as it sounds. After spending a crazy year dreading about the pandemic ,(Well we did travel in 2020 – to India , during onset of covid. Got stuck in India due to boarder closures for 4 months ) , when we got vaccinated by February we started making plans for our first flight post covid and guess what first came to our mind – Hawaii.

This trip was also made possible by Southwest as they offered 1+1 companion pass with their credit card. And we had to make use of the already cheaper flights to fly to paradise once again! Honestly Big Island needs lot more time than rest of the islands owing to its size but we tried to visit all the best things in a week and I thought we did good. In the end I will provide suggestions on other spots to goto if you have more time. Here is a week (7-days) itinerary to Big island, Hawaii.

Day 1: Fly Into Kona. Get to Airbnb and chill

There are two major airports in Big island. Kona (Ellison Onizuka Kona International Airport – KOA ) and Hilo (Hilo International Airport – ITO). I guess choose whatever is cheaper. For us with Southwest and Austin as start point, Kona worked cheaper. Since we were going to fly out from Kona, we planned to start exploring island from farther end. So after landing in Kona and picking the rental car, we started driving to Hilo (about 1.5hrs). It was late night when we reached our airbnb in Keaau (15mins south of Hilo) so we went straight to bed.

Note on car rental in Hawaii: Everytime we have been to Hawaii we always booked an intermediate car, nothing fancy. But have always been upgraded to a convertible (we had not even asked for it). Sometimes its just luck but I think its good to ask the rental agency when checking-in if they could offer an upgrade. Hawaiians are one of the most friendly people we have come across. They will do everything they can to make your trip memorable.

Day 2: Explore Hilo, Pahoa

ken’s House of Pancakes

Woke up to a beautiful morning well rested for week long excursions. Our breakfast is always at the Airbnb. we had picked up whatever stuffs we need last night from a Safeway in Hilo. First stop in Big Island – Kaimū Beach Park in Pahoa – new black sand beach created from the recent lava flows, cant swim, just a stop point – will need to walk on lava fields. Next in Pahoa Kehena Black Sand Beach – beautiful beach for taking a swim in the mornings but optional clothing. We did not go to this one 😀 , just some shots from far. Next stop Isaac Hale Park known for Pohoiki Black Sand Beach – we spent a good time here exploring the newest beach that was an after effect of 2018 lava flow. Not good for swimming or snorkeling as the waves are too rough. Afternoons can be extremely hot on the black sand. There are some thermal pools with good natural water for relaxing on a cool evening. We then headed to Hilo town making several stops because the route is beautiful at every corner! We had lunch at Ken’s House of Pancakes – contrary to the reviews we did not like the food, but I hear some of the pork and beef options are way better.

Boiling Pots
Rainbow Falls
Kaumana Caves
Liliuokalani Park and Gardens

Post lunch we visited Wailuku River State Park which is right beside Hilo town and home to some touristy spots in Hilo area. First stop – Rainbow falls , easy route, plenty parking – if you are lucky you will see rainbow over the falls on a sunny day – we did not. Next stop Boiling Pots overlook where you can see Pe‘epe‘e Falls and the boiling pots – these pots are lava created , spaced, nearly vertical columns which filled with river water eventually and when water rises in these pots, they become turbulent and appears to be boiling. Last stop in the state park was Kaumana Caves – bring torch to walk into 1881 lava-tube created by Mauna Loa. After this we went to Liliʻuokalani Park and Gardens for relaxing sunset views. This beautiful park in Hilo has many koi ponds, a Japanese garden and connects to tiny Coconut Island by a walkable bridge. Pretty impressive views. Most Hilo restaurants were closing early at night( as early as 7-8PM) . We picked up dinner from Tetsumen , a local Ramen place and headed to our airbnb.

Day 3: Explore North east of the Island

Waipio Valley , black sand beach and river flowing into ocean
Waipio Valley

We started early morning drive to Waipiʻo Valley – took about 1.5hrs from our airbnb in Keaau. I would say don’t do this point if you are not planning to hike/drive down into the valley. The lookout itself is pretty but nothing distinctive. Beauty is when you descend down to the beach. Hike is 4.5 miles out and back route with steep elevation drop(some places 40%) in the beginning. This route is used by both hikers and vehicles so could be bit annoying. Only 4×4(AWD) vehicles are allowed to drive down and into the muddy path later but we also saw some shuttle services. Ask and plan before going if you don’t plan to hike. Easy hike down but hard on legs coming back up but worth it. Wild horses, waterfalls to the ocean, plenty shade, Waipio river joining into the ocean, the Waipio valley view , black sand beach – all hit the right chords.

Tex Drive-In
Akaka Falls State Park
Akaka Falls

After an intense hike up we had lunch at Tex Drive-In close by – Don’t skip their malasadas – they are heavenly. We headed to Akaka Falls State Park after to look at the most touristy spot on this side of the Island. 5$ entry to the park and 10$ for parking! Park outside the gates for free – there is plenty of space. 0.4 mile loop trail to see the Falls – Bring a hat, it was hot and humid. Next stop was to Mauna Kea Summit but that needs 4×4 too. There are many tour companies that take you but we found them very expensive 200+$. We did drive up to Visitor center (now closed due to covid) where everyone is supposed to make a mandatory stop to get acclimated to higher altitude. The views from summit are said to be out of the world and start gazing is extraordinary at that elevation. Do plan appropriately if you want to have this in your itinerary. Also very very cold – so dress with layers.

If you are not interested in driving to summit then this could be a beach evening. There are many beautiful beaches around Hilo but they are more rockier and are better for a dip or snorkel then to just hang out by the shore. We visited Carlsmith Beach Park but didnt have swimsuits packed so could not take a dip but I bet it would be great in these spots. Another pretty beach close by is Richardson Ocean Park. Picked up dinner at Puka Puka Kitchen and headed to Airbnb.

Day 4: Hawaii Volcanoes National Park

Walking on the crater mouth
Kilauea Iki Trail
The crater view from rim
Lava Tube
Thai Curries at Tuk Tuk Food Truck

Headed to Volcanoes National Park about 45mins from Hilo. We started our exploration with most famous hike on the park – Kilauea Iki Trail and Crater Rim Trail – 3miles almost easy hike that takes you to middle of the crater. The landscape changes from rainforest around the rim to Mars like environment at the crater with steams still venting out from cracked floor. The earlier you start less crowded this will be. Also obviously no shade once you are in the crater so mornings would be wiser but still carry hat, water and sunscreen. We started from right side of the trail and came up from left , while also visiting Nāhuku – Thurston Lava Tube . Its partially lit so torch lights are not mandatory but would be useful. It was cool to be walking inside a tube made due to the lava flow! After the hike we had lunch at Tuk-Tuk Thai Food Truck in Volcano village close by – Their Avocado and pumpkin curries are delicious, must try. Spent the afternoon driving to many points in the NP to see the famous “world’s only drivable” volcano – Kīlauea. Points we covered were Sulphur Banks, Steam Vents, Kilauea Overlook. When we visited, Kīlauea Volcano was erupting at Halema‘uma‘u crater although there was no lava flow outside the caldera. The lava lake is so deep within that its not visible from any vantage points but during the night the glow of the lava lights up the sky. Road past Kilauea overlook were closed due to danger of poisonous gases and seismic activity.

Holei Sea Arch
Night glow of the volcano

We next headed on chain of craters road which is literally that. Lots of stops to make on the road to witness the multiple craters from eruptions dating from 60s. You drive from the main crater down to the sea where new land was created(Kalpana). It is lava fields all over. When you reach the sea level turn back to visualize lava flowing from the crater to the sea. It is surreal ! There are so many stops on the way on this 19mile road which ends at Hōlei Sea Arch – 90-foot arched rock formation in a volcanic cliff. We headed back to the Kilauea Overlook while enjoying sunset drive up the volcano. Now it was time to wait for the night glow of the lava. We could have picked up food until then but we didn’t – don’t do that mistake. Like I said most restaurants around these regions close very early, before sunset sometimes. The rangers suggested to wait until about an hour after sunset to see the glow and it was worth it. Gets pretty cold around this area so layer up and always keep umbrella or raincoats handy all through out the NP.

Day 5: Explore South part of the Island

Aloha Mix Food Truck – Sample plate
Punaluu Black Sand Beach
Green Sand Beach

It was time to checkout of our Hilo Airbnb and drive towards Kona. We planned to explore South region of the Island on the way. First stop Punaluʻu Black Sand Beach, the most famous one on Island – which is about 1.5hrs from Hilo. Clean rest/change rooms, lots of shade, sea turtles, lotus flowers on the backwaters. Black sand gets pretty heated up during midday so wear slippers, water shoes. We had lunch later at Aloha Mix Food Truck Cafe – sampler shrimp plate – lip-smacking ! Next we were onto Green Sand Beach – one of four such beaches in the world! This beach is almost at the tip of island and also the southernmost in United States. This remote beach can only be accessed by foot or a 4×4 with an experienced driver. Self driving on the route is not for everyone. Most people either hike or take one of the local trucks that pick you up like sheep in their car trunks (hold on to the bars for your lives – the drive is bumpy to say the least). The hike is 5.7 miles round trip and is not too difficult. We decided to hike up to the beach and took a lift from the local trucks on our way back – (20$ for two way or 10$ for one way trip, carry cash). Trail was not bad at all , breezy hike along the ocean but rocky most path so good shoes recommended. We rewarded ourselves with a dip in the ocean and it was great.

Southern most point of US
Umekes Fish Market

After heading back to the parking we changed and drove down a little further to the Southmost point of United States of America. Unlike KeyWest there is no landmark here, no tourists, only sound of waves and enormous cliffs. You will see locals catching fish and may be even some whales if you are lucky. We then started our drive to Kona which was about 1.5hours from there. After long rainy drive we rewarded ourselves with a nice dinner at Umekes Fish Market Bar & Grill.

Day 6: Island’s West Side

So pretty Yellow Tangs
Kealakekua Bay
Snorkel Ready
Shaka Tacoz
Magic Sands Beach

Started the day with hike to island’s best snorkeling spot – Kealakekua Bay. The hike is easy down but hard climb up, especially with the snorkeling gear. This bay is only accessible by a hike or boat/kayak tours so look at all options before you decide. Captain Cook Monument Trail , 4miles out-and-back ,that goes down to the monument on the bay shores is one of the popular hikes for adventure seekers so we decided to take it and we were not disappointed. Views change from covered to fully exposed with ocean views. Snorkeling was so much fun here – so many fishes with Yellow tangs dominating. Had great fun exploring the bay. After hiking back we had lunch at Shaka Tacoz few yards from parking lot. Must try. Headed to Airbnb to change and freshen up and relaxed rest of the afternoon at Magic Sands Beach – First white sand beach we encountered in days on this island. Later we went into Kona town for some ice-cream and souvenir shopping and got ourselves ready for night snorkel.

We have snorkeled with Manta rays in the wild before in Maldives. But Kona is world famous for their night snorkeling with these enormous creatures. There are many tour companies that offer this experience , we went with Sea Quest Hawaii. We didnt ride too far away from shores, the Manta’s just knew where they should be. You just hold on to light bars floating on the water with your head down and the Mantas come right to you – although they look intimidating they don’t want to feed on you but on the planktons that are feeding on the light. It was an amazing feeling to be able to see them up close. The light bars make the whole experience even more unreal. The crew was knowledgeable and patient and followed all covid protocols, with about 8 people on the boat. It was a fun night.

Day 7: Explore North West Beaches

Started driving to our farthest beach for today – Hāpuna Beach State Park which was about 50minutes from our Airbnb. Beautiful long stretch of white sand beach. Lots of parking, great facilities and life guards on duty. Spent good amount of time here. Then drove to Beach 69 (yeah its called that but for different reason) just adjacent to Hapuna beach. Mostly shaded with kiawe trees , perfect beach for mid day and great opportunity for snorkeling around. I heard the waves are much rough in the winter and the whole shore is covered with water. So this is mostly a summer beach. Next we picked some malasadas from Hot Malasadas Truck close by and headed towards ʻAnaehoʻomalu Beach after having lunch at Island Fish & Chips on the way. Next stop was Manini’owali Beach (Kua Bay) our personal favorite. Colors of water were different shades of blue here! Good beach with nice facilities. We changed to swim wear and hopped into the waters! As our tradition to end Hawaiian trip with beautiful sunset continues, final beach stop was Old Kona Airport State Recreation Area for sunset. As always it was spectacular. Ended the day and trip relaxing and enjoying breezy ambience and food at On the Rocks.

Day 8: Fly Back to Reality.

Airbnb in Kona

Some more notable spots:

  1. Pololū Valley Lookout : This was park of our Day 7, until we decided to skip it since it was too far to drive. I have heard this spot is more beautiful than Waipio Valley lookout. If you do plan to visit this, make sure you hike down the short trail.
  2. Kaunaʻoa (Mauna Kea) Beach – just above Hapuna beach.
  3. Spencer Beach Park : Much quieter I hear.
  4. Kahalu’u Beach : Close to Kona and best for snorkeling
  5. Two Step: Another great easily accessible snorkeling spot.
  6. Richardson Ocean Park: Nice beach for snorkeling on Hilo side.
  7. Hilo Farmers Market: Best for their produce and local find.
  8. Mauna Kea and Onizuka Center for International Astronomy Visitor Information Station for stargazing

Budget & Time Friendly Tips:

  • We never spend time or money on breakfasts. We usually pick grocery necessary for our trip on 1st/2nd day and eat breakfast at Airbnb/hotel. You need to make sure your place of stay has basic kitchenette to make this possible. A toaster, fridge are the minimal things we expect. Our breakfast is usually bread-peanut butter/nutella, scrambled eggs if there is stove and cookware and bananas. We also keep cereal bars/energy bars handy just incase we are hungry before lunch/dinner.
  • Local/regional grocery stores are way cheaper. In Big Island we found KTA grocery stores remarkably cheaper than Safeways.
  • Try to eat were locals do rather than tourists.
  • Book resort stays only if you know you are not going out to explore. Otherwise Airbnbs/VRBOs/Homeaways are your best hosts.

Big Island Points of Interest on Maps

The google maps list can be found here: BigIsland Points of Interest which includes spots for visiting and famous restaurants.

Featured

Oahu – The Paradise

After visiting Maui the winter of 2018 we were so in love with Hawaii that we wanted to explore the other islands. So when India trip of 2019 did not work out for winter and we had already visited the two countries we could travel with the visa restrictions that we had, it was an easy decision to make on where to go for 2019 shutdown week.

Oahu is so different than Maui. You have this concrete world of Honolulu, bustling with tourists, shopping malls and resorts all around but also the rest of the island still living a slower easy-going life with gigantic, absolutely awe-striking mountain landscapes and beaches that make you leave a part of your heart behind. We absolutely loved our 6 day trip in Oahu, Hawaii.

Here goes our itinerary for a 6-7 day trip to Oahu:

Day 1: Fly into HNL , explore close by Ala Moana Regional Park

View from our Airbnb.

Flying from Austin to Hawaii can be exhausting. We had about 9-10hour flight with few delays in between. Landed at Honolulu International Airport around 2PM, picked up our tour ride – a lovely red convertible beetle and headed to our Airbnb. Tip: Rental cars in Hawaii can be quite expensive. Compare rates at different websites. Although we usually go with Costco for their best rates for two drivers, we found that for Oahu, renting a economy sedan was costing the same as borrowing one from Turo (including the price of liability that is mandatory to be paid ).

Ramen Ono-Ya at Shirokiya Japan Village

We settled down in our wonderful Airbnb close to Ala Moana Center, Honolulu, with beautiful views of the beach and went out for a casual walk around Ala Moana Regional Park close by. After enjoying a wonderful sunset at the beach we headed to Shirokiya Japan Village Walk for dinner. We were amazed at the numerous food options available at this japanese food court. Most days they do have live music and the ambiance is easy-going. We headed to our Airbnb later for a good night sleep and get supercharged for the adventurous week.

Day 2: Diamond Head Crater Hike, Waikiki Beach, Pearl Harbor

Aimed to reach Diamond head summit before sunrise but previous day was so long that we could not get ourselves to be up on time. We started our hike around 7AM, right after sunrise so it was still pretty pleasant and less crowded.

View of Honolulu from summit
Some fact checks

Diamond Head Crater Hike: Try to do this hike before sunrise. Make sure you wear shoes and carry flashlights if climbing up in dark. The hike is a short, moderate 1.6 miles round trip. Allow around 2 hours for the hike, gazing views, taking pictures (while fighting against the numerous tourists). While you are at it, don’t miss going into one of the fire station control room with spiral stairs to get to the top (there is an alternate easier way but whats the point if can’t make it little adventurous ! ). Views are worth all that hiking – Honolulu city, the south shores, the crater , the lighthouse everything looks so wonderful.

Can you see the diamond head in the background?
Duke Paoa Kahanamoku Beach
Some Fact Checks

After hike we went down to Honolulu and relaxed at Waikiki beach – one of the most famous/iconic beaches in the world. The water is amazing and the location although bustling is still very calm. Diamond head crater views, light blue oceans, silky sands, surfers playing , palm trees all around – We get why this beach is so popular. While you are there you should also see the statue of Duke Paoa Kahanamoku – the father of International Surfing.

Reviews say it all!
Best Poke!

For lunch we went to Ono Seafood one of the best Poke places (for me) in the world!! Definitely try their Spicy Ahi. Seating area is limited so you might end up eating in your car but it is so worth it! If you still have some space , please try the malasadas (Portuguese donuts) at Leonard’s Bakery, you will thank me later!

The USS Arizona Memorial right above the submerged battleship
The recovered anchor of USS Arizona

We already had reservations for Pearl Harbor – USS Arizona Memorial tour for 3PM. There is a 60 day earlier window to reserve ticket for a specific day which starts at 7AM. If you miss that you can try to reserve a day before, starting 7AM and is first come first serve but free. So plan early for these tours. The tour takes about 75 minutes – there will be an introductory film explaining the events that took place on that unfortunate Sunday morning of December 7, 1941. After that a Navy operated boat will take you to the memorial built on top of the sunken USS Arizona.

The queue to get into Marukame
Delightful plates

We roamed around the museum for some more time and later came back to our stay, refreshed and headed for dinner at Marukame Udon Waikiki. The wait was exhausting but we had heard so much about the place that we had to try the famous Udon from Japan. After a satifstying dinner we headed to our stay for a early next morning.

Day 3: Lanikai PillBoxes, (Rain, Rain, Rain) Lanai Lookout, Halona Blowhole Lookout

It was Christmas! But the day was so gloomy and 90% chances of rain entire day and high wind advisory 😦

Lanikai Pillboxe Hike: We woke up early morning and convinced ourselves that the storm wont hit until we atleast hiked up to the Lanikai Pillboxes. We started our ascent before sunrise(use flashlights, the trail is a little steep in the beginning) and reached the first pillbox just around sunrise and it was beautiful. It was still gloomy, everything was indicating that storm was right around but it was still so good to be there. The water was so aqua blue despite bad lighting I could only imagine how it would be with great lights of the dawn. We enjoyed our ridge hike to the two pillboxes. We didn’t go up to the third since we knew weather was going to get bad soon. The hike is short but steep at points. Should take about 1-1.5hours. Good shoes are a must. Tip: Parking can be tricky since the trail head starts in between a nice neighborhood. Towing is enforced most places. So be very careful of where you are parking.

After the hike we wanted to visit the Lanikai beach which is few meters away but finding parking became impossible (we had parked at a non-parking area unknowingly but fortunately was not towed due to early hours). If you get a chance you should visit this beach – I hear its beautiful! It started pouring heavily around then so we lost hopes of doing anything else for the day , so headed to airbnb disappointed. For lunch we tried Duke’s Waikiki, which had a wait time of 2+hours but sure why not, we did not have anything else to do because of the rains 😦 We hung out at the Royal Hawaiian Center while our seat was available, checking out multiple fancy stores of the mall. The food at Duke’s was average for us compared to all the other restaurants we went to on our trip (also the most expensive and most rated).

Halona Blowhole Lookout
And it gushes out!

As the rain started subsiding around evening, we took a long drive to the lush green of Nuʻuanu Valley. We drove on the Nuuanu Pali Dr, engrossed all the hidden valley beauty around us. We wanted to drive to the Pali Lookout but the roads ahead were closed due to heavy rain damages. We drove back towards the southern shores driving along the ocean, making a stop at Lanai Lookout before finally enjoying sunset by the Halona Blowhole Lookout. Since it was Christmas most restaurants were closed (even iHOP! ) We had dinner at an Indian restaurants close to our airbnb called Bombay Palace. Food was average but better then the McDonalds beside it , so we were happy.

We managed to catch up with most of the missed places on the later days except for Waimanalo Beach. This is supposed to be one of the best beaches in Oahu so try to add this in your plan. The planned itinerary for this day was : Lanikai Pillboxes, Lanikai Beach, Waimānalo Beach Park, Makapu’u Tide Pools, Makapuʻu Lookout and finally Makapu‘u Point Lighthouse Trail. Basically cover south-east shores of Oahu.

Day 4: Koko Crater Railway Trailhead, Hanauma Bay, Makapu‘u Point Lighthouse Trail

Koko Crater Railway TrailHead morning:

Crazy railroad stairs!
Going up at sunrise!

We started another sunrise hike to the Koko crater head before sunrise. The gates to park open at 7AM, but we saw hikers up the summit already, so you can start earlier to catch sunrise at the top if you uber to the place I guess, which we didnt know. The hike is a total stairs-master challenge. The climb is about 1000+ not maintained, irregular, steep railway stairs to the summit, about 1.8miles round trip and is considered hard but so worth it. It was fun to see kids enjoying and racing to the top and inspiring to see elderly acing the challenge better than us. You get a spectacular view of the south and east shores of Oahu and view of the Hanauma bay and crater too.

Afternoon at Hanauma Bay :

Hanauma bay vibes…
Snorkeling around !

Took us about 2 hours to the top and back, after spending good amount of time to get aerial shots of the area. There was so much to capture. After that we picked up our hats, bathing suits and snorkel kit and walked to the Hanauma Bay entrance which is right across from the Koko crater parking lot. Hanauma bay parking lot is very limited and they fill up right when they open at 7AM. If you are planning to visit this place atleast during the AM, its very difficult to find a spot. So people either take uber or few of them like us, leave the car at already found spot in Koko crater parking lot and take some extra steps to reach the bay but atleast no hazzle ! There is an entry fee of 7$ at the entrance of the bay and shuttles operate to drop you up or down from the entrance to the bay. While you are enjoying the bay please be mindful to not hurt the marine life in anyways. It has been said that the life here is dwindling owing to excessive tourism which is very saddening. We spent good amount of time here snorkeling along the reefs and finding so many variety of colorful fishes. Snorkel kit and fins are available for rental here, but no lifejackets – so if you are not a confident snorkeler get a life vest from outside. Also, there is only a snack bar here – no full fledged restaurant.

Evening at Makapu’u Point Lighthouse:

Mango Cheese pie

We had a late lunch at a restaurant on our way to Makapu‘u Point Lighthouse. This is another great family hike which was the most easy of all the hikes we did in Oahu. About 2 miles round trip but so many changing views. The trail is uphill but steady and is completely paved( so strollers will go easily although might be bit slow uphill). You can see the Koko head at the beginning and then face the lighthouse and the deep blue oceans on another side of the hill while you hike. There are many viewing spots with binoculars setup as this is one of the best places to watch whales. We spotted couple of them while we were there too.

The trail to the lighthouse itself is closed now but you get a good view of it along with the east shores of Oahu from the summit. The sun almost set when we reached summit and it started pouring while we were coming down. We enjoyed the rain while remembering how happy drenching in rain used to be in our childhood.

We did not plan the second hike this day since we wanted to keep it light and easy to prepare for the intense 10miles hike planned for next day. But since day 3 did not go as planned we had to do this hike if we had to see what it was about and I am glad we did. Makapu‘u Point Lighthouse trail was simple and beautiful. We had dinner at Diamond Head Market & Grill. Don’t forget to pick up some scones on your way out from the market. They are the best!

Day 5: Legal way to Stairway to Heaven (Moanalua Valley Trail Start (Kulana’ahane))

It was my bucket list to see the Haʻikū Stairs from the top and I was very disappointed that they have declared climbing these stairs illegal. There 3,922 not maintained steps of this steep, one of a kind stairs (built in 1942, repaired some of it in 2003), has caused a lot of deaths ,emergency causes and an annoyance to the neighborhood has led it to be declared illegal and there have been many cases with people getting citations and arrested while attempting to climb them. So we decided to take the back route – a long, hard and exhausting 10.3miles round trip hike to see them. The day started cloudy with a good chances of rain but we were hoping that it could get better as we climb up and away from our airbnb.

Happy Hiker in the beginning

The gates to the parking lot is open from 7AM to 7PM. The first 2 miles of the hike is pretty straightforward and flat with lots of creeks and beautiful green flora of the Moanalua Valley. At around 2.5 miles from start you will see a small trail head mark to your left for Kulana’ahane. That’s were the ridge hike and elevation gain starts. You start crossing these narrow ridges with steep valleys on either side and then use ropes to climb up the mountains every once in a while. On a normal day I would say it would have been manageable. But it had started raining and the winds were harsh. The ropes to climb were so muddy and slippery and the trail itself was too slimy and not suitable to climb. As we went to higher elevation the winds started getting so much stronger that crossing the barren ridges became too risky. We were 0.3 miles to reach the stairs but we made a painful decision to head back down since we knew we would not have the time to reach back to our car before 7PM if we kept on going. It was also because we were scared the condition could go worse anytime and we wanted to be at a safer location while it does. It was also because there was absolutely no view since it was too foggy to see each other a little far apart as well.

Before
After

It was a grueling climb down but we did make it right on time to the parking lot where we could change clothes(restrooms available) and headed to our second airbnb in the north eastern shore. We had dinner at North Shore Tacos walking distance from our Airbnb.

Day 6: Dolphin Excursions, Nu‘uanu Pali Lookout, Ho’omaluhia Botanical Garden, Kualoa Regional Park

Swimming around Dolphins: Dolphin Excursions Hawaii

Dolphin excursion was a late decision, hence we had to drive 1.5 hours towards opposite side of the island to reach them. We wanted to keep this day lighter, after our previous full day hike, but we could not bring ourselves to not do what our heart wants! We were really exhausted but equally excited to swim with Dolphins. We had picked Dolphin Excursions Hawaii after their raving reviews and we were not disappointed. We were a group of 20 on the boat. We saw a pod of spinner dolphins within 10-15mins of offshore, we waited to see if they would be fine joining them for a swim. When we realized they didn’t mind us hanging around, we hopped out of the boats in a domino style to observe them in their habitat free and wild. Absolutely loved them!

Our excursion also included whale watching – we saw couple of them and it was so special. Finally we were taken to another spot to swim with sea turtles. Saw couple of them along with good variety of fishes and we even saw sting ray! It was a great 3 hour excursion and the crew was so disciplined and fun! They provided a lot of info about all these amazing creatures throughout the trip. We were very glad to have decided to add this to our itinerary! Our Oahu Dolphin Excursion package for 140$ included Waikiki pickup (10% off if no pick up needed), complimentary lunch after the excursion and touring around the West coast for Spinner dolphins, humpback whales, sea turtles and beautiful tropical fishes.

Pali Lookout!
Thats the Kualoa Ranch in front with some Jurassic Park movie spots

After lunch we drove to Nu‘uanu Pali Lookout that we missed due to rains few days back. And then headed to Ho’omaluhia Botanical Garden where I was very eager to go for the picturesque surroundings. However, due to heavy rains from previous days, the garden was closed which was very disappointing! If you guys are around the area please drive or stroll around this beautiful park. Its iconic Oahu picture park with towering mountains, greenery all around and a nice curvy road leading to no where.

Chinaman’s hat island.
Papa Ole’s garlic shrimp and chicken!

We then drove to Kualoa Regional Park to see the Chinaman’s hat island and to chill until the sun came down. If you were here for longer, you could rent some paddle-boards or use kayak to reach the tiny little island.

After sunset we headed home, took a nice shower and went to dinner at Papa Ole’s Kitchen, a highly rated local favorite restaurants walking distance from our airbnb.

Day 7: Swim with Sharks, Aloha Stadium Swap Meet, Kailua Beach Park, The Byodo-In Temple, Sunset Beach Park

Sharks Adventure – North Shore Shark Adventures:

Our Ride and our Cage

This was our last day in Oahu and there were so many places still to be visited. Due to some bad weather a lot of things did not work as we had planned in our itinerary, but we knew it was a pretty good day since we were going to swim with sharks! We had reserved our excursion with North Shore Shark Adventures. Tip: Book the earliest slot since the waters are too choppy and your whole experience could be worse with sea sickness. It was about 30mins from our airbnb. We started before sunrise for our 7AM tour, driving along the beautiful north shores. While booking, we had two options – go on a cage swim or snorkel/free-dive in the wild( One Ocean Diving) . After some research we decided to go for the cage since the chances of seeing the sharks was almost 99% guaranteed and they do get pretty close to you. Although we did not go with One Ocean diving, from our experience it feels like snorkeling, free diving with this amazing creatures in the wild would also be a great and adventurous experience that I want to try when we go back to Oahu again. (For the stairs 😛 ) .

So how do these cage tour companies guaranty that sharks will be at the location? They use spots where crabbing is common and where sharks come to eat the bait (free food, who does not want it) . It has been said that these sharks are accustomed to the sound of diesel engine and treat them as signals for finding food. That is why these tour companies use diesel engine boats to lure these sharks from deep under ocean to the surface for our amusements.

Sharks under my legs

They put you in the cage, in groups of max 6 I think and eat group gets about 20mins of time in cage. If you are prone to sea sickness, take precautions since the cage tied to the boat makes the whole sea sickness worse. The waters get choppy as the day goes by , so the first ones to dive into the cage have better experience than the last group. Over all it was a great 20minutes. The whole tour took about 1.5 hours and we were on shores by 8:30AM. There were no tour restrooms and you have to use the public restrooms so be prepared for that. For the amount of money you pay I did expect a decent changeroom/restroom! The tour costed us about 120$ (right now I see 20% discount going on ).

Support Local!

After that we headed down to the Aloha Stadium Swap Meet for souvenir shopping. This is Hawaii’s biggest flea market which is only open on Wednesdays, Saturdays and Sundays. We bought some great local hand crafts for a good price here, much cheaper than in Honolulu.

Boots & Kimo’s Macadamia nut pancakes ! Yummm
Sunny afternoon at Kailua Beach

After this we drove towards Kailua Beach adjacent to Lanikai Beach (we missed it due to bad weather after our pillbox hike).  We had lunch at Boots & Kimo’s Homestyle Kitchen before heading to the beach. Expect some wait but dont miss the Macadamia nut pancakes! After spending our afternoon at the beach which was pretty yet crowded but had a great restroom system, we headed to The Byodo-In Temple ( we crossed it everyday on our way to north shore airbnb, but always reached late so we had to make it today).

There is an entrance fee of 7$ for the temple which was built to commemorate the 100 year anniversary of the first Japanese immigrants to Hawaii. It is a replica of United Nations World Heritage Site by the same name in Uji, Japan. This temple is in the heart of the Valley of the Temples, a memorial park where thousands of Buddhist, Shinto, Protestant and Catholic residents of Hawaii are buried.

Best way to end a trip – with the most blazing sunset

We had so many more places pending on our list – most importantly the north shore beaches. But it was 2 hours to sunset and an hour drive to north shore. So had to decide one place to enjoy our last evening in Oahu. We drove down to Sunset Beach , the enjoyed one of the most dramatic sunsets during our time in Oahu. We enjoyed the surfers playing with those huge pipelines, those were one of the highest waves I have seen. Surfing seems so much fun. Need to try some day(once I fully learn swimming ofcourse! )

We did not want the day to end. As the sunset, we sat there taking it all in, the most adventurous trip of the year, hating the fact that we were flying away from this paradise tomorrow.

Day 8: Fly back Home.

As we headed out. we witnessed a beautiful , bright sunrise on our way to airport, it felt like God cheated with us. We woke up everyday seeking such amazing weather which did not almost happen but today – today seemed like its going to be a great day, making it even more difficult to leave. We almost thought about postponing our flight to a day later (To leave after spending new years ), but convinced ourselves it was a crazy idea. (Not so comfortable with improptu plans) . We have promised each other to be back here again and visit the remaining saved places on our google map.

If you are not into full day hikes, may be you could cover some of the other places we could not make it on Oahu. Here are the notable ones:

  • Shark’s Cove: I hear this is a great place for snorkeling on north shore.
  • Waimea Bay Beach Park: Another surfing beach on north shore (more touristy)
  • Banzai Pipeline : Wonderland for surfers. One of the heaviest and most perfect waves in existence during winters. 2020 Volcom Pipe Pro – World Surf League happens here. Summers – its just a regular beach.
  • Kahana Bay Beach Park: A nice secluded beach with campsites – we crossed it so many times but could not stop for a view.
  • Waimānalo Beach Park: This was on our itinerary but could not go because of bad weather.
  • Tantalus Lookout – Puu Ualakaa State Park: You can see Waikiki skyline and the Diamond head crater from here.

There are two major touristy things that I have intentionally left out from this itinerary. The below two spots are rated the best by most travel company websites and I reckon that might be the case. But it was not inclining to the agenda we had for the trip. We wanted to experience more local – explore and experience the true essence of Hawai’i. Also these tours are not cheap and for us they did not seem to justify for the experience we would have. We will rather spend those couple of 100 dollar bills on other adventures.

  1. Polynesian Cultural Center: Almost everyone who comes to Oahu the first time makes it mandatory to add this in their plan. We found this place too touristy and did not feel like it would provide us what we were looking for – a true experience of what Hawai’i and people of Hawai’i are. So we decided to give this a miss. No offense to people who go there. We were attracted to it too. But we had done an authentic Luau at Old Lahaina Maui , our previous visit, and had a great time. From the reviews and our research it looked like this one is more commercial and not as authentic.
  2. Kualoa Ranch: A private nature preserve , active movie location and a tourist attraction providing different eco tours based on your liking. It seemed too commercial and the various packages provided kind of did not go with what we wanted to do with the time we had on the island. Note as part of the tour you could kayak to the Chinaman’s hat – but you can do that without any third party too, since the attached Kualoa Beach park is public.

Over all we had a blast in Oahu and now when people ask me whats my favourite island of Hawaii. I am completely torn between Maui and Oahu. They both have different vibes. I cant pick one better than the other. From these two trips one thing however has become evident. We are in love with Hawai’i and cant wait to be back to explore island of Kauai.

Featured

Aloha Maui

Hawaii is a bucket list destination for almost every person in this world. Before we visited, we were under the impression that it was overrated and over hyped; that it was too touristy and commercialized, visiting it would leave us disappointed…. Boy!!! Were we proven wrong and how! Although we have not been to all the islands of Hawaii, from the experience and wonderful time we spent on Maui, all my misconceptions about this place have been replaced with so much love and appreciation- I will cherish the experience for lifetime.

For our first wedding anniversary we had plans to visit Mexico during thanksgiving 2018, but due to Athreya’s visa travel regulations we had to cancel our plan last minute. The only exotic place I could think of in US to celebrate our special occasion seemed like Hawaii, although we were not too excited about it since a lot of people had expressed their disappointment on how touristy and overpriced the place was. After our wonderful honeymoon in Maldives we had an impression nothing can beat that. (Still can’t – but both are different experiences) .

While booking flights we noticed that prices for November (even during thanksgiving), were way too cheaper than December holidays. So this could be a great time to visit if your budget is low. Here is another Thanksgiving/Christmas/year-end holidays itinerary of Maui, Hawaii –

Day 1: Fly into OGG ( Kahului Airport )

Our HomeAway balcony views
Sunset Views

After landing around 2PM, we picked up our rental car and headed for our first Hawaiian lunch at Poi By The Pound. It was very different but nice. Recommend this place. After lunch we headed to our HomeAway stay at Maalaea. We chose this area for our week long stay since it was almost mid point to most places we wanted to visit on the island. Also, we wanted to stay away from the most touristy spots like Lahaina and Wailea (thats where all resorts are located). Tip: Stay in airbnb/homeaway/VRBO stays rather than resorts if you are more into exploring than relaxing. We settled in, took a good shower and then headed out for sunset views and early dinner. We just stopped at a beach close to our HomeAway to soak in our first Hawaiian sunset – it was serene and calm. Since it was thanksgiving that day we could not find many open restaurants. We had our dinner at Ohana Seafood Bar & Grill which was very average.

Day 2: Haleakala Sunrise – Kaanapali beach (Black Rock) Sunset

Happiness

Since you are already jet lagged you do tend to wake up early in Hawaii. (4hours difference to C.S.T) To take advantage of this, we planned most of our early morning plans towards the beginning of the trip. To see Haleakala crater sunrise, we started around 4AM from our HomeAway (its about 1.5hours from Maalaea) , since it gets crowded soon. You will need permit(fee $1) to visit this place for sunrise which you can book in advance from here. Tip: It gets really cold once you are at the summit so please layer up. Reserve a spot at the view point and wait for the most dramatic sunrise ! There are many trails you can take- we did the Pā Ka’oao Trail and just went till the first overlook of Keonehe’ehe’e. If you want something different, then take one of the tours where they drop you up the summit for sunrise and then provide bikes to ride down the summit.

Can get used to this view at Kaanapali Black Rock Beach
Coconut’s Fish Cafe: The Tacos were amazing!

After sunrise we went back to our stay, freshened up and headed for lunch at Star Noodles. It is a great place but might have to wait for sometime. We later headed to Kaanapali Beach, one of the touristy beaches of Maui. Parking can be tricky here. Tip: Park at Whalers Village mall which has paid parking – but if you buy something at one of the shops or have dinner in any of the restaurants in the complex, you can get it validated. Although the beach covers a huge stretch , we walked to the Black Rock towards the north side of the beach where you can snorkel and cliff dive. If you are here wait till sunset to see Hawaiian sunset rituals with fire and drums while soaking in the last rays of sun for the day. We came back to our stay, took bath and then went for diner at Coconut’s Fish Cafe – Love love love their fish tacos.

Day 3: Molokini Crater Snorkeling and Nakalele Blowhole

Off to Molokini Crater!
Naturally Formed Heart !

Morning, we spent snorkeling at world famous Molokini Crater ( an extinct volcanic crater with thriving coral reef, home to more than 250 fish species ) and Turtle arches. We took the tour by Pacific Whale Foundation (just beside our HomeAway) who were professional and educational. After great hours over water we came back home and had lunch somewhere local( I don’t remember now!) In the evening we went to see the Nakalele Blowhole and Heart Shaped Rock. Tip: Wear good footwear since you will have to do a short but tricky hike to see them both. You can also visit Honolua Bay which is on the way if you have time. After sunset we spent sometime at one of the Lahaina Malls looking for souvenirs and had a quick dinner there.

Our boat for our excursion

My opinion on Snorkeling with Pacific Whale Foundation: The tour costs about 125$ per person which is honestly pricey but again, you are in Hawaii so that is a normal price for such activities. They are non-profit, staff were knowledgeable and provided an informational presentation on conservation of oceans. Waters at Molokini were crystal clear although we didn’t see as many fishes as we did in Maldives – for which our tour guide had a good explanation , which was valid. If you are looking for snorkeling experience then I highly recommend them.

Day 4: Road to Hana

One lookout point in Garden Of Eden
Entering Hana

We were contemplating whether to take bus tour or drive by our self on the road to Hana since during my research a lot of them had mentioned that the routes are very narrow and drive can be stressful. In the end Athreya convinced me to take rental car and I am glad we did that. Yes, the road is curvy with many one lane bridges, but it is also beautiful and fun to drive around. I would advice to start early – plan such that you start the stretch from Ho’okipa Beach Park (where road to Hana starts ) just after sunrise. Note: One disadvantage with taking rental cars on this road- it is not permitted to drive on the backside of road to Hana – around Kipahulu region where the roads are unpaved. Most rental companies warn you about it when you get your car. Now, nobody can stop you from using those roads but it is risky since not much help will be available in that area. However, tour buses do take this route . Most drivers visiting road to Hana drive out and back the roads or stay at Hana and return the next day. Also, we would advise against driving after dark since roads get more tricky at night.

First stop Garden of Eden – there is an entry fee to this Arboretum. It was an average experience for us- we would have skipped this one if had known better. After this we drove straight towards our end point the Hamoa Beach so we can trackback and see more places on our way back. We did stop at random places along the way for views, so we spent a lot more time than anticipated on the road. But hey that’s what road to Hana is all about – its the journey not the destination. We wanted to go till the Pipiwai Trail and ‘Ohe’o Gulch but we could not start as early as we had planned so we had to make Hamoa our farthest stop. We relaxed at Hamoa Beach and then went back to Hana for some local lunch. From there we came back to Waianapanapa State Park, one of my favorite spots on this road trip. Black sand beach at this park was so surreal. We hiked the coastal path enjoying the black sand, lava rocks and blue ocean. Tip:Don’t forget to notice the Sea Cave and Sea Arch while you are there. It was about an hour for sunset so we decided to head back. We had dinner at Paia Fish Market – food was amazing, a must try.

We missed a lot of planned spots on road to Hana. Like I said, you need to start early to fully explore this wonderful region of Maui. Some of the other spots that are worth visiting are: Twin Falls, Keanae Lookout, Upper Waikani Falls, Hāna Bay Beach Park, Wailua Falls.

Day 5: Helicopter Tour & Old Lahaina Luau

Started the day exploring West Maui and Molokai by air taking Air Maui Helicopter Tour. The tour starts at Kahului Heliport and flies over west Maui, cross over to Molokai – the neighbor island, hovering over most dramatic cliffs and close view of hidden waterfalls. It was like we were in a Jurassic park movie! I highly recommend this tour. Tip: Wear dark colored clothes that don’t reflect on the glass doors. After lunch we went to Kamaole Beach Park III to chill at the beach. For evening we had a special dinner reservation at Old Lahaina Luau.

Luau Menu, all-inclusive dinner and drinks

If this is your first time in Hawaii, you must attend a Luau – a traditional Hawaiian feast with delicious food, lively music and of-course the hula. It was a great evening. We checked in around 5:30PM, enjoyed a beautiful sunset while strolling around the premises, witnessed the imu ceremony ( an underground oven used to cook delicious shredded kalua pork, a staple on any luau menu) and later enjoyed the most authentic Hawaiian dinner along with vibrant cultural performances from Hawaii and greater Polynesia.

Day 6: Iao Valley State Park , Waihee Ridge Trail & Makena Beach

Hiking along the ridges was fun and adventurous!

Morning started with Iao Valley State Park, a small park with short hike to see the Valley and Iao Needle. From there we went north to hike the ridges of Waihee ( Waihee Ridge Trail). There are many amazing hiking trails in Maui. We opted this because of its unique ridge path and amazing ocean and mountain views. It is a moderate hike of about 4miles out and back that gains elevation around the end. Tip:Wear right shoes since some places can be muddy and rocky.

Loved the Scampi at Da Kitchen
Makena Beach Sunset ! Sky is on Fire!

After a great hike we went to Da Kitchen for an amazing lunch and later headed to HomeAway for freshening up. For our last evening, we went to Makena Beach and enjoyed another spectacular sunset.

Day 7: Keawakapu Beach before you Fly Out

Our flight was in the late afternoon. Morning, we went to Keawakapu Beach near our HomeAway to enjoy some more time by the oceans. This beach was my personal favorite – I am not sure why. It might be because of the impressive mountains on the right, the picturesque black rock and the waves, the soothing palm trees around – I am not sure. We spent late morning here, strolling around the beach, taking in everything that Maui has to offer one last time. Later we checked out of our HomeStay and left to the airport with a heavy heart but with loads of memories!

Taking it all in, one last time

Maui was a wonderful surprise for us and surpassed our expectations. Everything we had planned for – the tours we took, the food, the people, the places – everything was perfect. There are some more places to visit in Maui. If you are around for more days try to include them in your itinerary – Ho’okipa Beach Park, Olivine Pools, Honolua Bay, Kapalua Beach, Wailea Beach, Secret Cove Beach, Kapalua Coastal Trail, Lava Fields- Kings Trail.

We loved our Maui experience so much, we have been dying to go back and explore other islands of Hawaii and finally its happening! We are going to Oahu for Christmas 2019 (If you know me you know I am jumping with joy when I am typing this). Will have another blog describing if Hawaii still will remain our favorite island destination in North american continent. From what our Oahu itinerary looks like I think its going to be different but still wonderful and wanting to go back for more! Cant wait! Aloha until then.

Mahalo

Featured

Yucatán Peninsula of Mexico

8-day itinerary of Yucatán Peninsula.

Last week we finally took a trip to parts of Yucatán Peninsula of Mexico – Cancun, Isla Mujeres, Chichen-Itza, Coba, Tulum & Playa del Carmen. I am amazed by the history, culture and beauty of this magical place. This was a special trip since we were celebrating our second wedding anniversary. We hoped for personal time but also wanted to get on the road and explore what this great region has to offer. So we spent most part of the trip traveling around, hopping from one place to another and then spent the last two days chilling at an exotic resort.

This region of Mexico has lots to offer. As far as we have seen most people just fly to Cancun to enjoy pleasant time in resorts. I am not criticizing! Resorts here are an exuberant world within themselves where time runs on a different pace and there are so many exciting things to do that you don’t feel like going anywhere else. However, for us things outside are far more exciting than just enjoying amenities in resorts. If you are one to have similar thinking then this itinerary will be great for you. So here it goes:

Day 1: Fly to Cancun International Airport.

Happy not-tanned faces at Austin Airport

We flew in the day before Thanksgiving, in the evening after office. It was pretty late when we reached Cancun. We had already made car reservations with Easy Way Cancun Car Rental. Almost all rental companies you find in US are available in Cancun. But there are a lot of hidden fees in terms of insurance with most rental companies so please inquire before booking. From research, Athreya found that Easy Way and Enterprise had the best ratings in terms of customer experience and price transparency. The process of picking us up from airport to the car rental office and getting our car was a smooth process. TPL (Third Party Liability insurance) is mandatory for anyone not from Mexico but anything other than that is not. Other rental companies may deny credit card auto insurance and force customers to purchase their expensive Auto insurance. If you plan to use your credit card auto insurance or personal insurance, the rental companies can keep a hefty amount (3000 USD) as deposit on hold on your credit card.

We then checked into our hotel (Ramada by Wyndham) – why this hotel? – We had some Free Wyndham points (Enough for 2 nights) with us that we wanted to use someplace available; this just happened to be that place 🙂 Most tourists stay in the resorts at Hotel Zone. We were not interested in that area since our plans were to explore outside Cancun.

If you are in this area (this is the city center), do have dinner at La Parrilla Cancún.

Day 2: Isla Mujeres

We started the day little later than planned since we got in late previous night. We took the ferry from Ultramar Puerto Juárez to Isla Mujeres. The ferry costs about 16$ USD for roundtrip which is pretty reasonable. They have a good frequency (every 30mins) and play live music while cruising along the turquoise Caribbean sea which makes the whole journey even more beautiful. I highly recommend this port over others since it is cheaper and experience was very pleasant.

Mixed seafood Ceviche

Isla Mujeres is a Caribbean sea island about 13KM from Cancun coast. It is a pretty small island (about 10KM long) but has so much to offer. We first went for lunch at La Lomita – since this is a resort island, there are many restaurants to choose from. But we wanted to get more authentic experience , so we looked for places that are more local and family owned. Food was great. Try one of their Ceviche!

Punta Sur

Isla Mujeres can be explored by bikes or golf carts. We rented a golf cart for 700 pesos (35 USD) until 6PM and started towards southern tip of the island – Punta Sur. It took us about 30 mins to reach the place (made some stops in between to take pictures of-course). I cant describe how beautiful this place is. The waves crashing on the rocks below, the ruins, the pathways, everything seemed so beautiful.

Playa Norte

After spending good amount of time here we headed back to the northern point of the island –Playa Norte. This is the commercial area of the island with resorts, shops and beach side restaurants. Nevertheless the beach still is very beautiful. We rented some beach umbrellas-chairs and relaxed until the sun started setting around 5:30PM. On our way back to the ferry terminal did some trinket shopping and got back on the 6PM ferry right on time to see the setting sun over Cancun.

Pinacolada at Surfin Burrito !

We then headed for dinner at The Surfin Burrito – great vibes , awesome burritos/tacos and amazing cocktails. Parking here is a bit tricky as it is in the beginning of Hotel Zone. We found parking near the flea market couple of blocks back and walked down to the restaurant.

I have heard that there are great places to party in Cancun. If you still have energy you could explore more on the crazy night life of Cancun. It was not part of our itinerary so we just went to our hotel and had a good night sleep 🙂

Day 3: Playa Delfines & Chichen-Itza

Playa Delfines

We spent the morning at Playa Delfines beach – the most famous beach in Cancun. Turquoise waters, rising sun, soothing wind – what else do you want! There is also a Cancun sign at the entrance of the beach which is another very touristy thing in Cancun. There is free parking in front of the beach but might get filled up soon. After that we checked out from our hotel and drove to Chichen-Itza.

Majestic

The drive is about 2.5hours by car without stops with toll. We made a detour to Valladolid to our airbnb – we wanted to drop off our luggage before exploring Chichen-Itza since we were not sure how safe the area is. Although the area turned out to be quiet safe for our surprise. If you just search for Chichen-Itza on google maps it takes you to a private parking spot very close to the structures but with a higher parking fee (6$ vs 4$). I would recommend taking the main entrance to the park where you can get good maps of the area and tour guides. The entrance fee is 480 pesos (about 25$) and can be purchased at both entrances. We didn’t have time for a guided tour but if you do I would highly recommend taking one. The official guides are usually inside the park. Be-aware: there are many scammers – We heard varying tour guide costs from around 500 pesos to 1300 pesos. Bring sunscreen, umbrellas (if midday) and water – It gets very hot around these regions. We hung out till the park closed (Park timings – 8AM – 4:30PM) – one advantage- you can bargain with the shopkeepers. The prices almost drop 50% during closing time since they just want to make as much money before closing. They have wonderful Mayan artifacts.

After that we went to Ik Kil Cenote for some fun in the underground well. This place is very close to the ruins. The entry fees is 80 pesos (about 4$) and additional for life vests. This place might get very crowded during mid day (also the most beautiful since you can see the blue color of the water). We went there almost at closing time (timings: 8AM – 5PM ; they let you stay till 5:30PM though) so found it nicer, more calmer yet beautiful. I would recommend taking a swim in this Cenote. We didn’t expect it to be this great so had left swim clothes in Airbnb. 😦

After coming back to Valladolid we relaxed at our airbnb before heading to the best dinner I had on our trip at Restaurante El Atrio del Mayab.

Day 4: Coba & Tulum

If you are in Valladolid, you cannot miss Cenote Zaci. We misjudged few things on this road trip and were already behind on schedule so could not make it although we were staying 300m away. This is one of the most popular Cenotes in the region and a must do. The entry fees is just 30 pesos and I have heard great reviews. If you are tight on time like we were, I would suggest missing the following places we went to in Vallodolid and enjoy cenote instead. Before we left Valladolid in the morning, we took a stroll at popular instagram spots – Calzada de los Frailes and Letras VALLADOLID infront of the famous Convent of San Bernardino of Siena.

On the way out of Valladolid, you will pass Cenote Chichén Suytun – The most instagrammable Cenote. The entry fee is 120 pesos (6-7 USD) + life jacket will be additional. We did not go here – the reviews are mixed – it is said most photos are edited extensively to add color and light. But if you have time you can explore this trending spot.

Impressive pyramid of Coba

We drove to Coba – another Mayan city with great structures, which is about an hour away from Valladolid. The entrance fee was 75 pesos + parking 50 pesos. I liked this area more than Chichen-Itza. The structures are surrounded by lush green forest and the weather seemed pleasant (until we started climbing the pyramid). There are 4 groups of structures here. To understand completely what these structures are it would be good to take guides. The groups are spread around lake Coba and walking although is a choice I would recommend either bikes or tricycle rides to go around the sites. The main spot is the Pirámide Nohoch Mul – one of the only climbable Mayan Temples left. About 130 steep and uneven steps to the top but they are worth the view. The tricycle ride feels better after the climb 😀 The rides are about 200 pesos for 2 hours and 75 pesos for one way. Before hitting the road we had lunch at El Faisán just beside entrance.

Snorkeling selfie

We then drove to Tulum, checked into our wonderful airbnb and then headed to Grand Cenote for a swim/snorkel. Fees: entrance =200 pesos+ locker =30 pesos + life jacket =50 pesos + snorkeling kit= 80 pesos. This one closes at 5PM but only lets you swim until 4:30 PM. It has great underground caves , blue crystal clear waters, little fishes and tortoises.

Tulum Beach
That El-pastor tacos though

After the park closed we went to Tulum Beach for sunset. This is also where you would park to get to the Mayan ruins. The roads to the beach are narrow and you will find multiple interesting restaurants to enjoy the night. We again wanted to avoid these fancy areas and see more real side of Tulum. We went to locals’ favorite Antojitos La Chiapaneca – place was crowded with both locals and tourists. Their El Pastor was amazing. Definitely must try. All items were so cheap (10-15 pesos), we ordered almost everything on the menu 😀

Day 5: Scuba Diving

There are many places to scuba dive. Isla Mujeres, Cozumel, Playa Del Carmen are some of the famous ones. I (Akshata) am not scuba certified (yet) so we had to find places and companies offering Discover Scuba. The options got limited and finally we went with Tank ha dive shop in Playa Del Carman. Phantom Divers are also one of the best in the area but our schedules were not matching. I hear Cozumel is the Mecca for scuba diving but most of the tours are for certified divers + they need more dives done. We have decided we will do another trip to just Cozumel to explore the wonderful coral world there. My diving experience before this was spoiled by the KeyWest Try Scuba I did 3 years back. But after understanding better on how to equalize under water this scuba dive has given me the confidence to get the certification ! My instructor also commended by buoyancy skills and said I should get certified 😀 big boost for me. The dives involve visiting the second largest barrier reef in the world – the experience was very fulfilling.

Our beautiful Airbnb

After two dives and spending whole afternoon in water we headed back to our airbnb to relax in our airbnb Jacuzzi.

Day 6: Archeological Zone of Tulum & Dos Ojos Cenote

The Great Mayan Port City

In the morning we checked out of airbnb and headed to visit the Archeological Zone of Tulum. There are two ways to go to the ruins. One is to park near Tulum Beach and walk – parking would be free but might be limited since it is roadside. The second is to reach the main entrance where parking ranges from 50 pesos to 100 pesos and then walk. There is almost no difference in the amount of walking between these two spots. It all depends on your starting location. We parked at the main entrance just before the chain of shops at this location where parking was 50 pesos. You will have to walk about 500m from parking area to reach the ticket counter. Entry fees is 75 pesos; if opting guide its about 600 pesos (30 USD). There will be a bit of walking involved if you want to explore the whole site. This ancient Mayan port city was once a commercial gateway for local and foreign products , some of which came as far away as Central America. Tip: Go in the mornings when it is least crowded and pleasant (Timimgs: 8AM to 4:30PM).

Underground caves of Dos Ojas
Ready for snorkeling tour

After visiting the ruins that took about 2 hours we drove to Cenote Dos Ojos (which means two eyes in Mayan) for another snorkeling excursion! This place contains so many centoes but the main ones are the two eyes and bat cave. You can either get general entrance which is about 350 pesos including life jacket (lets you swim in open section of two cenotes only. No cave snorkeling allowed) or you can go on a guided snorkeling tour which costs 600 pesos including wet suit, flashlight, lifejacket and snorkeling kit ( This tour takes you from one eye to another eye from underground routes and also lets you see the bat cave from within! ) . I highly recommend taking the snorkeling tour. Worth every penny. The guides were not very informative but there is no way to explore this place without them. There is also scuba diving available at these cenotes but you need to book with third party dive shops (I hear Tank-Ha has these tours).

Snorkeling selfie 🙂

We were awed by the grandeur of these underground caves & tunnels – a world within itself with pillars and structures several feet below us. The bat cave housed millions of bats and it felt so extraordinary to be swimming in their adobe! After a wonderful snorkeling session we spent some more time hanging out at the two cenote areas open for public. Later headed to Playa del Carmen to finally relax and enjoy each others company for the rest of the trip.

Day 7: Resort and Chill

We checked into our wonderful resort – Ocean Riviera Paradise previous evening. This was our anniversary day so we spent the whole day swimming in pool, enjoying pool foam party, relaxing on the beach, eating some great, delicious food and savoring a pleasant evening from our Jacuzzi on our private terrace.

My review on Ocean Riviera Paradise: We did a lot of research on the kind of resort we wanted to go to in Riviera Maya. Some of the criteria included – all inclusive, room amenities (Jacuzzi, ocean view, privacy) , good restaurants with multiple cuisines, number of pools and vicinity to the beach. We also had a particular budget in mind for two days we were spending. We circled down to two resorts after a lot of elimination – Ocean Riviera Paradise and Panama Jack Resorts. Since the former was 5-star rated and had higher customer reviews we went with it. Our overall experience was very pleasant. Almost everything in every restaurant was included with our stay. We had a blast at the foam party and really enjoyed the continental buffet at the Amaranto restaurant and the cooking dinner show at Sakura. Only thing this resort misses is an infinity pool. The staff is friendly and ambiance is aesthetically pleasing. They also provide shuttles to and from Cancun airport which is about an hour away. I would recommend it.

Day 8: Drive to Cancun and Fly out

Dont wanna leave 😦

We still had few more places on our check list which we could not cover given the time we had. If you don’t have resort plans I recommend adding these following spots to your itinerary if time permits:

  1. Cenote Zaci: As I mentioned earlier this is a must do if you are staying in Valladolid.
  2. Ek Balam : If you were impressed with the Mayan structures of Chicken-Itza and Coba, this one will also join your likes. Ek Balam is about an hour drive from Chicken-Itza and half an hour from Valladolid.
  3. Akumal Beach: Beautiful beach with turtles right at the bay. You can snorkel by your self or take a snorkeling tour. Entrance to the beach is 100 pesos (5$).
  4. Los Fundadores Park : This is right beside Tank-Ha dive shop. I am not sure why we missed it! We wanted to reach Akumal for sunset after scuba but couldn’t make it on time. This one is a very famous beach park in Playa del Carman.
  5. Point Esmeralda: Another beautiful beach in Playa del Carman.

Cancun and neighboring regions also have many amusement parks. We were looking for more local experience of the Yucatan peninsula, so did not go to any of them. But you cannot ignore the number of ads you will see right when you land in Cancun! Almost all resorts offer packages to visit atleast few of these parks. Mentioning some of the most famous ones here if you want to go for it!

  1. Dolphin Discovery Isla Mujeres – almost booked it but felt overrated and expensive so decided against it.
  2. Xcaret Park : This is the most highly rated park in this peninsula. I here great reviews about the park. They have a resort by the same name and provide many water activities at additional cost. They also feature Mayan cultural show for dinner. There are many sister parks too – Xel-ha, Xplor, Xsenses.

Is it safe to take road-trips in this region:

We were a little nervous when we decided to rent a car for the trip since we heard from a lot of people that it is not that safe in Mexico. May be it is true, but we did not experience even slightest trouble. It might be because we were exploring some of the most famous places of the Yucatan Peninsula. We found that most of these places were heavily guarded with armed soldier and huge bunker tanks. We tried to travel with least luggage, tried to load off luggage at BNBs before exploring the place whenever possible and parking in known spots where there are more people or in a secured parking lot. Avoid leaving behind any belongings inside the car that might attract someone. Keep everything in the trunk.

Overall we had a very pleasant experience in Mexico.

Cannot wait to be back to Cozumel for some adventurous scuba experience.

Travel Budgeting – II

PART-II Smart Planning

In our previous blog I shared how we take advantage of the credit card system to pay the price for most of our flights. In this blog I will be sharing information on websites that we use for booking, tips to save money during the trip and financial planning in general to make travel a reality.

How much do we save per vacation ?

When you jump from a plane 12000 ft above and the world is upside down – Keywest Florida

I am picking one of the exotic places to show greater savings impact, but every place we go to is not as exotic or expensive. The average cost (please correct me if wrong) for a week of beach side vacation to Maui, Hawaii from Texas would be 7000-8000 USD for 2 people. Our Total was 3400 with beach side stay, helicopter rides, snorkel tours and a very expensive dinner/entertainment experience at Old Lahaina Luau. Let us see how we made this possible.

Plan Early

Maldivian dream come true

I cannot stress enough on this but the single biggest reason why most people spend a lot of money on their vacation is because they plan very late. Booking early gives you the benefit of more options, cheaper prices, better flight timings, better stays, activity bookings that are restricted. I see so many people booking hotels on the fly or a few weeks before the vacation and I want to tell them how stupid it is financially. During our first trip to Arizona on a long weekend, we had to take a detour because of flat tire in the middle of Grand Canyon desert. This flat tire costed us on the fly hotel room booking for 400$ a night which otherwise would have been less than 100$. This was one of our initial trips when we didn’t have Chase Sapphire reserve to take care of trip interruption. Though we didn’t have an option that night, we learned a valuable lesson – Book in advance!

How early should I plan the vacation ?

I would recommend nothing less than 2 months, yes you heard it right. We typically try to book 3-4 months before our trip (if southwest 4-6) but things always don’t go as expected. This doesn’t require the full trip planning. Also you don’t have to book everything. You need to know the approx number of days, destination and a very vague plan so that you can book the flights, stay and rental car. You can always get back to other things later.

Avoid Peak Holiday Season

Luxurious Sea Plane Transfer to Maldives Resort

While this is not completely in your hands and can depend on your work, your kids holidays and other factors but avoiding peak season can save you tons of money and crowd. Note how I said “avoid peak season” and not “travel off season”. Definitely travel during the season to have that perfect weather, to not miss the whale/dolphin season or to avoid the hurricane but a week before or after the peak week can save you in flights, hotels and literally everything. Not to forget that it gets way over crowded during these weeks. This year we wanted to make a trip to India but unfortunately we had no vacation days left and shutdown week during Christmas was our only chance, but when we looked at prices, it was insane- 1600$ for 1 person round trip. We are now going in March for 620$ per person( 413$ in chase points). This is a little less than our usual 850-900$. Total Savings: 2000$ if paid in cash.

Where do we book our flights from ?

While we check the flight options and prices on multiple websites (2-3) like Momondo.com, expedia or cheapoair, we mostly book through chase travel portal using points. 90% of the times the prices and options are the same on Chase travel website V/S other websites but in rare occasions when other websites are cheaper we go with that. Now that the prices are same, it makes a lot more sense for us to buy in points because we are getting the flight price for x/1.5 price. For example our Hawaii flight to Maui from Austin was 600$ per person but in points we paid only 400$ (effectively a free flight paid in points).

Taking points to next level

Another method that we use is transfer our chase points to southwest for 1:1. Southwest each point is 1.5x the price in value i.e. a 1000$ ticket is 666$ in points. We combine this with southwest companion pass which is 1+1 offer (buy one ticket and your companion flies for free) so effectively we bought 2000$ (1000 x 2 tickets) southwest tickets to Oahu, Hawaii during the peak Dec season for 666$ in points(666$ x 1.5 is actual flight cost per person and 1+ 1 offer). Isn’t this insane! That is a savings of 1350$ USD from just one vacation! Not to forget we earned those points not paid for it! We have done this for 1 full year until the companion pass lasted !!! That literally saved us 1000s of $.

How to get Southwest Companion Pass ?

While we got the companion pass status through a promotional offer by Southwest for rest of the year, this offer may only come once in a while. Other way to attain this status is by accumulating 125000 qualifying points or by flying 100 flights in a calendar year. Applying for southwest credit cards can get you these qualifying points in no time. You will have companion pass status for rest of the year + 1 full next year.

Where do we book rental car from ?

A good majority of the times we use one of these 3 lowest priced websites :

Rental Car & Airbnb at Las Vegas. Parents Loved Vegas!

Costco travel usually provides the best price on the conventional renting car market with 1 free additional driver and free cancellation . The additional driver alone costs 14$ per day with crazy airport taxes making it around 17$ per day. That is a 75-85$ additional savings for 5 day vacation apart from 30-35% discount provided by Costco. Its hard for one person to drive everywhere. You are on vacation so let the strain of driving be equally divided. Handing over the keys to someone who is not authorized to drive is a very risky business with no insurance covering the rental car. Its a common misconception that your personal car insurance covers the rental car when you are not an authorized driver, well it does not!! (unless you are the spouse, then you may be) So please avoid this as much as possible.

Sister time at Beverly Hills, Los Angeles

Hotwire on the other hand doesn’t provide that additional driver benefit but often provides lowest price online. But its important to know that their reservations do not have free cancellation.

Turo is our new favorite. Turo cars are personal cars which are rented out for cheap price. So your personal car insurance and credit cards don’t cover for their rental cars. But the good news is they provide their own insurance and in spite of buying that insurance, the price is still cheaper than conventional renting car companies. For example: we are renting out a convertible for our next trip to Hawaii during the peak of Dec. The price of a full size car without insurance at conventional car companies is 700+, but the same for a convertible with insurance at Turo is 450$. That is a 250$ savings plus a sweet upgrade. If I were to compare apples to apples its $1100 for convertible at standard rental car companies v/s 300 at Turo (excluding insurance for both).

Happy moments in NY

In either case if you are renting a car in US, never book directly with the rental car company. You will pay significantly higher usually in 100s.

You have had a tiring flight and you have finally reached the destination and you are all excited to pick that rental car and get started. This is when the rental car companies take the benefit of your situation and try to squeeze more money from you and so comes:

Do not fall prey to rental car agents at pickup

Rental car agents will try to excite you into upgrading your car for 10$ more per day or scare you into buying their expensive rental car insurance. In reality after exuberant taxation the actual price is something that you never imagined to be but are forced to pay because you agreed to it. If you wanted to drive that better car, make that decision while booking not while picking. 90% of the times the credit card that you use has secondary rental car insurance, plus your personal auto insurance covers for it as well. So DO NOT BUY EXPENSIVE INSURANCE from rental car company and DO NOT UPGRADE at pick up for additional cost. Also depending on the agent you talk to, ask for a free upgrade. It doesn’t cost you anything for asking. We once got a free upgrade in Hawaii from intermediate to convertible for free! Thank you Enterprise!

Revisit your Hotel and car rental reservations for lower prices

Usually the rental car prices and Hotel prices go up as the dates are closer. But many a times a opposite of this is possible as well. When the expected number is much lower rental car companies and hotels pull down their prices to attract more customers. This has happened to us on few occasions mostly with rental car. Most recent one is our resort booking at Playa Del Carmen, Mexico. Initial (3 months before) booking rate 600$ for 2 nights. One week before vacation- 450$ for the same room for 2 nights.

View from our Airbnb at Maui -First Anniversary trip

Where do we book our stay ?

90% Airbnb and VRBO, 8% resorts and 2% hotels. Airbnb can save you loads of money – get you more space, kitchen and that beach side location for much affordable price as compared to a hotel. E.g. Hotel rooms in beach side Hawaii cost approx 3000$ for a week(assuming you book early) but the same costed us about 1400$ for a beach side condo in Airbnb. That is huge savings! Plus every place is unique as compared to a hotel room which always looks similar. Also owners provide a list of things to checkout which is more popular among locals. If its not prime time, you can always request the owner to provide some discount on stay. Like i said no harm if rejected. Remember to add the Airbnb offer to your chase card and use their link for booking to get up to 15% back.

Airbnb near Grand Canyon for Mutant Family

Also remember to always book an Airbnb which has good reviews and preferably a super host. We have had few (very few) average to bad experiences with Airbnb but this happens even with hotels/resorts. If you are new to Airbnb and would like to try out, drop us a message or comment with your e-mail id. Because we frequently use Airbnbs, anyone we refer gets 55$ off their first stay/experience.

The stay also depends on the kind of vacation you are interested in. I and my wife we love to try the local cuisine, drive on our own to visit places that are not as much popular, try a hike or snorkel at beach, speak to locals and enjoy the culture they have to offer rather than relax at a luxurious resort. But on our anniversaries we usually try to pamper our self with luxurious resort.

Free hotel stays for time share presentations

All you have to do is attend 2 hour presentations and you get free 2-3 nights stay at decent hotels. They might push you to sell their products but you can quietly deny them. We have used this for 1 night stay at Vancouver Canada, 2 nights stay at Cancun Mexico and 3 nights at Las Vegas Luxor. These guys can be advertising literally anywhere and may be hard to get sometimes. Do understand all the terms and conditions before you sign up for one.

Pricey restaurant is not always the best place to eat

Authentic Luau experience at Old Lahaina Luau, Hawaii

Most of the time local’s favorite/authentic food is very cheap to reasonable price. Its mostly the touristy places that tend to make everything expensive . Try to research a little based on reviews to find the locals favorite, you can even talk to locals or ask the Airbnb owner for suggestions. When you go to a place like Hawaii, even everyday food expenses can add up very quickly. In such places we lookout for $ and $$ restaurants on google and yelp for our everyday food. Only once in our vacation do we actually go for $$$$ restaurant if we feel its worth the money. We also tend to eat self prepared breakfast at Airbnbs to save on money and time.

Pay in local currency

Unless a business is operating in USD, always pay in the home currency of the country you are visiting. This would let the credit card company decide the exchange rate for you rather than the bank of the seller and this makes a difference.

Have a travel credit card

Fall colors at Whistler, Canada

If you are travelling to other countries always have a travel credit card which has no foreign transaction fee. This can save you tons of money from foreign exchange fees and forex conversions. I cannot admire Chase Sapphire Reserve enough for all the benefits it provides like -lounge access, trip delay/interruption and cancellation insurance, baggage insurance,medical insurance, rental auto insurance etc. Ex. A typical lunch or dinner in Mexico costed us about 500 Pesos. The market exchange rate was 1 USD to 19.50 Pesos. When we used our travel credit card we got an exchange rate of 19.45 or higher, no foreign transaction fee or any other fee, not to forget the 3% cash back we earned (which we maximize to 4.5% using reserve card). The same amount if spent in cash (converted either at Foreign exchange or using ATMs in foreign country) probably gets you an exchange rate 18.30 or lower + no cash back+ forex fees (approx 7%).

Lookout for discounts for expensive activities

Air Maui Helicopter ride – Hawaii
Costco offer saved us 100$

There is usually a Groupon discount, costco discount or some other discount for expensive activities like helicopter rides, skydiving or that Cirque du Soleil show that you always wanted to watch. It usually takes only one google search to find these offers and its worth it. Ex. When our parents and in-laws came to US, we wanted to end the trip with a show of Cirque Du Soleil- O, one of the popular ones (least discounted) performed over water at Vegas. Good seats for this show were costing us approx 220 USD per person plus taxes. With Costco gift card offer + their own coupon discount for booking early we were able to pull down that price to 120$ per person. That is a saving of 600$ right there for 6 people.

Everything else about Rental Car

We use our Chase Sapphire Reserve card with primary rental car insurance to book rental cars which takes care of collision damage and theft up to 75000$. In case of accident or theft, its very important to call the cops on the site and have a letter from them to claim for insurance. It takes care of roadside assistance up to 50$ only. We use our personal Auto insurance for liability and road side assistance. If its Turo we buy the insurance from Turo or the owner.

Its good to learn how to change the tires to a spare one available in the car trunk for flat tire situations. More than likely this skill will come to use.

Only authorized drivers to drive the rental cars at all time. Check with rental companies for free additional driver for spouse .

Always fuel the tank yourself, if you count on rental companies, you will get a hefty gas price charged to your card.

In case of flat tire situation- where you are using the spare tires, you can always drive to any branch of the rental company and get car exchanged for another one for no additional price. Also you never have to pay for flat tire.

Its important to check the rental car for any damages before picking the car and to mention it on paper if any.

Say NO to one day tour and packages

Pit stop on the way to Hana

This is more of a personal choice but we always say NO to travel agencies which take you around. When we visited Maui, we had an option to either pick 1 day tour on road to Hana for 150$ per person or drive ourselves. While this is not the perfect example to take (you need to be an expert driver for these roads which include several one way bridges), we chose to drive ourselves all the time because we get to stop at the places which are not commercialized, we can have our own schedule, we get to try local authentic food and also because we like to use that 300$ we saved towards a helicopter ride or scuba dive.

Hope you enjoyed reading this blog and found something useful from it. My last blog is the most crucial of them all on how to manage finances and is independent of geographic location. Appreciate taking your time off to read this.

Travel Budgeting – III

Part-III Financial Discipline

I was watching a Youtube video related to finance few months ago and an advice from that video stuck me forever ” If you want to be good at managing your finances, you need to be financially disciplined “. This is true not only of money but anything you want to achieve in life. This blog is going to explain how we disciplined ourselves in this unique set of rules to prioritize our expenditure on things we care about. This blog is less about travel budgeting and more about how we manage our finances to make travel a reality. I consider this the most crucial of all the 3 blogs and unlike the rest, it benefits everyone equally no matter where you are geographically located. This blog explains how it was possible to accomplish some of the materialistic things mentioned in blog 1 like a house in Austin Suburbs (with 15% debt balance), 2 cars (fully paid off), fly every other month to a new destination (for 2 years), fully paid off massive education loans in US, savings decent enough to buy a condo in Bangalore, US tour for parents and in-laws from India and all this in a short span of 4 years . So without any further ado lets get started.

Invest Time to grow money

As a kid growing up in a small town in India, I remember my parents, my school and the society always focused on doing well at studies, they wanted me to be the school topper because they believed the better you are at studies, the more focused you are in your life and better employment opportunities. The reasoning behind such a approach could be several things and they were definitely not wrong but its not enough. During their generation, a good majority of the population was not lucky enough like us to go to school and the number of jobs were very scarce – earning decent money to feed family was their motive. Because of this mentality that we grew up with, even now we put all our energy and time into doing well at studies and work, to improve ourselves technically everyday while putting in less or no time/effort to manage money because we were taught that if you focus on work, the job will take care of you. Well I don’t think its enough.

No school today teaches how to manage your finances, no one teaches you how to do your taxes, or to invest money or manage debts. If you care about money you need to invest time into it to grow, its not going to happen on its own like everything else. Its time we stop taking money for granted.

Go Comets! Whoosh!

Financial Analysis

When we came to this country we knew we would have to repay a huge education loan back home. So our mindset was always to clear that loan off because of its insane interest rate of 11-14%. So soon after we started working in Feb of 2016, we started noting our expenses by categories on an excel sheet at the end of each month. We would then analyze the info to understand what should be our monthly limits in each category (ex. Restaurants ) without adding a toll on what I call our standard of living. Every time we failed in a particular category, we would try to make it better the next month. This stopped after a couple of months but we learned a valuable lesson from this exercise- ” To not stop the damn exercise” , to always be aware of where we spend our money. Our methods have become more sophisticated now, we use the free tool – Mint by Intuit to do the analysis which saves us tons of time. This tool syncs the info from all of our financial accounts (Bank accounts, credit card accounts, 401k, Venmo etc.), analyses the expenditure and provides us a simple readable report at the end of each month. We can set threshold for every category and the tool alerts us every time we cross the limits. The tool is not as perfect as the excel sheet we used to create manually but it serves the purpose.

We live and work in Austin Suburbs so our monthly expenditure in 2018 for the month of June looked like this :

Our Monthly Expenses combined (2 people)
ItemAmount
Rent/mortgage$1,068.92
Electricity$23.61
Gas$68.29
Cell phone$52.00
Internet$41.33
Groceries$219.75
Car maintenance (2 cars) $148.61
Water bill + trash (included in rent)$0.00
Restaurant$403.24
Movies$0.00
Auto insurance (2 cars)$61.16
Stuffs for home$397.27
Entertainment$148.38
Miscellaneous$52.91
Total$2,685.47
Monthly expenditure for 2 in Austin, TX for the month of June, 2018

The table above is actual expenditure for both of us combined and not the threshold set by us. This analysis helped us understand how much money we can save each month to pay towards the education loan, when would we finish our loan, set threshold for each category, if we should cut down our expenses in a particular category and most important of all – is travel possible?

For example: When you are young you like to party every weekend and drinks at pubs aren’t cheap. Each drink is equivalent to a meal at a restaurant. A couple of drinks plus an expensive cab to and fro each weekend can add up very quickly to empty your pockets in no time. If you don’t analyse your expenditure you will probably never realize that you are overspending on parties.

Even now, every vacation of ours ( irrespective of group or solo) is linked to a Splitwise group of its own which has all the transactions including the ones paid for self which help in understanding the overall expenditure for a trip.

Prioritize your expenses

We all are limited from accomplishing goals faster by 2 major factors- time and money. What do we do when we fall short of time, we prioritize our list of things to do. If we can do that with time, why do we take money for granted ? Its probably because we never had a major financial breakdown.

2 chicks in 1 at Oahu, Hawaii

Luxury Car

After a long struggle to get into this country for higher education, all that slogging for 2 years to graduation and job hunt, one is easily tempted to buy a new luxury car that they can afford now. There is nothing wrong with buying fancy cars, but we both are not into cars and paying off education loan/ buying a house and travel was our priority. So looking at my analysis below, I realized that a luxury car would be a major toll on our savings and it is not something we should buy right now especially when we plan to travel so much. Let us look at the amount we delayed spending.

Price difference: Min of 35k USD for a new luxury car for each (70k for 2) V/S 9k for 4 year old Ford Focus Sedan + 7k for 8 year old Nissan Sentra.

Min. delayed expenditure: 54k USD

Luxury has no limit, I chose minimum values of luxury to show the impact on us could have been much larger.

New non-luxury sedan

If you have ever visited Texas, you would know that its almost impossible to survive on 1 car for 2 people if both work at different places. So lets compare prices now:

Price difference: 20-30k USD for a new non luxury sedan (40-60k for 2) V/S 9k for 4 year old Ford Focus Sedan + 7k for 8 year old Nissan Sentra.

Min. delayed expenditure: 24k-44k USD

Auto Insurance

Considering that you are new to US like us and have no driving history in US, let us calculate the auto insurance difference:

New Luxury Car: 1900$ for 1 year of insurance ( 3800$ for 2 cars) V/S 600$ for 2 old cars combined. Savings over 4 years: 12,800$ USD.

Why am I calculating for 4 years ? Since its been close to 4 years we started working, all the accomplishments mentioned above took 4 years.

New Non-luxury Sedan: 1560$ for 1 year of insurance (3120$ for 2 cars) V/S 600$ for 2 old cars. Savings over 4 years: 10,080$ USD.

Those insurance prices are ridiculous, who is your insurance provider ?

Over last 4 years we have had auto insurance with AAA, Progressive, Geico and root – All popular brands (except root). These are probably the same companies you have had insurance with. The reason why our insurance price is far less is because our cars are far less valuable in case of accidents. After some point it becomes unnecessary to buy collision and comprehensive coverage thereby further pulling down the insurance prices.

NY trip with Trojan family

Rent

Irrespective of which city you live in, a major chunk of your salary goes into rent. Texas is very economical when it comes to rent and one can afford to rent a complete 1 bedroom apartment by himself/herself. However remember that this is a luxury only available in few cities in US. While its a personal preference to live by yourself or have a roommate, you should be aware that it can make a huge difference on your savings. Both I and Akshata preferred renting out a 2 bedroom apartment and staying with a roommate. Let us look at the money we saved by sharing a 2 bedroom apartment and utilities.

Renting an apartment by oneself + utilitiesSharing a 2 bedroom apartment + utilities
Cost per month1200600
Cost per year144007200
Cost over 4 years5760028800
Savings over 4 years  N.A28800$ USD per person
Savings in rent

As you can see from the above table that we saved at least 57,600$ USD by sharing a 2 bedroom apartment as compared to living alone.

Avoid luxury apartments

The one with the lobster at Maine

Luxury apartments are expensive for a reason which could be their location, build quality, inbuilt security systems or a gated community. Unless you truly appreciate or feel the apartment is worth the extra price, there is no point living in one. Ex. Rent of 2 bedroom apartment in Austin Suburb is approx 1300$, but the same sized apartment 15 mins away at Domain is probably 2000+$ because Domain is a very happening place. Unless you truly take advantage of this, it doesn’t make sense to live in there paying 700 more every month because you can also drive there anytime you want to.

Restaurants

Most people when they start earning are bachelors and not married. The reason I point this out is because bachelors tend to eat outside a lot more than married folks and outside food isn’t cheap and healthy at the same time. It might seem like a 10$ meal every time but this can add up quite quickly. Both me and Akshata used to cook at home most of the times and eat out only a couple of times every month when we used to hangout with friends. Let us look at the amount each of us saved over 4 years.

Eat out everydayEat out ocassionally
Avg Price per meal1015
No. of meals per month6010
Cost per month600150
Cost per Year72001800
Cost over 4 years288007200
Savings over 4 yearsN.A21600$ per person
Avoiding outside food can make a difference

As you can see from the above table we saved about 43,200$ USD over 4 years by choosing to eat outside occasionally.

Choose your city wisely

A city like New York or San Francisco is very expensive to live in but they also have a lot to offer. Unless you are making enough money or taking advantage of what the city has to offer like working for a startup, it doesn’t really make sense to live pay check to pay check in those cities. Think long term and move to more affordable neighborhood or city if you have to. The salaries in Texas are generally much lower than bay area which has plenty of opportunities for software engineers but the cost of living is significantly lower as well and hey there is no state or county tax here. So I do believe that living in Austin has saved us much more money than living in California as entry level software engineers can earn more money for the cost of living here.

Don’t underestimate summer internship

Summer internship at Juniper Networks, Sunnyvale

Internships during masters is a great time to make a decent money before starting full-time because you get back most of the taxes you paid, your standard of living is little to nill as you have no money in your bank and a huge debt to payoff. I did my summer internship at Juniper Networks in 2015. Even though my pay was very low as an intern and the cost of living was ridiculously high in bay area, my savings from those 3 months was an easy 15000$ USD, the reason being I stayed with 5 other like minded students from bay area in a 2 bedroom apartment paying low rent, cooking my own food everyday, taking the public transport paid for by the company and paying negligible federal and no state tax.

How is your electricity bill so low ?

The average electricity bill for an apartment in Austin is probably 70+$ per month considering the need for AC and heater most of the year. While we have paid 23-29$ for the past 4 years for a usage less than or equal to 1000 KWh per month. we have used http://powertochoose.org/ to find the cheapest provider in our area for the longest term possible. The electricity providers have monopoly over certain areas and this website may not come to use at all times. There is no quality when it comes to electricity other than customer service in case of rare problems so paying less than half the average the public pays is totally worth it. After we moved to a house we pay 70-90$ per month because we don’t have a choice here.

I do not agree with a lot of above thoughts as this means I am not living my life ?

Unless you are very rich, we all cannot afford everything we want in our lives. So it is important to prioritize our expenditure to spend on things we value the most. If luxury car is your dream then definitely buy one but know that you would probably have to sacrifice elsewhere to make it possible. Being blindfolded to your own expenditure can lead to digging your own grave of debt without your knowledge.

High yield Savings Emergency Account

I have had to deal with a lot of visa issues in this country and if there is something that I have learned the hard way, then it is to always have a backup plan in case things don’t go as expected. So its important to have a liquid emergency fund enough to survive for 6 months and continue paying any debts that you may have during that period until you find another job for yourself. Either for emergency purpose or for other, always have a high yielding savings account. If you are in US, make sure you have a savings account with 2% interest like Discover and not something which offers 0.1% interest.

Financial Goals

Life without a goal is like a race without a finish line, you are running nowhere. Just like life, have practical short term and long term financial goals and work towards it. Our vague short term goal was to buy a fully paid off house in Texas, pay off all existing education loans and a retirement condo for parents in India before we turn 30. This goal may be very easy for some, very hard for others. So create your own practical ambitious goal and work towards it based on the analysis of your expenditure.

Misleading US currency

US dollars are small in numbers but high in value. This can often add up quickly not realizing where you spent all your money. For example. the cost of one way toll road to office from our house is 3.5$ and this cuts down 50% of the travel time during peak hours. Assuming we took the toll everyday, we would be spending 2500$ every year on tolls which is equal to 2 months of apartment rent. Small amounts like this everyday add up very quickly. So I like to call the US currency very misleading.

Monthly Installment Plan

Almost everything in US is smartly designed to make you spend money without your knowledge. Is there anything in here that you cannot buy on an installment plan ? Have you ever heard this from an apple salesman “Sir, you have the iphone from last year and you could upgrade to the latest by paying only 5$ more every month, that is the cost of 1 starbucks coffee” Its surprising that customers still do actually buy it even after knowing all the installments that they paid until now for their old phone(400+$) is lost because they are excited by the fact that they could buy the latest one for 5$ more per month. Do you actually realize what you signed up for ? You not only spent 400$ on a phone which you gave away but signed up to spend another 1200$ on a new phone !! ssh don’t show the bigger picture, its only 35$ a month.

Reduce your taxes

I see that a good majority of folks want to spend the least amount of time on their tax returns and get it over with. I look at tax returns as a gold mine, the more you dig the more you get back, the smarter you dig the better it gets. All successful companies earn in billions but pay lower income tax percentage than most of us. In fact last year General Electric (GE) got back more returns than it paid. So let us not be lazy when it comes to taxes and spend some time on it. Find ways to reduce the taxes that you pay every year. If you have quite a bit on your portfolio, then its time to find a good tax consultant who can advice you on ways to reduce tax. Even if it means savings a few hundred $ or a couple of 1000s, its your hard earned money.

Memorable Florida Trip in 2016

Travel in groups

Travelling in small groups has lots of advantages. You get to catch up with old friends who stay at a different place, vacations have a new meaning, stay and travel is a lot cheaper since you are splitting up costs, you learn how to manage working in groups etc. We spent most of 2017 and 2018 travelling in groups and we had a lot of fun.

Take advantage of low mortgage rates in US

We were always taught debt is bad! That is so not true! There is good debt and bad debt. Mortgage rates in US are currently at an all time low in its history. 15 yr fixed rate is approx 3% or lower and 30 yr fixed rate is 3.5% approx. There is no better time to buy a house in US when it comes to mortgage rates. While you are tempted to pay off that home loan quickly, resist yourself from doing so. These interest rates are at an all time low, which means the money you earn can be invested in stocks and mutual funds to easily earn almost twice the mortgage interest rate (going by all time average). In addition to this, the interest paid every year towards the loan is tax deductible.

Does it make sense to buy a house or rent a house?

Its not a simple question, there is a lot of math involved behind it which is a separate blog of itself.

Take care of your money, it will take care of you later

Money not invested depreciates faster than you think. So stop holding up all the money in a savings account which pays you negligible interest and start investing early. It could be stocks, mutual funds, bonds, traditional and roth 401k, traditional and roth IRA, property or even a business but do invest your money wisely, else the 1000$ you earned today could only be worth 500$ by the time of retirement.

Conclusion

The intention of this blog series on travel budgeting is to help readers with new information that they may not be aware of, create an awareness among the younger crowd and the next gen to work on money management early in their career. These 3 blogs have been very time consuming and I would appreciate if you could provide your honest feedback in comments on any of the platforms this is shared. If you want to apply for any of the credit cards I mentioned in blog 1 please do ping me for referral. Truly appreciate taking your time off to read this. Hope you learned something new today.

Express Entry Pathway to Canada

What to expect from this blog ?

This blog is all about the process of attaining Canadian Permanent Residency through their Express Entry Visa Program and the fees associated with it. It does not contain any information about the benefits or disadvantages of permanent residency or living in Canada. If we ever move to Canada, I will make sure to write an article on that. Also this blog is written by an Indian citizen living in US, so things could be slightly different based on the country you are currently living in. I have tried to include all the useful tips, documents required, mistakes to avoid in the form of Q&A. Its a detailed blog. You may want to skip the questions you are not interested in.

 Why did we apply for Canadian Permanent Residency ?

I and my wife are citizens of India. We moved to US for Masters on F-1 student visa. F-1 student visa lets you work for 1 year after graduation, and if your course is in STEM (an acronym for Science, Technology, Engineering and Math) then you get additional 2 years. If you are interested in working longer, then you need to have H1B work visa, which is limited in number and hence the lottery every year to get one before your student visa expires. I wasn’t lucky enough to get picked in the lottery in all 3 years and we decided to work on a back up plan in case we have to leave the country- Canadian Permanent Residency. The situation is a lot more complex, however it is not important here.

How much does it cost to become a Permanent Resident ?

 If you are single it will cost you around 2000 USD and if you are married, it would cost you approximately double of that assuming both are moving to Canada. Please note that this price does not include travel expense to Canada.
An approximate break up of the same for a single is here:
1. IELTS Exam: 250 USD.
2. Medical Exam in US: 350 – 400 USD.
3. PR Visa Fee: 550 CAD.
4. Right of Permanent Residency Fee: 490 CAD.
5. FBI Police Clearance Fee (Police clearance from all countries you lived in): 20-50 USD.
6. Indian Police Clearance certificate (Police clearance from all countries you lived in): 27-55 USD.
7. Educational Credential Evaluation: 227-300 CAD.
8. Transcripts: 10-40 USD

i. What if you are married and only you are moving to Canada but not your spouse ?
You will earn points as if you don’t have a spouse and evaluated as one.

ii. What if you are married and only you are applying to Canada for express entry because your spouse is Canadian PR or citizen ?
You will earn points as if you don’t have a spouse and evaluated as one.

 If you are still reading this, it probably means you are OK paying the price…
 So whats the first step  ?

Understanding Canadian Points structure and How it all works

Canada invites limited number of people every month to apply for Express Entry Visa. This invitation is decided based on a points system. At first you prepare all the documents required to get the maximum points you possibly can and enter the pool with other candidates for an invitation from IRCC. If your scores are above the cutoff for that draw (which happens usually twice a month), you will be given 2 months to get the remaining documents and apply for Canada PR.

So its important to understand the points structure because ultimately you get an invitation to apply for Canada PR only if you clear the cutoff for the draw in that month. IRCC(Immigration, Refugees, Citizenship and Canada) provides a set of questionnaire which helps you understand the maximum score you could get and how you could improve your overall score. The link to the same is here:

http://www.cic.gc.ca/english/immigrate/skilled/crs-tool.asp

Additionally the following link will help you understand the points system clearly:
https://www.canada.ca/en/immigration-refugees-citizenship/services/immigrate-canada/express-entry/eligibility/criteria-comprehensive-ranking-system/grid.html

Latest cutoff scores can be found here:
https://www.canada.ca/en/immigration-refugees-citizenship/services/immigrate-canada/express-entry/submit-profile/rounds-invitations.html

Fall Colors in Canada

While writing this article, the lowest score of the last round of draw of invitations was 441. I believe this has been the approximate cutoff for quite some time now.

What do you need to enter the Pool ?

– IELTS General Test results.
– Education Credential Evaluation Report
– Rest of the documents should be readily available in your document folder.

STEPS TO EXPRESS ENTRY

Its important to carry out multiple things in parallel in the first 2 months to avoid losing time in the process. They are:

STEP 1 : Book a slot for IELTS General Exam.  

The wait time for an IELTS exam could be anywhere from few weeks to few months. IELTS preparation along with work can take a maximum of 3-4 weeks. Give a mock exam, see how you fare and book a slot! Once you book the slot you have a hard deadline to finish preparation. Also the wait time for first slot could be too long so its important to book the slot first to save on time.

i. Can you apply for Canadian Express entry without IELTS/CELPIP scores ?
No. Without the IELTS/CELPIP score you simply cannot apply for the express entry program.

ii. How much should you score in IELTS ?
While there is no cutoff as to how much you need to score in IELTS to clear, you often need to be in highest band to make your overall score go up. To be in the highest band you need the following scores in each section:
     Reading :  7
     Writing:    7
     Listening: 8
     Speaking: 7
This is equivalent to CLB (Canadian Language Benchmark) 9. Here is a link to the tables I am referring to:

https://www.canada.ca/en/immigration-refugees-citizenship/services/immigrate-canada/express-entry/documents/language-requirements/language-testing.html

iii. What about CLB 10 ? Isn’t CLB 10 better than CLB9 ?
You could always score more than CLB9 in any/all of the sections to make it to CLB 10, however please note that you get the same points irrespective of CLB9 or CLB10.

iv. If you are married, is it better for both of you to give the exam ?
For better chance of invitation to Canada, both need to give the exam as this increases the overall points to get an invitation to apply for Canadian PR. However please note that the increase in points is very minimal from the secondary candidate’s IELTS scores as compared to the primary candidate. You will need to evaluate your position to decide if its required for both of you to give the exam. IELTS exams are not cheap and you could save 250$ USD.

v. Any benefit of being married for Canada PR?
One benefit of being married is that even if one person does better than the spouse in the IELTS  exam, you can make him/her the primary applicant and gain more points. This is assuming both have the same points for rest of the categories i.e age, education level, study in Canada, work experience . However if you are single, every section of IELTS matters. Single applicants have nothing else to worry as this is the only benefit of being married.

vi. Do married applicants get more Canadian points as there are 2 applicants ?
No. The points system is designed such that single applicants and married applicants get equal opportunity i.e. points attained by single applicant for a particular category is much higher than points attained by a person who is married because he/she has a spouse to add on points and make it equal. So its possible that one spouse can pull the other down and decision to select primary applicant must be done wisely.

Olympic town of Whistler, Canada

vi. How much does IELTS exam cost ?
It costs around 250 USD per applicant.

vii. How important is IELTS score ?
I would say that IELTS scores have a lot of weightage and usually is a deal breaker to get/not get the invitation in most cases.

viii. How do i prepare for IELTS exam ?
Unlike GRE/GMAT, IELTS doesn’t need much preparation. I didn’t feel the need to buy any course material as I found many free tests online. Also there is free mock exam by British Council which conducts the IELTS exam. The link to the same:
https://takeielts.britishcouncil.org/prepare-test/free-practice-tests
I did a lot of tests from this site which seemed more than enough to prepare myself for the exam:
https://ieltsonlinetests.com/ielts-exam-library#general-training
Apart from this I followed Liz who gives enough guidance on how to prepare for IELTS especially the writing section:
http://ieltsliz.com

ix. Can I use my IELTS Academic scores for immigration ?
Unfortunately only IELTS General scores are accepted for immigration purpose. So be careful while booking the exam. Be sure to book IELTS General not Academic.

x. Where can I book IELTS General exam for this ?
First step is to find a test location near you using:
https://www.ielts.org/en-us/book-a-test/find-a-test-location
Once you find the location near you, the steps will guide you to the slots available for that location. Once you book a slot they usually give you 24 hours to make the payment and the guidelines to the same.

xi. If I am married, is it mandatory for both of us to take IELTS ?
No. Its not mandatory for both of you to take IELTS but its mandatory for the primary applicant.

xii. How do we decide the primary applicant ?
Primary applicant always gets more points for a category than secondary applicant. So its important to select primary applicant wisely. If one applicant has benefit over the other applicant because of age, level of education, study in Canada, work experience, primary or secondary language scores, then that person should be the primary applicant. The best way to evaluate who is a better primary applicant is by using the points calculator to see both the combinations. This is the safest and easiest way to decide the primary applicant.

STEP 2 : Apply for transcripts.

Duke University’s Department of Computer Science held commencement exercises on Sunday, May 14, 2017 at the Durham Convention Center. (Photos ©2017 Kevin Seifert Photography | kevin@kevinseifertphotography.com | 919-208-9458)

This could be a tedious process considering you are currently not living in the same country where you graduated from. If you graduated from a university in US, its probably much simpler and can be done online. However in countries like India its not as advanced as that which would mean you need to give good amount of time for the transcripts to be in your hands.

i. If you have done Masters should you get transcripts for your undergrad as well ?
No, you don’t. Canada only cares about your highest degree and this needs to be evaluated. However I did get both my Masters and Undergrad evaluated as it doesn’t cost more to get both evaluated at the same time but its not required. Same applies to PhD holders, they do not need Masters or Undergrad transcripts to be evaluated.

ii. How much do transcripts cost ?
I have noticed that US universities usually provide transcripts at nominal price of 10$ and post it to any address provided by you for no or very minimal additional fee. However this is general post and can take a few weeks to get to Canada for evaluation. Premium services from universities can cost a lot more like 30$ but expedited delivery.

iii. If I studied in Canada should I apply for transcripts as well ?
Probably not. Since you don’t have to get your degree evaluated, you won’t be needing transcripts.

STEP 3 : Get your transcripts evaluated (Educational Credential Assessment).

These are the list of Institutions from which you can get your degree evaluated.
https://www.canada.ca/en/immigration-refugees-citizenship/services/immigrate-canada/express-entry/documents/education-assessed/how.html
We chose WES as its widely popular and accepted by many institutions.

i. How do I get the transcripts posted to WES, Canada ?
When I did it in September 2018, things were slightly different. To view the latest ways in which transcripts can be posted to WES, Canada, I would recommend using the following link:
https://www.wes.org/ca/required-documents/
Be sure to select WES Canada, then select your Country and type of education to know how the transcripts can be posted to WES. Generally they are of 2 types but changes from country to country.
-Send the transcripts in sealed envelopes directly from the University to WES, Canada.
-Get the transcripts from your university in sealed envelopes as they won’t post it themselves and you post it for them. However on referring to the website again this option may no longer be available for Indian graduates and has changed in Dec, 2018.

ii. How much does it cost for WES evaluation ?
When I did it in September 2018, it costed around 200 CAD. However prices seem to have increased now. It costs about 220 CAD now. An additional 7 CAD at minimum for post with no tracking for the report to be delivered to your home. You will need to send additional document like photocopy of degree certificate which will cost another 8$ at minimum.

iii. Should you get all your degrees evaluated ?
While it doesn’t cost more to get all your degrees evaluated, Canada only cares about the highest degree obtained. I did have extra copies of transcripts of undergrad and got it evaluated along with masters, however this is not required.

iv. What are the documents required for WES evaluation ?
Original transcripts in sealed copies and photo copy of degree certificate.

Capilano Suspension bridge – Tree Top Adventure

v. How long does WES evaluation take ?
As per their website it takes 20 business days after confirmation and review of the documents and fees. However in my case it took close to 2 months for the entire process since I requested my university to send transcripts using regular post and also chose regular post for receiving the WES report. Even if you chose expedited shipping for both sending and receiving, I would expect the entire process to take a minimum of 1 month and few days.

vi. How much does expedited shipping cost ?
Universities usually charge around 30$ USD more for expedited shipping of transcripts. WES charges 85$ CAD for expedited shipping. You will have to post photocopy of degree certificates which will cost another 20$ USD at minimum for expedited shipping to Canada from US.

vii. Link to WES(World Education Services) so that I can get started ?
https://www.wes.org/ca/eca/

viii. Is this evaluation required for people who studied in Canada ?
Probably not.

All the above 3 points need to be done during the time you prepare for IELTS as they are very time consuming. If you are confident of a good IELTS score and Canadian points in total, I would also recommend doing STEP 4 and STEP 5 in parallel to save on time

STEP 4 : How do I get started with my application online?

First, you need to create an account at the following link:
https://www.canada.ca/en/services/immigration-citizenship.html
I used the “Continue to GCKey” to create an account. The other option “Continue to sign in partners” is I believe for people who have bank accounts with those partners but I didn’t have any.

Once you are logged in, use the “Start an application” option. You will notice that it will ask you a “Personal Reference Code“, chose the “Express Entry“, answer the questions right to create the code. In order to create this code you will need your IELTS scores, funds you will get to Canada, NOC code for your skillset and few other general questions.

i. How much money should I get to Canada ?
This link will help you answer the question right for the code above:
https://www.canada.ca/en/immigration-refugees-citizenship/services/immigrate-canada/express-entry/documents/proof-funds.html

ii. How do i find out my NOC code ?
This link should help you find it:
https://www.canada.ca/en/immigration-refugees-citizenship/services/immigrate-canada/express-entry/eligibility/find-national-occupation-code.html

The process is self explanatory, you should be able to create a profile and enter the pool when you are ready. Enter the pool only when you want to. Once you enter the pool its a wait until you get the invitation. If you consider your scores to be much lower than cutoff, I would highly encourage you to revisit the points table and see how you could improve your points. I guess the best ways are to retake IELTS or to find a job in Canada. Once you get picked in lottery, you will have 2 months to get rest of the documents in order to submit online. So comes the next steps:
Again its important to do these steps in parallel to make it on time for 2 months deadline.

STEP 5 : Apply for Police Clearance certificate in the country you are living in currently.

In my case : Apply for FBI clearance certificate in the United States.

i. Link to the official site to apply for FBI clearance ?
https://www.fbi.gov/services/cjis/identity-history-summary-checks

ii. What are the different options I have to apply ?
The site provides 3 different options to apply for FBI clearance:
-Electronically submit your application directly to FBI here   
-Submit directly to FBI via physical mail
-Apply through FBI approved Channeler

ii. Which method works the best ?
I would recommend submitting electronically if you want to save a few bucks and FBI approved Channeler if you want to avoid all the hassle.

iii. How does electronic submission work ? Advantage/disadvantage ?

They charge you only 18$ USD per person. The application is submitted online at  https://www.edo.cjis.gov/. The process takes 3-5 days for approval. Once approved they provide you with instructions to post your fingerprints. You could send as many fingerprints as possible as long as one works. You can either do this yourself or use one of the professional services (like Dept. of Public Service and other finger printing services). I have noticed that professionals charge 15$ for this service at minimum. There are chances of rejection if the fingerprints are considered to be not good enough. FD-258 fingerprint cards are designed for this purpose and are much better for capturing fingerprints than regular paper. They are available for purchase at several stores including Amazon and can cost around 2$ each. Instructions for capturing fingerprints yourself: https://www.fbi.gov/file-repository/capturing-legible-fingerprints.pdf

iv. How does the process work through FBI channeler ?
FBI approved channelers are premium priced but they get you the result most probably in the first attempt and some of them even get you the results in very short time in case you have time constraints. They usually charge around 50$ per person and the price can increase if you need the results in very short time. Basically everything is at one place so you don’t have to go through any hassle. Make an appointment, fingerprints are electronically captured and submitted rather than on paper and results are sent to your home. Though I have not personally tried this, I would highly recommend this as they could save you all the hassle for saving few extra bucks. Link to FBI approved channelers: https://www.fbi.gov/services/cjis/identity-history-summary-checks/list-of-fbi-approved-channelers-for-departmental-order-submissions.

STEP 6 : Apply for Police Clearance Certificate (PCC) from other countries that you have lived in.

Being an Indian citizen, I have lived in India for good amount of time and hence I need a PCC from there.

 i. How to apply for Indian PCC in US ?
 Depending in the state you are in form could be slightly different. However PCC needs to be obtained from Indian Embassies in US and all of them are some kind of miscellaneous form.

ii. Instructions for the residents of  Texas, Arkansas, Kansas, Louisiana, Oklahoma, New Mexico, Colorado and Nebraska.
You need to apply for the Indian Embassy in Houston. You need to fill in the following form:
http://cgihouston.gov.in/files/Misc_Form8.pdf

Instructions to get PCC from Indian Embassy in Houston are here:
http://cgihouston.gov.in/consular-services/miscellaneous-services/9-consular-services/37-police-clearance-certificate-pcc

iii. Instructions for the residents of California, Alaska, Arizona, Hawaii, Idaho, Montana, Nevada, Oregon, Utah, Washington, Wyoming and Territory of Guam ?
You need to apply for the Indian consulate in San Francisco. Instructions to the same:
https://www.cgisf.gov.in/page/display/143/236

iv. How much does it cost ?
You will need to get 3 cashiers cheque or money order all of them in favor of “Consulate General of India”- one for 25$ USD (PCC Fee), one for 2$ USD (ICWF Fee), one for 20$ USD(Return postal fees). The last one is mandatory if you are posting your application. If you are personally applying and picking up the documents personally then you can avoid the postal fee of 20$. If you are posting your documents you will spend an additional 8$ for post.

v. What are the documents required for this ?
-Completed application form along with affixed passport size photo.
-Original Passport and photo copy of first 3 and last 2 pages of the same.
-Fees in cashier’s cheque or money order. Other forms of payment not accepted. Also prepaid return envelopes not accepted.

-Proof of current US residence (list of accepted documents vary depending on consulate)
-Proof of US visa status(list of accepted documents vary depending on consulate )
-Documents required slightly vary depending on the consulate. Please do you own research before applying.

vi. How long does this take ?
Although the Houston consulate website states it may take up to 6 weeks, it took about a week for us or 2.

vii. What about the residents of other states ?
Please refer the following link. Depending on the state you are residing in, you could find the Indian Embassy serving your state.
https://www.immihelp.com/directory/indianconsulatesusa.html

STEP 7 : Apply for work experience letters.

i. What information is mandatory on your work experience letter ?
– It should be printed on the company letterhead.
– Applicant’s name, company contact information (address, phone and email)
– Name, Title and signature of immediate supervisor.
– All positions held at the company, job title, duties and responsibilities, job status, dates worked for, number of hours per week, annual salary plus benefits.

ii. What if I am self employed ?
Please find the details on the link below:
https://www.canada.ca/en/immigration-refugees-citizenship/corporate/publications-manuals/operational-bulletins-manuals/permanent-residence/express-entry/applications-received-on-after-january-1-2016-completeness-check.html
This link is not specific to self employment and can be used by other as well for checking their work experience letter requirements.

iii. Should I get work experience letters for my internship as well ?
Internship counts towards work experience as long as its 40 hours of work per week. While getting this letter for a very short period of time can be painful, it does make a difference if your overall work experience is less than 3 years.

iv. How many years work experience should I have to apply for Express Entry?
Work experience up to 3 years is valued. That is anything above 3 years of foreign work experience w.r.t. Canada gets you the same amount of points as someone with 3 years of work exp.

Blackcomb Mountain Peak

STEP 8 : Apply for Medical Test. 

Its mandatory to pass the medical tests to be approved for Express Entry.

i. Can I go to any hospital for these tests ?
No. Canada has a list of approved hospitals and Doctors you can go to. To find the closest Hospital and Doctor near you, please use the following link: https://secure.cic.gc.ca/pp-md/pp-list.aspx

ii. What tests need to be performed ?
These hospitals are equipped with the information about the tests they need to perform for Express Entry to Canada Visa. FYI it includes blood test for HIV, urine test for syphilis, Chest X-ray and physical checkup of eyes and ears.

iii. Is it OK to have alcohol the night before tests ?
Slight traces of alcohol is acceptable.

 iv. Should I upload the report myself ?
 The hospital will take care of uploading the report themselves when available. The hospital however provides you with an “Information sheet” which needs to be uploaded by you online. This sheet contains your information and shows that you have completed all the medical tests required and also includes the UMI number that is generated along with its bar code. Confirm all the details on this sheet are accurate as per your knowledge before you leave the hospital.

v. How much does this cost ?
Cost varies from country to country. US being one of the most expensive for medical, costs about 350-400$ per person depending on the location you go to.

vi. Does your insurance cover it ?
Medical insurance won’t cover you for this examination. However you could use your HSA money towards this test. We were denied from using HSA card at the hospital. However we applied for reimbursement and didn’t have any trouble getting the money back. If you are lucky enough like us, the company we work for loads some amount of cash every year into HSA, you could use that money.

vii. When should I take my medical test ?
As per my understanding, once you are approved for PR and done with stamping, you get 1 year from the date of medical test to enter Canada and not lose the permanent residency you obtained. So better plan your application and medical test smartly.

viii. Can I take this test on weekends ?
We were able to schedule an appointment on weekend. However this may change from Hospital to Hospital.

STEP 9: Consolidate your financial statements.

Canada requires that you prove your financial stability before you enter the country.

1. How much money should I show ?
Depending on your status, the amount you need to show varies. This link should help you with it.
https://www.canada.ca/en/immigration-refugees-citizenship/services/immigrate-canada/express-entry/documents/proof-funds.html

2. What can I show for financial proof ?
Anything considered liquid amount can be showed as proof. This includes your savings account, shares, current account, etc.

STEP 10: Consolidate other documents.

1. What are the other documents you may require ?
– Passport
– Marriage Certificate
– Degree Certificates
– Passport Photo digital copies.
– There could be several other documents you may require depending on your situation.

STEP 11: Apply for express entry with all the documents requested. 

Now that you have all the documents requested, its time to upload all of them and submit the application before the end of 2 months deadline provided. Once the application is submitted, lookout for any notification from IRCC from time to time. You will receive email when there is a notification. However you should proactively check for any notification or document they may have requested from you. After you receive the e-mail, you will be given 1 week for any additional document that were requested, so you do not want to miss their notification. Once you are approved for Canada PR, they will request you to send your passport for stamping. After the stamping you have certain number of days before which you need to enter Canada.

i. After stamping, by what date should you enter Canada to avoid losing the Permanent Residency ?
As per my understanding you get 1 year from the date of your medical examination to enter the country provided that you are approved for PR and done with stamping. When your passport is done stamping, you will know the date by which you need to enter the country.

ii. How long does the application take after you submit all the documents in STEP 11?
Currently it takes about 6-8 months to get the PR after you have submitted all the documents.

MISTAKES TO AVOID!!!

Do not forget to use a credit card with no foreign transaction fee for all transactions in CAD. Else you will end up paying quite a bit only in foreign transaction Fee.

Book IELTS General not Academic. IELTS Academic scores won’t be accepted for immigration purpose.

Medical Test Reimbursement: While the hospitals I contacted in Dallas and Houston mentioned that HSA won’t be accepted for payment, I was able to apply for reimbursement and get that money back from HSA. Since the company that I work for gives 750$ each year towards HSA, this amount was covered. So you may be able to use similar benefits without paying for it.

Plan your application carefully. Once you are approved for PR, you need to travel with your spouse to Canada within certain time limit. My understanding is that its 1 year from the date of your medical exam provided your PR is approved and stamping is completed. Its possible that you are restricted from moving out of your current country because of visa restrictions. So its crucial to plan your application accordingly.

QUESTIONS ?

Please use the comments section to ask any questions you may have. I will try to answer them. I will also consider it to be added to blog. These questions are often useful to others, so please do not hesitate to ask


Travel Budgeting – I

PART-I The Art of Spending

What goes on your mind when your spouse asks you”lets go on a vacation to Hawaii ?”, let me guess- “That would be amazing, but isn’t it expensive ?” Unfortunately that is the truth about vacations, they are expensive, they always have been. Yet in spite of this, me and Akshata, we love to travel and try to find our way through this. We have traveled almost every other month for the past 2 years including many exotic places. That is a total of 5 countries, 20 US states and 21 trips in 3 years (not counting the ones by road). Our friends often ask us “how do you guys manage to travel so much ?”. Our followers probably think we spend all of our earnings in travel or we are rich enough to afford it. The truth is we started at ground 0, to be precise we started with massive education debt (Tuition alone was 100 grand USD combined for 2 years not to forget the cost of living at LA for Akshata). So we had to prioritize our expenditure if we wanted to travel and save at the same time. We disciplined ourselves in what I call the art of spending .

At Hawaii for our first anniversary trip

You will be surprised to know the amount one can save after so much travel. Its been 3.5 years since we started working, we bought a house 6 months ago in Austin Suburb(15% debt), paid off our massive education loans, bought 2 cars and savings decent enough to buy my parents a retirement condo in Mysore, India. So how is this all possible in such short time along with travel ? I have been waiting eagerly to share this information for a while now yet pushed it away as writing blogs can be tedious.

This short blog series (3 blogs) is going to be all about money, how and where can you save money, how to manage your money, make your spending earn you more money to spend it all again, did i just say that!

My First Car 2012 Ford Focus SE bought in 2016

In this particular blog, I will focus on how we use the credit card system to our benefit. Without any further ado, lets get started on how we spend money.

Credit cards points system

Spending money is inevitable, be it for gas, grocery or restaurant. So let us learn to spend it wisely.

This one is mostly applicable to people living in United States. If you are from another country, this may not help you . Almost everyone in here has few credit cards, after all that is how we build credit history, we all earn points and we get statement credit, so whats new about it that I didn’t know earlier ?

While all of us use credit cards, its important to use the right credit card at right place and spend the points carefully. Most of us have multiple credit cards but mostly use one for all of our purchases. What this means is, you are probably earning 1-1.5% as points which you probably get en cashed for statement credit. On the contrary, we have a set of 5-6 credit cards that we use, depending on the category and time of the year. When we spend, we receive 1.5-5% as points (Sometimes up to 15%). Then we further exploit the points system to combine them and get 1.5x more out of it, making it 2.25-7.5%. That is a maximum cash back of 7.5$ for every 100$.

Does this sound like a lot of hassle to manage multiple credit cards ? Well its not, once you get used to it. Every time I go to the grocery store now, my mind automatically picks up this one card dedicated to grocery shopping.

One Big Mutant Family in NY

How much do you actually make out of it ? Well you will be surprised to know that a good majority of our flights are booked using just the points. The following are flights we booked this year (2019) through points:

  • 1 Round trip flight ticket to India from Houston
  • 1 Round trip flight ticket to Miami from Austin
  • 2 Round trip flight tickets to Seattle from Austin(Vancouver Canada trip)
  • 2 Round trip flight tickets to Maine from Austin
  • 2 Round trip flight tickets to San Jose from Austin
  • 2 Round trip flight tickets to Cancun, Mexico from Austin
  • 6 Round trip flight tickets to Vegas from Austin (us + parents + in-laws)

Following are the flights we actually paid for through credit card (not in points)

  • 6 Round trip flights tickets to New york /Buffalo (us + parents + in-laws )
  • 4 Round trip flight tickets to Austin from India (Parents + in-laws)
  • 2 Round trip flight tickets to Hawaii from Austin
  • 1 Round trip flight ticket to India from Houston

As you can see majority of our flight tickets were booked through points rather than actual money. 2018 was no different and 2020 will be no different.

List of categories and the credit cards we use:

  • Grocery: Amex blue cash every day card with 3% returns and 0$ annual fee.
  • Gas: Chase AARP credit card with 3% returns on Gas and 0$ annual fee.
  • Restaurants & Travel: Chase sapphire reserve card with 3% returns and 450$ annual fee.
  • Chase Freedom with 5% cash back and 0$ annual fee on rotating categories every quarter typically Gas, restaurants, grocery, stores (Amazon, Target, Walmart etc.) and payment gateways(Paypal, Chase Pay).
  • Discover it credit card with 5% cash back and 0$ annual fee on rotating categories every quarter in categories similar to freedom but at different times.
  • Chase unlimited credit card for everything else which doesn’t fall in any of the categories with 1.5% cash back and 0$ annual fee. If you are not planning to use the chase sapphire reserve card to get 1.5x out of it (making it 2.25x), I would recommend cards which pay back 2% such as Paypal credit card.

Chase cards additionally offer up to 15% on specific stores that you normally shop from. But its a hassle to add the offer to card every time. We generally use this on Airbnb reservations.

Most of the credit cards above belong to Chase. I should mention that Chase didn’t pay us for this blog (though I wish they did). The points we earn in each credit card is combined and moved to Chase Sapphire reserve card to redeem the points for 1.5x. In our case as my wifey holds this credit card, I transfer my points to her account before we book flights from it. It doesn’t have to be Chase, perhaps there are credit cards in other banks that work better for you but I haven’t found one that works better than Chase for us.

But isn’t the annual fee for Chase Sapphire Reserve like 450$ ? Yes but out of that 450, 300 is instant travel credit when you use it for travel category (Flights, Uber, parking). So I see 150$ as its actual annual fee. But considering its benefits I feel its worth the 150$.

So what exactly are the benefits of Chase Sapphire Reserve ?

  • The ability to get 1.5x of the existing points is amazing and saves us tons of money.
  • 3x points at restaurants and travel which is hard to find for a free card.
  • 50k introductory bonus points on spending 4000 USD which is worth 750 USD.
  • Primary rental car insurance for all the drivers up to 75000$. I see a good number of people buying the expensive rental car insurance at the airport every time because they don’t want to bump their auto insurance in case of accidents.
  • Trip interruption insurance- Its not very uncommon for a flight to cancel or reschedule due to weather and other issues. The airlines declines from providing any stay during such occasions. Guess what Chase will cover you and your spouse for up to 1000$ per night for stay, rental car and food. We have used this once and I must say, we had no trouble claiming the money.
  • Priority Pass- Rather than spending on restaurants( typically 10-25$ per person per meal), we travel early to airport and have our lunch/dinner over there. Priority pass covers for the credit card holder + 2 guests. This otherwise costs 27$ per person per visit. We try to use this almost every time possible.
  • No foreign transaction fees- Before I started using this card I assumed that banks in US charge exorbitant fees if used in other countries. I was wrong. Not only is the foreign transaction fee completely waived in this, even the exchange rate is very reasonable. Pro Tip: Always remember to pay in the home currency of the country you are in. If the transaction is carried out in USD then the bank managing the transaction machine decides the currency exchange value which is very high. Exception to this is when the business is carried out in USD rather than home currency, then paying in USD makes sense.
  • TSA pre and global entry Fee is reimbursed which is typically 100$. You can literally save so much time with this.
  • Trip cancellation insurance- If you had to cancel or cut short your vacation because of sickness or because of the airlines, no problem, chase covers you up to 20,000$ per trip.
  • Medical emergencies during travel are covered.
  • Damaged or lost luggage reimbursement up to 3000$
  • Points transfer to other airlines – We have mostly used this to move the points to Southwest when we want to book southwest flights. Its a 1:1 transfer and each point in southwest is actually 1.5x the point value.
  • There are more benefits but these are the ones related to travel.
1:1 transfer of Chase Ultimate Rewards to Southwest worth 1.5x

With so much free advertisement on Chase, we deserve to get paid for this!

Does the chase travel portal over charge for flights ? 90% of the times we find the flight we want to go on (which is typically the cheapest flight) at the same price as other websites. There are times at which other websites offer better price during which we ditch the chase travel points.

At Mexico Resort celebrating our second wedding anniversary

Most important of all!! Never have a credit card debt. Credit cards are a great way to build credit score, credit history and points but its a two sided knife, debts not paid on time incur very high interest rates and penalty. If you cannot handle your finances and credit cards, please do not use one.

This was only one aspect of managing finances for travelling. More will follow. Hope you enjoyed reading this blog. Thank you for your time.

Design a site like this with WordPress.com
Get started